Getting Started with Raw Food
Using My Food Saver – What Is The Best Way To Vacuum Seal Raw Hamburger Patties
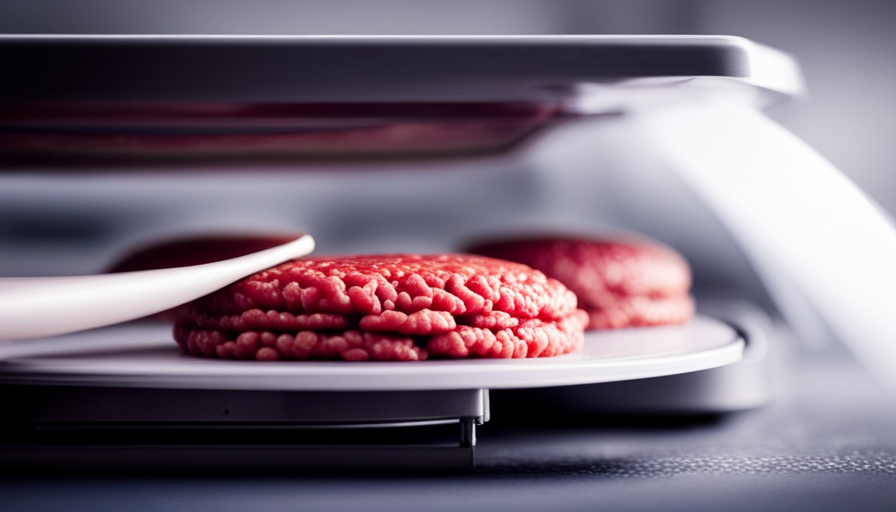
When it comes to maintaining the freshness and flavor of raw hamburger patties, my preferred method is using a food saver. This convenient tool allows me to vacuum seal my patties, keeping them fresh for extended periods of time. So, what is the most effective way to do this? Allow me to share some tips and tricks to help you achieve the best results.
First things first, selecting the right packaging material is crucial. You want something sturdy and airtight, like high-quality vacuum-seal bags. Once you’ve got that covered, it’s time to prepare your patties. Make sure they’re properly shaped and seasoned to your liking.
Next, arrange the patties in a single layer inside the bag, leaving some space between each one. This allows for even freezing and thawing. Now comes the fun part – removing excess air from the bag. Using the food saver, suck out all the air until the bag tightly hugs the patties.
Sealing the bag properly is essential to maintain the vacuum seal. Double-check that the seal is secure and airtight. Now, it’s time to store those vacuum-sealed patties. Place them in the freezer, making sure they’re in a flat, stable position.
When you’re ready to enjoy your delicious burgers, simply thaw and cook the vacuum-sealed patties as you normally would. But remember, safety first! Follow the recommended thawing and cooking guidelines to ensure your patties are safe to eat.
Lastly, let’s talk shelf life. When vacuum-sealed and stored properly, raw hamburger patties can last up to three to four months in the freezer. However, always trust your senses – if the patties have an off smell or appear discolored, it’s best to discard them.
Now that you’re armed with these tips and tricks, go ahead and confidently vacuum seal your raw hamburger patties with your trusty food saver. Your taste buds will thank you!
Key Takeaways
- Select high-quality vacuum-seal bags made from multilayer materials and suitable for freezing.
- Shape and season the hamburger patties before vacuum sealing, ensuring even distribution of seasoning and a slight indentation in the center.
- Remove excess air from the bag using a food saver to create a tight seal and maintain freshness.
- Properly label and date the vacuum-sealed patties to track freshness, prioritize use, and reduce the risk of spoilage.
Selecting the Right Packaging Material
Now, let’s talk about finding the perfect packaging material to keep your raw hamburger patties fresh and delicious. When it comes to vacuum sealing techniques, selecting the right packaging material is crucial. The benefits of vacuum sealing include extending the shelf life of your patties, preventing freezer burn, and preserving the flavor and juiciness.
For vacuum sealing raw hamburger patties, it’s recommended to use high-quality vacuum sealing bags or rolls specifically designed for food preservation. These bags are made from multilayer materials that provide a barrier against moisture and oxygen, which are the primary culprits behind food spoilage. Look for bags that are BPA-free and have a thickness of at least 3 mil to ensure maximum protection and durability.
When selecting the packaging material, make sure it’s compatible with your food saver machine. Some machines require specific types of bags or rolls, so it’s essential to check the manufacturer’s recommendations. Additionally, opt for bags that are suitable for freezing, as raw hamburger patties will most likely be stored in the freezer.
Now that you’ve selected the perfect packaging material, let’s move on to preparing the hamburger patties for vacuum sealing.
Preparing the Hamburger Patties
To prepare your hamburger patties for vacuum sealing, you’ll want to make sure they are shaped evenly and have a slight indentation in the center to prevent them from puffing up during cooking. This will ensure that the patties freeze well and maintain their shape.
When it comes to freezing techniques, it’s important to handle the raw meat with care to maintain its quality. After shaping the patties, you can choose to season them before vacuum sealing. This step allows the flavors to penetrate the meat, enhancing the taste when you cook them later. Some popular seasoning options include salt, pepper, garlic powder, or even a dash of Worcestershire sauce.
To add depth to this discussion, here’s a table showcasing different seasoning options you can use for your hamburger patties:
Seasoning Option | Description |
---|---|
Salt and Pepper | Classic and simple |
Cajun Seasoning | Adds a spicy kick |
Italian Seasoning | Infuses a herbaceous flavor |
Barbecue Rub | Gives a smoky taste |
After seasoning, arrange the patties in a single layer in your food saver bag or roll. This will ensure that they freeze evenly and maintain their shape.
Arrange the Patties in a Single Layer
Once you’ve shaped your evenly sized and seasoned hamburger patties, make sure to arrange them in a single layer. This step is crucial for maximizing freshness and ensuring the best results when vacuum sealing with your food saver. Here are some packing techniques to help you achieve optimal results:
-
Use a flat surface: Place the hamburger patties on a flat surface, like a baking sheet or cutting board, to ensure they are arranged in a single layer. This will prevent any patties from sticking together during the freezing process.
-
Leave space between patties: Make sure there is enough space between each patty to allow for proper airflow. This will help the patties freeze evenly and prevent ice crystals from forming, which can affect the texture and taste.
-
Avoid overlapping patties: Overlapping patties can cause uneven freezing and potential damage. Arrange them so they are not overlapping or touching each other.
-
Place a sheet of parchment paper: To further prevent sticking, you can place a sheet of parchment paper between each layer of hamburger patties. This will make it easy to separate them when it’s time to cook.
By following these packing techniques, you’ll be able to freeze your hamburger patties evenly and maintain their shape. Next, we’ll discuss how to remove excess air from the bag to preserve freshness and prevent freezer burn.
Removing Excess Air from the Bag
Ensure you remove excess air from the bag to preserve the freshness and prevent freezer burn, so your hamburger patties stay delicious and ready to cook whenever you desire.
When using a food saver to vacuum seal raw hamburger patties, it’s crucial to eliminate any excess air inside the bag. This step not only helps in maintaining the quality and taste of your patties but also extends their shelf life. By removing the air, you prevent the growth of bacteria and the oxidation process that can lead to spoilage.
To remove excess air from the bag, first, ensure that the vacuum sealer is in good working condition. Regular maintenance of your vacuum sealer will guarantee optimal performance.
Once you have arranged the patties in a single layer, carefully place the open end of the bag into the vacuum sealer. Activate the vacuum seal function, and the machine will start removing the air from the bag. As the air is removed, you’ll notice the bag tightly wrapping around the patties, creating a seal that locks in the freshness.
Properly sealing the bag is essential to maintain the vacuum seal and prevent any air from re-entering. This will further enhance the benefits of vacuum sealing, such as preventing freezer burn and preserving the flavor and texture of your hamburger patties.
With the excess air removed and the bag sealed securely, your patties are now ready to be stored in the freezer or cooked right away.
Sealing the Bag Properly
Properly sealing the bag is key to preserving the freshness and flavor of your mouthwatering hamburger patties, ensuring they stay delicious until you’re ready to cook them.
When using a food saver to vacuum seal raw hamburger patties, it’s essential to follow the correct procedures to achieve an airtight seal. If you don’t have a vacuum sealer, there are alternative methods you can use. One option is to use a zip-top bag and remove as much air as possible by hand before sealing it tightly. Another option is to use a straw to suck out the excess air before sealing the bag.
If you’re experiencing sealing issues with your vacuum sealer, there are a few troubleshooting steps you can take. First, make sure that the bag is properly positioned in the sealer and that the sealing strip is clean and free from any debris. If the bag isn’t sealing properly, you may need to adjust the sealing time or temperature settings on your machine. It’s also important to check for any wrinkles or folds in the bag that may be preventing a proper seal.
In the next section, we’ll discuss the importance of labeling and dating the vacuum-sealed patties to keep track of their freshness and ensure you use them in a timely manner.
Labeling and Dating the Vacuum-Sealed Patties
Labeling and dating the vacuum-sealed patties is a simple yet crucial step in keeping track of their freshness and ensuring they’re used within the optimal time frame. By labeling the packages, you can easily identify the contents without having to open them, saving time and reducing the risk of spoilage.
Additionally, dating the patties allows you to prioritize their use based on the date of sealing. This ensures that older patties are used first, minimizing waste and maintaining quality.
When labeling the vacuum-sealed patties, it’s important to include essential information such as the date of sealing and the type of meat. This helps you keep track of when the patties were prepared and identify any potential issues in case of a recall or foodborne illness. You can use waterproof labels or permanent markers to ensure the information remains intact and legible throughout the storage period.
Proper storage recommendations for vacuum-sealed patties include keeping them in a freezer set at or below 0°F (-18°C). This temperature ensures that the patties remain frozen and maintain their quality and taste for an extended period. It’s important to stack the patties flat and avoid overpacking to allow for efficient air circulation and even freezing.
In the subsequent section about storing the vacuum-sealed patties, we’ll discuss the importance of proper packaging and the ideal storage duration to maintain the best quality.
Storing the Vacuum-Sealed Patties
To store your vacuum-sealed patties, remember to follow these important guidelines for optimal freshness and taste.
When storing frozen patties, it’s crucial to keep them in a well-organized freezer. This will not only ensure easy access but also prevent any potential cross-contamination with other food items.
Start by designating a specific area in your freezer for the patties, preferably on a lower shelf, away from raw meats and other perishable items. This will help maintain a consistent temperature and prevent any accidental thawing.
To further protect the patties, place them in a sturdy plastic container or ziplock bag before placing them in the designated area. This will provide an extra layer of protection against freezer burn and help maintain their shape. Additionally, make sure to label and date each package to keep track of their freshness.
When organizing the freezer, it’s best to stack the patties in a way that allows for easy retrieval. Place the oldest packages at the front, so they’re used first, while keeping the newer ones towards the back. This rotation system will ensure that you consume the patties in the order they were stored, minimizing any potential waste.
By properly storing your vacuum-sealed patties in an organized freezer, you can maintain their quality and taste for an extended period.
Now, let’s move on to the next step: thawing and cooking the vacuum-sealed patties.
Thawing and Cooking the Vacuum-Sealed Patties
After storing the vacuum-sealed patties, it’s important to know the proper way to thaw and cook them. When it’s time to enjoy those juicy hamburgers, I recommend thawing the patties in the refrigerator overnight. This slow thawing method ensures even defrosting and minimizes the risk of bacterial growth.
Once thawed, it’s time to fire up the grill or heat up the skillet. Before cooking, you can season the patties according to your taste preferences. From classic salt and pepper to more adventurous spice blends, the possibilities are endless. Just make sure to evenly distribute the seasoning on both sides of the patty for maximum flavor.
When it comes to cooking temperature, the USDA recommends cooking ground beef to an internal temperature of 160°F (71°C) to ensure it’s safe to eat. This temperature kills any potential bacteria present in the meat.
Now that we’ve covered thawing and cooking, let’s move on to the next section about shelf life and safety guidelines. It’s important to understand how long vacuum-sealed hamburger patties can be stored and the proper safety measures to follow.
Shelf Life and Safety Guidelines
To ensure the safety of your vacuum-sealed hamburger patties and prolong their shelf life, it’s crucial to follow these guidelines and take the necessary precautions. Factors affecting the shelf life of vacuum-sealed hamburger patties include temperature, moisture, and oxygen exposure. Proper handling and storage are of utmost importance for food safety in vacuum-sealed patties.
Temperature plays a key role in the shelf life of vacuum-sealed hamburger patties. It is recommended to store them at or below 40°F (4°C) to inhibit bacterial growth. Moisture can lead to spoilage, so it’s essential to remove excess moisture from the patties before sealing. Additionally, exposure to oxygen can cause oxidation and deterioration of the meat, resulting in a shorter shelf life. By vacuum sealing, you can effectively remove oxygen from the packaging, extending the quality and freshness of the patties.
To better understand the impact of these factors, refer to the table below:
Factors | Shelf Life Impact |
---|---|
Temperature | Prolongs shelf life when kept at or below 40°F (4°C) |
Moisture | Excess moisture leads to spoilage |
Oxygen exposure | Oxidizes meat, causing deterioration |
By following these guidelines and considering these factors, you can maximize the shelf life and ensure the safety of your vacuum-sealed hamburger patties. Now, let’s explore additional tips and tricks for vacuum sealing raw hamburger patties.
Additional Tips and Tricks for Vacuum Sealing Raw Hamburger Patties
Now that we understand the shelf life and safety guidelines for vacuum sealing raw hamburger patties, let’s explore some additional tips and tricks to ensure the best results.
When it comes to vacuum sealing raw hamburger patties, there are a few things to keep in mind. First, it’s essential to handle the patties with clean hands and ensure they’re properly shaped and sized for your needs. Here are some additional tips to consider:
-
Freeze patties before vacuum sealing: Freeze the patties for about 30 minutes prior to vacuum sealing. This will help maintain their shape and prevent them from getting squished during the sealing process.
-
Use parchment paper: Place a small piece of parchment paper between each patty before vacuum sealing. This can prevent them from sticking together, making it easier to separate and thaw only the desired amount.
-
Vacuum seal fruits: Utilize your food saver for vacuum sealing fruits as well. This’ll help preserve their freshness and extend their shelf life, making them perfect for smoothies or baking.
-
Vacuum seal leftovers: Don’t limit your food saver to just raw patties. Vacuum sealing leftovers like cooked hamburger patties can help maintain their flavor and juiciness, allowing you to enjoy the same deliciousness even after some time.
By following these additional tips and tricks, you can maximize the benefits of using your food saver and ensure that your vacuum-sealed raw hamburger patties stay fresh and delicious for an extended period.
Frequently Asked Questions
Can I vacuum seal my hamburger patties with regular plastic wrap?
No, regular plastic wrap isn’t suitable for vacuum sealing hamburger patties. Vacuum sealing offers several benefits such as preventing freezer burn, extending the shelf life, and maintaining the freshness of food. To properly vacuum seal raw hamburger patties, it’s recommended to use a food saver or vacuum sealer machine. Alternatively, you can store the patties in airtight containers or freezer bags to maintain their quality and prevent spoilage.
How long can I store vacuum-sealed hamburger patties in the freezer?
When it comes to storing vacuum-sealed hamburger patties in the freezer, you’ll be pleased to know that they can last for an extended period of time. The airtight seal created by vacuum sealing ensures minimal exposure to air and prevents freezer burn. As a result, you can safely store your vacuum-sealed hamburger patties for up to 6-12 months in the freezer.
This same technique can also be applied to vacuum sealing fruits and cheese, extending their shelf life and preserving their freshness.
Can I use the food saver to vacuum seal cooked hamburger patties?
Yes, you can use the Food Saver to vacuum seal cooked hamburger patties. This is a great cooking tip for burger storage. To do so, make sure the cooked patties have completely cooled down before sealing them. Place each patty in a separate vacuum seal bag, removing as much air as possible. This will help prevent freezer burn and extend the shelf life of your cooked hamburger patties.
What is the recommended temperature for thawing vacuum-sealed hamburger patties?
The recommended thawing methods for vacuum-sealed hamburger patties depend on the desired meat quality. Thawing at room temperature isn’t recommended as it can promote bacterial growth. Instead, it’s best to thaw the patties in the refrigerator.
This slow thawing process helps maintain the meat’s texture and flavor. Thawing at higher temperatures, such as in a microwave, can negatively impact the quality of the meat, resulting in a less desirable texture and taste.
Are there any safety guidelines I should follow when vacuum sealing raw hamburger patties?
When vacuum sealing raw hamburger patties, it’s important to follow safety guidelines and best practices. Firstly, make sure the patties are fresh and properly handled to minimize the risk of contamination.
Secondly, ensure that the sealing bags or containers are clean and free from any debris.
Lastly, when sealing, remove as much air as possible to maintain the quality and extend the shelf life of the patties.
By adhering to these safety guidelines, you can ensure the safety and freshness of your vacuum-sealed raw hamburger patties.
How Can Vacuum Sealing Help with Raw Food Diet?
Vacuum sealing can preserve the freshness of raw food, maintaining its nutrients and flavors. By removing excess air, vacuum sealing prevents the growth of bacteria and mold, extending the shelf life of food. This method can contribute to achieving the projected results raw food diet enthusiasts aim for in terms of food preservation.
Conclusion
In conclusion, my experience with using the Food Saver to vacuum seal raw hamburger patties has been nothing short of extraordinary.
The careful selection of packaging material, the precise arrangement of the patties, and the meticulous removal of excess air from the bag have all contributed to the perfect preservation of my precious patties.
With the proper sealing and storage techniques, I can confidently say that my vacuum-sealed patties will remain fresh and delicious for an extended period of time.
So go forth, my fellow hamburger enthusiasts, and embark on your own vacuum sealing adventure! Your taste buds will thank you.
With her ability to convey complex concepts in a clear and accessible manner, Belinda ensures that readers of all backgrounds can grasp the benefits and techniques of raw food. She excels at breaking down scientific information into digestible pieces, allowing readers to understand the impact of raw food on their bodies and encouraging them to make informed choices about their diet.
One of Belinda’s notable contributions to rachaelsrawfood.com is her collection of mouthwatering recipes. She delights in experimenting with various combinations of raw ingredients, exploring innovative ways to create delicious and nutritious meals. Belinda’s recipes showcase the incredible flavors and textures of raw food and emphasize its versatility, dispelling any misconception that a raw food diet is limited or monotonous.
In addition to her writing responsibilities, Belinda actively engages with the raw food community, attending workshops, seminars, and conferences to expand her knowledge and network. She enjoys connecting with like-minded individuals, exchanging ideas, and staying up to date with the latest trends and advancements in the field of raw food nutrition.
Kitchen Essentials for Raw Food Preparation
Raw Food Safety Documentation Systems
Properly implementing raw food safety documentation systems is crucial for compliance; discover how to enhance your practices and safeguard against potential risks.
Raw food safety documentation systems are essential for you to maintain compliance and protect against foodborne illnesses. These systems include HACCP plans, Standard Operating Procedures (SOPs), and rigorous record-keeping methods. They help you manage hazards in real-time and guarantee staff receive proper training. Implementing digital solutions can make documentation easier and more accessible, keeping your operations efficient. Always review and update your documentation to meet evolving regulations. This proactive approach not only minimizes risks but also boosts your audit preparedness. Stick around, and you'll discover deeper insights into optimizing your food safety practices.
Key Takeaways
- Implement a HACCP plan to identify and control food safety hazards throughout the raw food production process.
- Utilize Standard Operating Procedures (SOPs) to provide clear guidelines for the safe handling of raw foods.
- Maintain detailed records of temperature controls and cleaning schedules to ensure compliance and safety.
- Use traceability systems to document the supply chain flow of raw ingredients for effective recall management.
- Leverage digital documentation solutions to streamline processes and enhance accessibility for audit readiness.
Importance of Food Safety Documentation
Food safety documentation isn't just a formality; it's a critical component in ensuring the safety and quality of the food you serve. By maintaining thorough documentation, you help safeguard public health against foodborne illnesses like Listeria and Salmonella. This is akin to ensuring a clean and healthy environment, as seen with the benefits of air quality management in other industries.
It allows you to meet regulatory compliance with agencies like the FDA and EFSA, ensuring that your operations adhere to necessary safety standards.
Effective food safety management systems rely on well-documented procedures and records. These records not only serve as proof of compliance during audits but also minimize the likelihood of costly product recalls. With solid documentation, you can streamline employee training, equipping your team to recognize and manage risks effectively.
Real-time monitoring of food safety documentation enhances your ability to manage potential hazards proactively. By utilizing tools like HACCP plans, you can implement robust risk management strategies that keep food safety at the forefront of your operations.
Types of Essential Food Safety Documents
Effective food safety documentation is crucial for any operation dealing with raw products.
You'll need to establish a robust food safety management system to guarantee compliance with industry standards. Start with your HACCP plan, which identifies and controls food safety hazards throughout the production process. This plan is critical for maintaining the safety of your raw food items.
Next, implement Standard Operating Procedures (SOPs). These detailed, step-by-step guidelines help your team handle, process, and store raw foods safely, assuring quality standards are met.
Record keeping is also essential; maintaining logs for temperature control, maintenance, and cleaning schedules allows you to track the safety of your products effectively.
Moreover, consider incorporating traceability systems to document the supply chain flow of raw ingredients. This will enable you to manage recalls efficiently in case of contamination.
Best Practices for Documentation
Establishing best practices for documentation can considerably enhance your raw food safety management system. Begin by utilizing Standard Operating Procedures (SOPs) to provide clear, step-by-step guidelines for handling raw food safely. This guarantees consistency and compliance with food safety standards.
Implement traceability systems to document the flow of raw materials from suppliers to production, facilitating efficient recalls and accountability during food safety issues. Accurate and complete record-keeping is essential. Maintain logs of temperatures, cleaning schedules, and maintenance activities to support compliance with regulatory audits.
Regularly review and update your documentation to align with evolving regulations and industry best practices, making sure all procedures remain relevant and effective. It's critical to stress the importance of food safety documentation during employee training. Employees should understand the need for accuracy and accessibility. This helps foster a culture of food safety within your organization.
Employee Training in Food Safety
To maintain a safe food environment, employee training in food safety is essential. You need to guarantee your staff understands their roles and responsibilities, which greatly reduces the risk of foodborne illnesses. Start with a structured onboarding process that incorporates food safety training, instilling a culture of compliance from day one.
Regular training sessions should focus on best practices and cover the importance of documentation systems, including how to use digital tools effectively. Continuous training and periodic refreshers are crucial for keeping everyone updated on the latest food safety regulations. This ongoing education helps reinforce staff qualifications and guarantees they remain competent in their roles.
Don't forget the importance of documenting training records. This is critical for compliance verification during audits, making it easy to demonstrate that your staff is adequately trained.
Technology Solutions for Compliance
In today's fast-paced food industry, leveraging technology solutions for compliance can streamline your raw food safety documentation processes considerably. By integrating digital systems into your food safety management processes, you can reduce the time spent on manual documentation by up to 1000%.
Cloud-based platforms enhance accessibility, allowing authorized personnel to access and update records from any device, anywhere.
Automated monitoring tools, linked with Internet of Things (IoT) devices, track critical control points (CCPs) in real-time. This guarantees compliance with food safety regulations without the need for constant manual checks.
Customizable checklists and templates within these digital systems help you meet all compliance requirements according to local and international food safety standards.
Additionally, robust document management features centralize your food safety documentation, making it easier to maintain audit readiness.
With a reliable traceability system in place, you can manage the flow of products throughout your supply chain efficiently.
Frequently Asked Questions
What Is the Food Safety Management System Documentation?
A food safety management system documentation's a structured collection of policies and procedures that helps you identify, prevent, and control food safety hazards, ensuring compliance with regulations and enhancing consumer trust in your operations.
What Is FSO System for Food Safety?
An FSO system for food safety helps you manage and document practices effectively. It includes components like HACCP plans and real-time monitoring, ensuring compliance with regulations while enhancing accountability and traceability in your food operations.
What Are the Examples of Food Safety System?
Think of food safety systems as the backbone of a healthy kitchen. You'll find examples like HACCP plans, Standard Operating Procedures, recall plans, traceability systems, and food safety management systems ensuring quality and accountability in food handling.
What Is FSMS Certification?
FSMS certification, like ISO 22000, shows your commitment to food safety. It requires a systematic approach to managing hazards and compliance with regulations, enhancing consumer trust and giving you a competitive edge in the market.
Conclusion
In the bustling kitchen of food safety, documentation is your sturdy shield, protecting both your business and your customers. By embracing best practices and harnessing technology, you weave a safety net that catches potential hazards before they slip through the cracks. As you cultivate a culture of training among your employees, you'll turn the tide against foodborne risks, ensuring your raw food remains as pristine as a morning dew. With vigilance, you'll serve not just meals, but peace of mind.
Rachael, the Editor in Chief of RachaelsRawFood.com, is an inspiring and passionate individual who has dedicated her life to promoting the benefits of a raw food lifestyle. Known for her vibrant and energetic personality, Rachael has built a strong online presence that has transformed her personal journey into a thriving community of raw food enthusiasts.
Kitchen Essentials for Raw Food Preparation
Raw Food Safety During Power Outages
Navigating raw food safety during power outages is crucial—discover essential tips to protect your food and ensure your family’s health.
During power outages, the safety of your raw food can be at risk. Keep refrigerator doors closed to maintain temperatures below 40°F for 4-6 hours. If food rises above that for over 2 hours, it's best to discard it. A full freezer can keep food safe for about 48 hours. Use appliance thermometers to regularly check temperatures. For cooking, consider using outdoor grills or camp stoves, but avoid indoor appliances due to carbon monoxide risks. Staying informed can help you better prepare for these situations, and you might find even more tips to safeguard your food safety.
Key Takeaways
- Discard raw foods that have been above 40°F for more than 2 hours to prevent foodborne illness.
- Keep refrigerator doors closed to maintain safe temperatures for 4-6 hours during a power outage.
- Full freezers can keep raw food safe for approximately 48 hours; half-full lasts about 24 hours.
- Use appliance thermometers to monitor food temperatures and ensure safety during outages.
- Refreezing raw food is acceptable if it has ice crystals or has remained at 40°F or below.
Understanding Power Outage Risks
Power outages can happen unexpectedly, and understanding the risks they pose to your food safety is crucial. When the power goes out, your refrigerator can keep food at safe temperatures for about 4-6 hours, as long as you keep the doors closed. However, any food stored above 40°F for more than 2 hours should be discarded to prevent foodborne illness. This is especially critical for raw meats and dairy products, which can spoil quickly.
If you have a full freezer, it can keep food safe for about 48 hours under the same conditions. To effectively monitor the temperature during a power outage, it's wise to use an appliance thermometer. This tool helps you keep track of the internal temperature of your food, ensuring you know when it's time to take action.
Understanding the causes and duration of power outages is essential for effective planning. By staying informed and prepared, you can minimize the risk of spoilage and protect your family from foodborne illnesses.
Always remember that a little knowledge and preparedness can go a long way in keeping food safe during uncertain times.
Essential Food Storage Practices
Effective food storage practices are essential during power outages to guarantee your perishables remain safe. Keep your refrigerator doors closed as much as possible; this helps keep the internal temperature below 40°F for up to 4-6 hours.
If your freezer is full, it can maintain a safe temperature for about 48 hours, while a half-full freezer may only last 24 hours.
If food thaws but still has ice crystals or is at 40°F or below, it's safe to refreeze, though its quality might decline. Always use an appliance thermometer to check the temperatures of your fridge and freezer, ensuring they stay within safe limits.
Be vigilant: discard any perishable food that's been above 40°F for more than 2 hours. This includes raw meats, dairy products, and other potentially hazardous items.
Safe Cooking Methods
When the lights go out, you still need to secure your raw foods are cooked safely. Here are some safe cooking methods you can rely on during a power outage:
- Use outdoor grills or camp stoves, avoiding indoor appliances to prevent carbon monoxide poisoning.
- Set up charcoal or gas grills in well-ventilated areas to avoid hazardous fume buildup.
- Cook over an open fire in a fireplace if the chimney is sound and maintained.
- Power small electrical appliances with generators, following safety guidelines.
These methods guarantee food safety while minimizing risks. The key is to maintain the right environment; cold air can affect your cooking methods, so always check your setup.
Remember, food safety is paramount. Regardless of how you cook, make sure raw foods reach a safe internal temperature to kill harmful bacteria. Using a food thermometer is vital for this step.
Monitoring Food Temperature
How do you guarantee your food stays safe during a power outage? First, make certain you use appliance thermometers to regularly check your refrigerator and freezer temperatures. Keep your refrigerator below 40°F to avoid foodborne illnesses.
During an outage, keep the refrigerator doors closed as much as possible; this helps maintain a safe temperature for 4-6 hours without power.
If you have a full freezer, it can stay at a safe temperature for up to 48 hours, while a half-full freezer may only last about 24 hours.
If the power comes back on and your thermometer reads above 40°F for more than 2 hours, it's essential to discard perishable items like meat, poultry, and dairy to prevent foodborne illnesses.
After thawing, always check for ice crystals in your foods. If you find them, you can safely refreeze the food.
However, if there are no ice crystals, you should cook the food before eating it.
Emergency Preparedness Tips
Being prepared for power outages can make a significant difference in keeping your food safe. Here are some essential tips to help you stay ahead of potential issues:
- Keep an appliance thermometer in your refrigerator and freezer.
- Freeze water in bags or use frozen packs to maintain cold temperatures.
- Store perishable foods in insulated coolers with ice packs for outages over six hours.
- Familiarize yourself with your insurance policy regarding food loss.
During a power outage, monitor your fridge to confirm it stays below 40°F. If the power's out for more than two hours, keep the door closed to maintain the cold temperature.
For your freezer, it should remain at 0°F or below. If you anticipate a longer outage, consider transferring perishables to coolers with ice packs.
Having alternative cooking methods ready, like charcoal or gas grills, is also crucial for preparing meals.
Frequently Asked Questions
Are Pickles Safe After a Power Outage?
Yes, pickles can be safe after a power outage if they've stayed below 40°F. Check for spoilage signs like off smells or mold; if you see any, it's best to throw them away.
What to Do if Power Goes Out While Cooking Meat?
If the power goes out while you're cooking meat, check the internal temperature immediately. If it's above 40°F for over two hours, it's best to discard it to avoid foodborne illness. Stay safe!
How Long Will Milk Last in the Fridge Without Power?
Milk can stay safe for up to four hours in the fridge without power if you keep the door closed. If it's above 40°F for more than two hours, you need to discard it.
How Do You Know if Meat Is Bad After a Power Outage?
To tell if meat's bad, check for off smells, slimy textures, or discoloration. Use an appliance thermometer—if it's above 40°F, discard it. When in doubt, it's safer to throw it away.
Conclusion
In the face of a power outage, you can take control of your food safety and protect your loved ones. Imagine the relief of sharing a meal, knowing you've kept everything safe and sound. By following these guidelines and being prepared, you're not just safeguarding food; you're preserving moments together. Remember, it only takes a little planning to turn a potential crisis into a shared experience, transforming uncertainty into the warmth of family and friendship.
Rachael, the Editor in Chief of RachaelsRawFood.com, is an inspiring and passionate individual who has dedicated her life to promoting the benefits of a raw food lifestyle. Known for her vibrant and energetic personality, Rachael has built a strong online presence that has transformed her personal journey into a thriving community of raw food enthusiasts.
Kitchen Essentials for Raw Food Preparation
Raw Food Safety Certification Guide
Consider the critical steps to ensure raw food safety certification and uncover vital practices that could prevent dangerous foodborne illnesses.
To get a thorough understanding of raw food safety certification, start by recognizing the risks of foodborne illnesses like E. coli and Salmonella. You'll learn essential practices for handling raw meat, such as checking temperatures, preventing cross-contamination, and maintaining proper hygiene. Familiarizing yourself with effective storage methods and proper cooking temperatures is critical to ensuring food safety. Engage in hands-on training activities to reinforce these concepts, and stay updated on food safety regulations through resources from agencies like the FDA and USDA. There's plenty more to discover that can enhance your knowledge and compliance in this important area.
Key Takeaways
- Food safety training minimizes risks of foodborne illnesses like E. coli and Salmonella through proper handling practices.
- Safe storage methods include keeping raw meat at or below 41°F (5°C) to prevent spoilage and contamination.
- Cross-contamination can be avoided by using separate cutting boards and utensils for raw meat and ready-to-eat foods.
- Regular assessments and training activities help reinforce food safety practices and ensure compliance with health regulations.
- Continued education through online courses and workshops keeps food handlers informed about the latest safety guidelines and trends.
Importance of Food Safety Training
Food safety training is essential for every food service employee. It empowers you to recognize and mitigate risks associated with foodborne illnesses, like E. coli and Salmonella, which are often found in raw meat. When you understand these risks, you can take the necessary steps to protect yourself and your customers.
Proper training enhances your compliance with health regulations, creating a safer food handling environment. You'll learn to evaluate raw meat shipments for freshness, ensuring only safe products make it to the kitchen.
Additionally, you'll become familiar with critical practices like proper storage methods and safe preparation techniques to avoid cross-contamination.
One of the simplest yet most effective practices you'll learn is how to properly wash your hands. This can greatly reduce the risk of transferring harmful pathogens to food.
Training also covers understanding cooking temperatures necessary to eliminate any pathogens present in food.
Continuous education reinforces the importance of food safety in your workplace, promoting a culture of accountability among staff. By prioritizing food safety training, you not only protect your customers but also enhance the overall reputation of your establishment.
Key Learning Objectives
Understanding the significance of food safety training sets the stage for grasping key learning objectives.
First, you'll need to evaluate raw meat shipments effectively. Confirm to check for proper temperatures, guaranteeing that frozen meat is received frozen and refrigerated meat is at or below 41°F (5°C).
Next, it's essential to describe safe storage methods. Organizing food according to cooking temperatures and keeping raw meat separate from other foods prevents cross-contamination.
When preparing raw meat, confirm to implement best practices. This includes cleaning hands, changing gloves, and sanitizing work areas after handling raw products.
You should also identify proper cooking temperatures for various meats; verify they're cooked to FDA-recommended levels to eliminate harmful pathogens.
Essential Food Safety Facts
When storing raw meat, it's vital to keep it at the right temperatures to prevent spoilage and contamination.
You should also take steps to avoid cross-contamination by storing raw meat separately from other foods and maintaining strict hygiene practices.
Understanding these essential food safety facts will help you guarantee a safer food handling environment.
Importance of Safe Storage
Safe storage is fundamental for preventing foodborne illnesses, especially when handling raw meat. To guarantee safety, always keep raw meat at the right temperatures. Frozen meat should arrive frozen, while refrigerated meat must be no warmer than 41°F (5°C). This temperature control helps prevent bacterial growth.
You should also organize food storage effectively. Keep raw meat separate from other foods to minimize the risk of cross-contamination. Store all raw meat on designated shelves, ideally at the bottom of your refrigerator, to prevent its juices from dripping onto ready-to-eat foods.
After handling raw meat, it's imperative to maintain cleanliness. Clean your hands, change gloves, and thoroughly sanitize all work surfaces and utensils to eliminate potential pathogens.
This step is essential for maintaining a safe kitchen environment.
Cross-Contamination Prevention Techniques
Cross-contamination is a serious risk in any kitchen, especially when handling raw meat. It occurs when raw meat comes into contact with ready-to-eat foods, spreading harmful pathogens like E. coli and Salmonella. To prevent this, always store raw meat separately from other foods, ideally on the bottom shelf of your refrigerator to avoid any drips.
When preparing food, it's vital to keep your surfaces clean. Use separate cutting boards and utensils for raw meat and other food items. This minimizes the risk of cross-contamination during food prep.
After handling raw meat, make sure to wash your hands thoroughly, change gloves if you're using them, and sanitize your work surfaces to eliminate any potential contaminants.
Regular training and reminders about safe food handling practices are essential for maintaining a contamination-free kitchen environment. Make it a habit to review these techniques with your team or yourself.
Engaging Training Activities
How can you make food safety training more engaging and effective? By incorporating interactive activities that reinforce essential practices for handling raw meat safely, you can boost retention and awareness among trainees.
Here are three engaging training activities to contemplate:
- Receiving Meat Activity: Have participants identify signs of improper shipment, like temperature abuse or damaged packaging. This hands-on approach highlights the importance of inspecting raw meat upon arrival to prevent foodborne illness.
- Food Storage Organization Challenge: Set up a competition where teams organize a mock storage area. Emphasize storing raw meat on the bottom shelves and separating it from ready-to-eat foods to avoid cross-contamination.
- Preventing Cross-Contamination Discussion: Facilitate a brainstorming session on safe food preparation strategies. Encourage the use of separate cutting boards for raw meat and other ingredients, fostering a culture of safety.
Effective Follow-Up Strategies
To guarantee that food safety practices remain top-of-mind, implementing effective follow-up strategies is vital. Start by conducting regular assessments of raw meat handling practices. This helps facilitate compliance with health regulations and highlights areas needing improvement.
Focus on key inspection points like the separation of raw and cooked foods, proper thawing methods, and cleanliness standards during your follow-up evaluations.
Observe employee practices during food preparation and provide constructive feedback. Reinforcing the importance of food safety protocols can greatly enhance compliance.
Don't forget to celebrate and praise those employees who consistently follow safety guidelines; this fosters a culture of accountability and encourages good practices among your team.
Additionally, schedule periodic reviews of training materials. Keeping food safety standards fresh in employees' minds is essential, especially when addressing any changes in regulations or best practices.
By consistently implementing these follow-up strategies, you'll help create a workplace dedicated to food safety, where everyone understands their role in maintaining a safe environment.
Common Food Safety Violations
When it comes to food safety, you need to be aware of common violations that can compromise your practices.
Improper storage, cross-contamination, and inadequate cooking temperatures are just a few examples that can lead to serious health risks.
Let's explore these violations and discuss effective strategies to prevent them.
Common Violation Examples
Food safety violations can have serious consequences, making it vital to understand and avoid them in any raw food handling environment. Here are some common examples of violations you should be aware of:
- Improper Storage Temperatures: Raw meat must be stored at 41°F (5°C) or lower to prevent harmful bacterial growth. Failing to keep meat at the right temperature can lead to foodborne illnesses.
- Cross-Contamination: It's essential to keep raw meat separate from other foods. If you don't, you risk contaminating ready-to-eat items, which can lead to serious health issues.
- Neglecting Handwashing Protocols: After handling raw meat, you must wash your hands properly to avoid spreading pathogens. Skipping this step can greatly increase the risk of contamination.
In addition to these examples, remember that inadequate cooking temperatures and not sanitizing work surfaces after raw meat preparation can also pose major risks.
Prevention Strategies Overview
Implementing effective prevention strategies is essential for maintaining food safety, especially in environments handling raw meat. To keep your food safe, you need to focus on common violations that can lead to serious health risks.
First, verify that raw meat is stored at or below 41°F (5°C) to prevent bacterial growth. Always store raw meat separately from other foods to avoid cross-contamination. This means using separate cutting boards and utensils, too.
Next, make certain you and your employees wash hands thoroughly and change gloves after handling raw meat. This simple step greatly reduces the risk of contaminating other food items.
When thawing meat, avoid room temperature methods, as they can encourage rapid bacterial growth. Instead, thaw it in the refrigerator or under cold running water for safety.
Regular health inspections will help you stay compliant by focusing on key areas. Pay attention to the separation of raw and cooked foods, maintain cleanliness in preparation areas, and verify proper cooking temperatures are upheld.
Resources for Continued Learning
Continued learning is essential for anyone involved in raw food safety, as the landscape of regulations and practices is constantly evolving. Staying informed not only enhances your knowledge but also helps you implement the best safety protocols in your operations.
Here are some valuable resources to evaluate:
- Online Courses and Webinars: Utilize platforms offering courses focused on the latest food safety regulations and best practices. These resources can keep you updated on raw food safety protocols.
- Industry Newsletters and Publications: Subscribing to newsletters will provide insights into emerging food safety trends and research findings. This information can help you adapt and improve your practices.
- Workshops and Conferences: Attend events dedicated to food safety to network with professionals and gain hands-on experience with new safety techniques. Engaging with peers can also lead to collaborative learning opportunities.
Don't forget to check resources from government agencies like the FDA and USDA for extensive guidelines.
Joining professional organizations can also be beneficial, offering shared knowledge and certification opportunities to further your expertise in raw food safety.
Frequently Asked Questions
What Are the 5 C's in Food Safety?
The 5 C's in food safety are Clean, Cook, Chill, Cross-contamination, and Combat. You should keep your hands and surfaces clean, cook meats thoroughly, chill food properly, avoid cross-contamination, and combat foodborne illnesses effectively.
How to Study for a Food Safety Test?
To study for a food safety test, review key concepts regularly, practice identifying improper shipments, engage in training activities, and discuss best practices with others. Repetition and active participation will reinforce your knowledge effectively.
What Is the Highest Level of Food Safety Certification?
If you're managing a busy restaurant, achieving the ServSafe Manager certification is essential. It's the highest level of food safety certification, ensuring you understand foodborne pathogens and implement best practices to keep customers safe.
What Are the 5 Basic Food Safety Rules?
You should always wash your hands, store raw meat separately, cook it to safe temperatures, check refrigeration regularly, and sanitize surfaces after handling. Following these five rules helps keep your food safe and healthy.
Conclusion
In summary, prioritizing food safety training is vital for anyone handling raw food. By understanding essential facts, engaging in hands-on activities, and implementing effective follow-up strategies, you can greatly reduce the risk of violations. For instance, a small café that trained its staff on proper food handling saw a 50% drop in health code violations within six months. With continuous learning and vigilance, you can guarantee a safer dining experience for everyone.
Rachael, the Editor in Chief of RachaelsRawFood.com, is an inspiring and passionate individual who has dedicated her life to promoting the benefits of a raw food lifestyle. Known for her vibrant and energetic personality, Rachael has built a strong online presence that has transformed her personal journey into a thriving community of raw food enthusiasts.
-
Raw Food Recipes2 months ago
How Much Raw Food to Feed a Cat: A Simple Calculator
-
Raw Food Recipes2 months ago
Is Freeze-Dried Raw Food Good for Cats? Find Out Here
-
Health and Wellness2 months ago
Can You Drink Coffee on a Raw Food Diet? What You Need to Know
-
Raw Food Recipes1 month ago
How Much Raw Food to Feed a Kitten: A Complete Guide
-
Raw Food Recipes1 month ago
How Much Raw Food to Feed a Puppy: Essential Guidelines
-
Raw Food Recipes2 months ago
How Much Does a Raw Food Diet Cost for Humans?
-
Kitchen Essentials for Raw Food Preparation4 weeks ago
Understanding Ph in Raw Food Safety
-
Raw Food Recipes2 months ago
Dry Food Vs. Raw Food for Dogs: Which Is Better?