
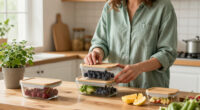
Choose and use food storage containers made from materials such as glass, stainless steel, or certified food-grade silicone to store groceries and leftovers. This guide is for beginners setting up a home storage system. You will learn how to match containers to foods, prepare them for use, and check that stored food is protected from leaks and spoilage. Allow 30–60 minutes to review your needs and prepare a first set; routine storage takes only a few minutes.

Get health and wellness essentials delivered free with Prime
- Fast, free delivery on millions of items
- Prime Video, Amazon Music and more included
- Member-only deals all year

Verel Glass Food Storage Containers with Bamboo Lids (4 Pack, 36 Ounce)
- ✔ Set size: 4 containers
- ✔ Capacity: 36 ounces each
- ✔ Glass: Borosilicate

5PCS Glass Storage Containers with Lids, Airtight Pantry Storage Containers
- ✔ Set size: 5 containers
- ✔ Capacities: 0.5, 0.85, 1.2, 1.6, and 2.3 quarts
- ✔ Glass: Borosilicate

Caraway Glass Food Storage Container with Lid, 4.4 Cup
- ✔ Set size: 1 container
- ✔ Capacity: 4.4 cups
- ✔ Container: Glass with ceramic coating
Difficulty: Beginner | Time: 30–60 minutes to choose and prepare containers; a few minutes per storage task
What You’ll Need
Tools & Materials:
- Food-grade containers with lids, such as glass, stainless steel, or food-grade silicone
- Dish soap, clean water, and a drying rack or clean towel
- Permanent marker and removable labels, or masking tape
- Measuring cup or kitchen scale, optional
Knowledge:
- Basic kitchen and food-safety habits
- Ability to check product labels and care instructions
Choose containers labeled for food contact. The word “organic” does not describe a container material or certify that it is safer. If you want a lower-impact option, compare material, durability, repair or replacement options, and local recycling access. Check whether each container and lid is safe for the intended use, such as freezer storage, microwave heating, or a dishwasher.
Verel Glass Food Storage Containers with Bamboo Lids (4 Pack, 36 Ounce)
For shoppers who want an everyday set with clearly described materials, Verel is the most direct fit in this comparison. Four 36-ounce borosilicate glass containers give us a consistent format for batch cooking and leftovers, and the listing says the glass can handle oven use up to 520°F as well as microwave and freezer use. That versatility makes it more meal-prep oriented than the pantry-focused five-piece set, whose heat-use guidance is not provided.The bamboo lids and silicone seal are the defining tradeoff. Bamboo gives the set a plastic-free lid surface and can double as a small cutting board, but it cannot follow the glass into the dishwasher, microwave, or oven. The silicone seal supports an airtight fit, yet buyers seeking an entirely natural-material assembly should recognize it as a distinct component. Compared with Caraway, Verel supplies four containers and a more explicit plastic-free claim; compared with the pantry set, it is better suited to prepared food than to sorting multiple dry ingredients. Choose it for a coherent meal-prep set, and skip it if low-maintenance, all-parts dishwasher cleaning is essential.
Pros:
- Four matching 36-ounce containers suit batch cooking and leftovers.
- Borosilicate glass is listed as oven-safe up to 520°F, as well as microwave- and freezer-safe.
- Bamboo lids and silicone seals are identified, giving more material clarity than the pantry set.
- The lids can serve as small cutting boards when removed.
Cons:
- Bamboo lids are not dishwasher-safe and require separate care.
- The silicone seal means the assembly is not made solely from glass and bamboo.
- Four identical sizes offer less pantry-organizing flexibility than the five-size set.
Best for: Meal preppers who want several medium-large glass containers and explicitly described bamboo lids.
Not ideal for: Anyone who needs every component to be dishwasher-safe or wants a container assembly without silicone.
Bottom line: We rank Verel first for its clearly stated plastic-free meal-prep design, provided buyers are comfortable hand-washing bamboo lids and using a silicone seal.
“We rank Verel first for its clearly stated plastic-free meal-prep design, provided buyers are comfortable hand-washing bamboo lids and using a silicone seal.”
5PCS Glass Storage Containers with Lids, Airtight Pantry Storage Containers
When the goal is to organize several kinds of dry goods, variety of size matters more than matching meal-prep portions. This set runs from 0.5 to 2.3 quarts across five containers, so we can assign smaller jars to tea or nuts and larger ones to flour, rice, or pasta. That range gives it a clearer pantry role than Verel’s four identical 36-ounce dishes, while its airtight lids are described as helping keep air and moisture away from dry foods.The limitation is material transparency. The listing specifies borosilicate glass but does not say what the lids are made from, nor does it provide microwave, oven, or freezer guidance. That makes this a sensible fit for countertop and cabinet storage, but a less complete answer for buyers who prioritize knowing every food-contact material or want to reheat directly in the container. Its glass is dishwasher-safe, which is simpler than washing Verel’s bamboo lids by hand, though we should not assume that applies to the lids. Compared with Caraway, the five sizes are more useful for a whole pantry; compared with Verel, the product description leaves more unanswered questions about materials and heat use.
Pros:
- Five capacities range from 0.5 to 2.3 quarts for different pantry staples.
- Borosilicate glass material is specified.
- Airtight lids are intended to limit air and moisture exposure for dry foods.
- Dishwasher-safe glass and wide openings support straightforward cleaning.
Cons:
- The lid material is not identified in the supplied details.
- No microwave, oven, or freezer safety information is provided.
- Pantry-focused shapes are less clearly suited to meal prep and reheating than Verel.
Best for: Households organizing different quantities of dry pantry ingredients in clear, stackable-looking glass vessels.
Not ideal for: Buyers who need disclosed lid materials, cookware-style heat guidance, or a verified plastic-free construction.
Bottom line: We recommend this set for pantry organization when size variety is the priority, but material-conscious buyers should confirm the lid composition before choosing it.
“We recommend this set for pantry organization when size variety is the priority, but material-conscious buyers should confirm the lid composition before choosing it.”
Caraway Glass Food Storage Container with Lid, 4.4 Cup
Caraway is the most focused single-container option here. Its 4.4-cup square format is sized for a lunch portion, a side dish, or a modest amount of leftovers, and the clear glass lid lets us see what is stored. The listing also says the container is free of PTFE, PFOA, PFAS, and BPA, with a ceramic-coated body. That makes its material story more specific than the pantry set’s, although the supplied description does not identify the lid material.This compact format trades breadth for a polished, contained use case. Unlike Verel’s four-piece set or the pantry set’s five sizes, Caraway gives us only one vessel, and its lid cannot go in the dishwasher, microwave, or oven. The container itself is described as safe for microwave, oven, refrigerator, and freezer use, so reheating is possible after removing the lid. Its coordinated color and compatibility with optional Dot & Dash inserts make it appealing for lunch packing, but those extras are not included in the single-container listing. We place it third because it serves a narrower storage need than the larger sets; choose it when presentation and a compact portion matter more than stocking a full pantry or meal-prep rotation.
Pros:
- Compact 4.4-cup capacity fits a lunch portion or smaller leftovers.
- Ceramic-coated container is described as free of PTFE, PFOA, PFAS, and BPA.
- Container is listed as microwave-, oven-, refrigerator-, and freezer-safe.
- Clear lid supports quick identification of stored food.
Cons:
- One container offers less capacity and flexibility than either multi-piece set.
- Lid is not dishwasher-, microwave-, or oven-safe.
- The supplied details do not specify the lid material.
Best for: Someone seeking one attractive, compact glass container for lunch portions or smaller leftovers.
Not ideal for: Buyers who need a multi-container set, a large batch-prep capacity, or a lid that can be machine-washed and heated.
Bottom line: Caraway suits buyers who value a compact, coordinated lunch container, while its single-piece format and lid-care limits make it less versatile for general storage.
“Caraway suits buyers who value a compact, coordinated lunch container, while its single-piece format and lid-care limits make it less versatile for general storage.”
As an Amazon Associate we earn from qualifying purchases.
Before You Start
Decide what you store most often and where it will go: refrigerator shelves, freezer, pantry, lunch bag, or countertop. A small set of matching containers is easier to stack, but different shapes can suit different foods. Keep raw meat and seafood sealed on a low refrigerator shelf so drips cannot reach ready-to-eat food. Do not put hot glass into cold water or move cold glass directly into a hot oven; sudden temperature changes can break it. Follow the container maker’s temperature and care limits.
Step-by-Step Instructions
Step 1: List the foods and storage spaces you use
Write down the foods you regularly store, such as leftovers, chopped produce, dry grains, or packed lunches. Note whether each item belongs in the refrigerator, freezer, or pantry, and estimate the portion size. This list will help you buy containers that fit your routines instead of accumulating pieces that are rarely used.
Tip:Measure one refrigerator shelf or lunch bag if space is tight. A container that is too tall or wide may be difficult to use even if its capacity seems right.
Check: You have a short list of foods, typical portions, and storage locations to guide your container choices.
Step 2: Choose food-safe materials and sizes
Select food-grade containers in sizes that match your portions. Glass works well for refrigerator storage and many dry or moist foods, but it is heavy and can break. Stainless steel is durable for packed meals and some storage uses, but you cannot see the contents and it is generally not microwave-safe. Food-grade silicone is flexible and light; check its temperature limits and lid fit. For every material, read the manufacturer’s instructions and confirm the container is intended for food contact.
Tip:Inspect the lid as carefully as the container. A loose lid may be fine for dry pantry goods, but it can leak in a lunch bag or refrigerator drawer.
Check: Each selected container has a clear intended use, a suitable capacity, and care instructions you can follow.
Step 3: Check lids, seals, and condition
Fit each lid onto its matching container and inspect the rim, gasket, and locking tabs. Look for chips, cracks, rust, deep scratches, warped edges, or a gasket that is loose or split. Set aside damaged pieces and replace a worn gasket only with a compatible part recommended by the maker. Do not rely on a container with a compromised seal for liquids or transport.
Tip:To check a leak-resistant container, place a small amount of water inside, close the lid, and turn it over above a sink. Do this only if the product is designed to seal; many lids are not leakproof.
Check: Containers are intact, lids fit correctly, and you know which pieces are suitable for liquids or travel.
Step 4: Wash and dry containers before first use
Wash new containers and lids with dish soap and warm water, or use a dishwasher only when the care label allows it. Clean removable gaskets and lid grooves, where residue can collect. Rinse well and let every piece dry fully before storing it or adding food. Keep lids open or separate while drying so moisture does not remain trapped inside.
Tip:Some lids and seals require handwashing even when the container body is dishwasher-safe. Check each component’s instructions.
Check: Containers are clean, odor-free, and dry, including the lid grooves and seals.
Step 5: Prepare food for storage
Store food promptly after serving or preparation. Divide large amounts into smaller, shallow portions so they cool more quickly, and refrigerate perishable food within two hours of cooking, or within one hour when the room is above 32°C (90°F). Keep raw meat and seafood sealed separately on a low shelf. Rinse produce only when appropriate for the food and dry it well if excess moisture could speed spoilage.
Tip:Do not leave a large pot of hot food out to cool for an extended period. Portion it into shallow containers and refrigerate promptly; leave space around containers so cold air can circulate.
Check: Food is portioned appropriately, separated to prevent drips or cross-contact, and placed in its correct storage area promptly.
Step 6: Pack containers without overfilling
Transfer food into clean containers and leave enough room for the lid to close without pressing on the contents. For freezer storage, leave expansion space for liquids and choose a container marked freezer-safe. Wipe the rim clean, close the lid evenly, and avoid forcing latches that do not align. Put dry goods in a dry container and close it to protect them from moisture and pests.
Tip:Do not assume that an airtight-looking lid is leakproof. Keep uncertain containers upright and use a secondary bag or tray when carrying liquids.
Check: Lids close without pressure, food is protected from spills, and freezer containers have room for expansion.
Step 7: Label, date, and store each container
Write the food name and storage date on a removable label or tape. Add reheating instructions or contents such as “contains nuts” when useful. Place refrigerated foods where they are easy to see and use older portions first. Store pantry containers in a cool, dry place away from heat and sunlight. Follow reliable food-safety guidance for storage times; when you cannot identify how long food has been stored or whether it was kept cold, discard it.
Tip:Use a consistent date format, such as “12 Nov,” to avoid confusion. For frozen portions, include the year if they may be stored for several months.
Check: Every container is clearly identified and dated, and is in an appropriate refrigerator, freezer, or pantry location.
Step 8: Clean and inspect containers after use
Empty containers promptly and wash them according to their care labels. Remove food residue from corners, threads, and gaskets; let all parts dry completely before stacking or closing them. Check for lingering odors, stains, cracks, or damaged seals. Store containers with lids loose or separate if trapped moisture or odors are a concern.
Tip:For persistent odors, wash with baking soda and water if the material’s care instructions allow it. Avoid abrasive cleaners on surfaces that can scratch.
Check: Used containers are clean, dry, and ready for reuse, with damaged or unsuitable pieces removed from service.
Common Mistakes to Avoid
- Buying containers based only on the “organic” label. —
Check for food-contact suitability, material, size, temperature limits, lid fit, and care instructions. “Organic” is not a standard certification for container materials.
- Using one container type for every task. —
Match the container to the job. Use freezer-rated pieces for freezing, keep non-microwave-safe materials out of the microwave, and use leak-resistant lids for transport.
- Putting wet produce or damp containers into storage. —
Dry containers fully before filling them. For produce, use storage conditions suited to that food and avoid excess moisture when it causes faster spoilage.
- Keeping food without a date or relying on appearance alone. —
Label containers when you fill them and follow food-safety storage guidance. Discard food when its safe storage time or temperature is uncertain.
Troubleshooting
Problem: The lid leaks when the container is carried.
Solution:
Check that the gasket is present, clean, and seated correctly, then close each latch evenly. Confirm that the container is designed to be leak-resistant. If it still leaks, keep it upright in a secondary bag or switch to a container rated for liquids.
Problem: A container smells like a previous meal.
Solution:
Wash the container and lid separately, paying attention to the seal and grooves. Try a baking soda wash if the care label permits it, then dry completely. Replace a gasket that holds odor or residue, if the manufacturer offers a replacement.
Problem: Glass cracks or breaks after heating or chilling.
Solution:
Stop using the damaged piece and discard it safely. Avoid sudden temperature changes, follow the stated heating limits, and do not use a container with chips or cracks. Transfer food to a suitable dish before reheating if the container’s instructions are unclear.
Problem: Food spoils sooner than expected.
Solution:
Check that food was refrigerated promptly and that the refrigerator is cold enough according to food-safety guidance. Keep raw items separate, dry produce as appropriate, close containers properly, and label dates. Discard food that has been held at unsafe temperatures or has an uncertain storage history.
What Success Looks Like
Your storage system is working when containers are clean and intact, each food is in a suitable location, lids fit the intended use, and labels show what is inside and when it was stored. Food should be protected from spills and cross-contact, and containers should be easy to locate, open, wash, and reuse.
Next Steps
After a week, note which sizes and shapes you reach for and which remain unused. Add containers only to fill a clear gap. Replace damaged pieces or worn seals, and review stored food regularly so older portions are used safely. Follow local guidance for recycling or disposal, since options vary by material and location.
Frequently Asked Questions
Are organic food storage containers a specific type of product?
“Organic” is not a standard category for food storage containers. It usually refers to food production. For containers, check material and food-contact labeling, care instructions, durability, and the product’s intended uses.
Which material is best for storing leftovers?
There is no single best material for every household. Glass lets you see food and suits many refrigerator uses, while stainless steel is durable and light enough for transport. Food-grade silicone can be useful where flexibility matters. Choose by food, location, weight, heating needs, and the maker’s instructions.
Can I microwave food in a glass or silicone container?
Only if the container is labeled microwave-safe and its instructions allow that use. Remove lids unless they are also rated for microwave heating, and avoid sudden temperature changes with glass.
How long can I keep leftovers in a container?
The container does not determine how long food stays safe. Storage time depends on the food, how it was handled, and whether it stayed at a safe temperature. Follow current food-safety guidance, label the storage date, and discard food when its history is uncertain.