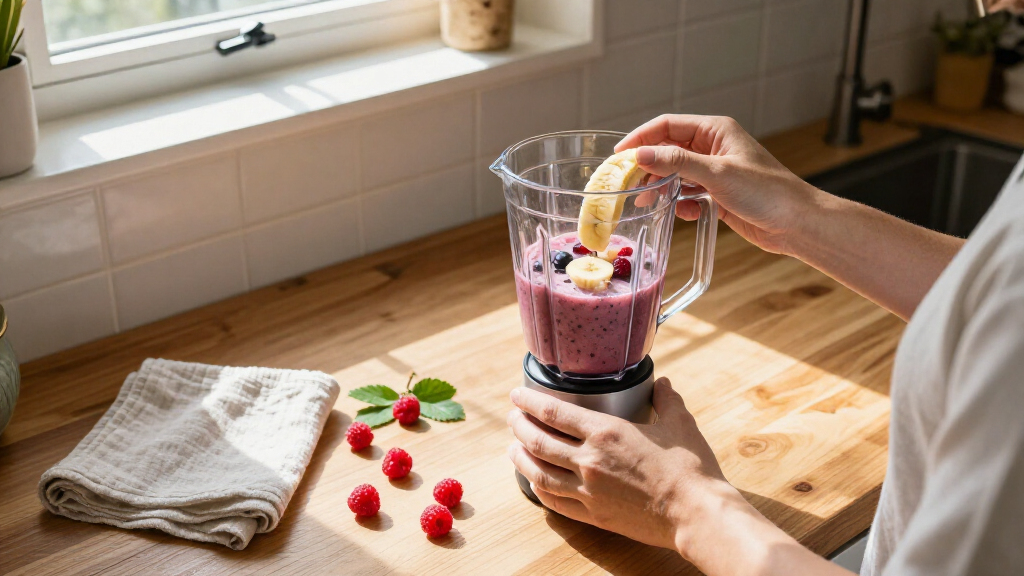

Make a single-serving smoothie in a personal blender by preparing the ingredients, loading the cup in the right order, blending in short runs, and checking the texture before drinking. This guide is for beginners using a standard personal blender with a blending cup and screw-on blade lid. Allow about 10-15 minutes, including basic cleanup.

Get health and wellness essentials delivered free with Prime
- Fast, free delivery on millions of items
- Prime Video, Amazon Music and more included
- Member-only deals all year

Magic Bullet Personal Blender, 22 oz, 250 W, Silver (MBR-1101)
- ✔ Motor power: 250 W
- ✔ Capacity: 22 oz
- ✔ Color: Silver

Magic Bullet Personal Blender, 22 oz, 250 Watt, Black (MBR-1101AK)
- ✔ Power: 250 W
- ✔ Capacity: 22 fl oz
- ✔ Dimensions: 4.01 × 4.48 × 11.61 in

Hamilton Beach Portable Blender for Smoothies with 14 oz Travel Jar
- ✔ Capacity: 14 fl oz
- ✔ Wattage: 175 W
- ✔ Model number: 51172
Difficulty: Beginner | Time: 10-15 minutes
What You’ll Need
Tools & Materials:
- Personal blender with blending cup and blade lid
- Measuring cup or kitchen scale
- Knife and cutting board
- Spatula or spoon
- Water or another smoothie liquid
Knowledge:
- Basic knife handling
- How to operate and unplug a small kitchen appliance
Check the blender manual for its cup capacity, blade assembly, and approved ingredients. Use only cups and lids made for your model. Do not blend hot liquids, and do not exceed the fill line.
Magic Bullet Personal Blender, 22 oz, 250 W, Silver (MBR-1101)
The silver Magic Bullet MBR-1101 is the most balanced choice here for a regular smoothie routine. Its 250-watt motor and 22-ounce cup provide more stated power and capacity than the Hamilton Beach’s 175-watt, 14-ounce setup. That extra room can make a single serving less constrained, while the compact footprint still suits kitchens with limited counter space.Its edge over the black Magic Bullet is the described set of versatile attachments for chopping, grinding, whipping, and mixing. That makes the silver model a stronger fit if we want one small appliance to handle occasional prep beyond drinks. The tradeoff is that a 22-ounce cup still limits larger recipes, and its plastic may hold stains or odors with repeated use. Like the other two picks, it is single speed, so it gives us little ability to fine-tune smoothie texture.
Pros:
- 250-watt motor for everyday single-serving blends.
- 22-ounce capacity is larger than Hamilton Beach’s 14-ounce jar.
- Attachments support chopping, grinding, whipping, and mixing.
- Dishwasher-safe parts simplify cleanup.
Cons:
- The 22-ounce cup is limiting for larger recipes.
- Plastic cups may retain stains or odors over time.
- Single-speed operation offers limited texture control.
Best for: Smoothie drinkers who want a compact 22-ounce blender that can also handle occasional chopping, grinding, or mixing.
Not ideal for: Households making multiple servings at once or buyers who want variable speeds or a glass cup.
Bottom line: Choose the silver MBR-1101 if we want the most versatile balance of smoothie capacity and extra food-prep uses in this group.
“Choose the silver MBR-1101 if we want the most versatile balance of smoothie capacity and extra food-prep uses in this group.”
Magic Bullet Personal Blender, 22 oz, 250 Watt, Black (MBR-1101AK)
The black Magic Bullet MBR-1101AK matches the silver model on the two smoothie specs most buyers will notice first: a 250-watt motor and 22-ounce capacity. Its listing describes multiple cups, including a tall cup, short cup, and party mug, plus lids and a stainless-steel cross-blade. That package makes it appealing when we want different vessels for blending and serving without moving up to a larger countertop machine.Compared with the silver MBR-1101, this version puts more emphasis on its named cup assortment and lightweight, BPA-free construction; the silver listing instead calls out two cup sizes and broader attachments. The black model’s fixed single speed remains a constraint for smoothie texture, and its cup capacity does not exceed the silver option. Choose it for the accessory mix described in its listing, rather than expecting a more powerful or more adjustable blender.
Pros:
- 250-watt motor and 22-ounce capacity match the silver model’s core specs.
- Listing describes tall, short, and party-mug cups with lids.
- Stainless-steel cross-blade is included.
- BPA-free plastic and dishwasher-safe components support convenient daily use.
Cons:
- Only one fixed speed limits control over texture.
- 22-ounce capacity may be too small for larger recipes.
- The stated features do not establish a power advantage over the silver version.
Best for: Buyers who value a range of included cups and lids for single-serve drinks and snacks.
Not ideal for: Anyone who needs variable speed, a larger batch capacity, or a clear performance step above the silver Magic Bullet.
Bottom line: Pick the black MBR-1101AK when its described multi-cup arrangement matters more to us than extra attachments or speed control.
“Pick the black MBR-1101AK when its described multi-cup arrangement matters more to us than extra attachments or speed control.”
Hamilton Beach Portable Blender for Smoothies with 14 oz Travel Jar
The Hamilton Beach 51172 is the clearest choice when we care more about taking a smoothie along than making a larger one. Its 14-ounce travel jar doubles as a drinking cup and is described as fitting most car cup holders. At four inches deep and wide, it has a compact shape suited to small counters, desks, or travel routines.That portability comes with a practical compromise: its 175-watt motor is less powerful on paper than the 250-watt Magic Bullet models, and the smaller jar leaves less room for ingredients. The description says its stainless-steel blades can handle ice, frozen fruit, and leafy greens, but the lower wattage may struggle with very thick or large batches. Compared with either Magic Bullet, this is the narrower choice: simpler one-touch operation and a travel-first vessel, with less capacity and fewer stated extra uses.
Pros:
- 14-ounce jar doubles as a to-go cup.
- Compact dimensions are designed to fit most car cup holders.
- One-touch push-button operation keeps use simple.
- Removable parts are dishwasher safe.
Cons:
- 175-watt motor may struggle with very thick or large blends.
- 14-ounce capacity is smaller than either Magic Bullet’s 22-ounce cup.
- Single speed provides limited blending control.
Best for: People who want a small smoothie to-go and value a jar designed for car cup holders.
Not ideal for: Buyers who regularly blend thick recipes, need a fuller single serving, or want attachments for other food-prep tasks.
Bottom line: Choose Hamilton Beach for travel-friendly convenience when a smaller portion and lower stated wattage suit our smoothie routine.
“Choose Hamilton Beach for travel-friendly convenience when a smaller portion and lower stated wattage suit our smoothie routine.”
As an Amazon Associate we earn from qualifying purchases.
Before You Start
Unplug the blender while preparing ingredients. Keep fingers and utensils away from the blade assembly; the blades are sharp, including when the blender is off. If using frozen fruit, let large pieces soften briefly or cut them smaller. Add enough liquid to help the blades move, but stay below the cup’s maximum fill line.
Step-by-Step Instructions
Step 1: Choose and prepare the ingredients
Choose one liquid, one or two fruits, and any optional additions such as yogurt, oats, or leafy greens. Wash fresh produce. Remove pits, hard cores, stems, and inedible peels, then cut ingredients into pieces small enough to fit loosely in the cup. Measure ingredients so the total volume will remain below the blender’s fill line.
For a simple starting ratio, use about ¾ cup liquid and 1 to 1½ cups fruit. Adjust for your cup size and the blender manual’s limits.
Tip: Frozen fruit makes a thicker smoothie, but very large or solid frozen pieces can stall a small blender. Use smaller pieces and add liquid as needed.
Check: All ingredients are clean, appropriately cut, and measured to fit below the fill line.
Step 2: Add liquid and soft ingredients
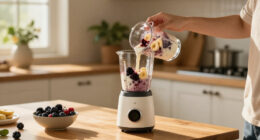
Pour the liquid into the blending cup first. Add soft ingredients such as yogurt, ripe banana, or leafy greens next. This order helps liquid reach the blades and gives the ingredients room to move. Leave space for the remaining ingredients and do not pack greens tightly.
Tip: If your blender manual specifies a different loading order, follow the manual.
Check: Liquid sits at the bottom of the cup, with soft ingredients added above it.
Step 3: Add fruit and other solid ingredients
Add fresh or frozen fruit, followed by small amounts of optional ingredients such as oats or seeds. Distribute the pieces rather than pressing them into a solid layer. Stop at the marked maximum fill line, even if you have ingredients left over.
Tip: Do not add ice unless your blender manual says the model can crush it. Ice and hard frozen ingredients can strain personal blenders.
Check: The ingredients fit without being compressed, and the cup remains below the maximum fill line.
Step 4: Fit the blade lid securely
Check that the gasket or seal is seated as described in the manual. Screw the blade lid onto the cup until it is secure, without forcing it. Turn the cup over carefully and check that no liquid leaks around the lid. Keep your hands away from the blades.
Tip: If the lid does not thread smoothly, remove it and start again. A crooked lid can leak or prevent the blender from operating correctly.
Check: The blade lid sits evenly, feels secure, and does not leak when the cup is turned over.
Step 5: Attach the cup and blend in short runs
Place the blender on a dry, stable counter. Attach the inverted cup according to the model’s instructions, then plug in the blender. Blend for 20-30 seconds, or use the manual’s recommended setting and timing. If the blender uses a press-to-blend design, do not run it longer than the manufacturer permits.
Stop the motor if the ingredients stop moving, the blender stalls, or you notice an unusual smell. Unplug it before removing the cup or changing the ingredients.
Tip: Keep the blender on the counter while it runs. Do not loosen the cup or lid while the motor is operating.
Check: The mixture circulates through the cup and blends without leaks, unusual noise, or repeated stalling.
Step 6: Check the texture and adjust
Stop the blender and unplug it before removing the cup. Turn the cup upright and inspect the smoothie. If it is too thick or the ingredients are not moving, add 1-2 tablespoons of liquid, secure the blade lid again, and blend briefly. If it is too thin, add a small amount of fruit or yogurt and blend again.
Never reach into the cup while the blade lid is attached. If ingredients are stuck, unplug the blender, remove the blade lid carefully, and use a spoon or spatula to loosen them away from the blades.
Tip: Make small adjustments. Adding a large amount of liquid at once can make the smoothie watery.
Check: The smoothie pours or spoon-drinks at the thickness you want, with no large unblended pieces.
Step 7: Serve and clean the blender
Unplug the blender before separating the cup and blade lid. Remove the blade assembly carefully and pour the smoothie into a glass, or drink from the cup if the model includes a compatible drinking lid. Rinse the cup and blade lid promptly so fruit and dairy do not dry onto them.
Wash parts as directed in the manual. Keep the motor base dry; wipe it with a damp cloth only when unplugged. Do not put any part in a dishwasher unless the manufacturer says it is dishwasher-safe. Dry the parts before storing them.
Tip: Handle the blade lid by its outer edges and keep the blades pointed away from your hands while washing.
Check: The smoothie is served, the blender is unplugged, and washable parts are clean and dry.
Common Mistakes to Avoid
- Adding mostly frozen or solid ingredients without enough liquid. — Pour liquid into the cup first and add a little more if the ingredients do not circulate. Stop and unplug before making adjustments.
- Filling above the maximum line or packing ingredients tightly. — Measure ingredients before blending, leave space for movement, and blend a smaller batch if needed.
- Using oversized frozen fruit pieces or adding ice to a model that cannot crush it. — Cut fruit into smaller pieces and check the manual before using ice or hard frozen ingredients.
- Removing the blade lid or touching the blades before unplugging the blender. — Stop the motor and unplug the unit before removing the cup, opening the lid, or loosening ingredients.
Troubleshooting
Problem: The blades spin, but the ingredients barely move.
Solution: Stop and unplug the blender. Check that the cup is below the fill line, loosen any packed ingredients with a spoon away from the blades, and add 1-2 tablespoons of liquid. Reattach the blade lid securely and blend again briefly.
Problem: The blender stops or struggles during blending.
Solution: Turn it off and unplug it. Let the motor cool for the time given in the manual. Reduce the batch size, cut large pieces smaller, and add liquid before trying again. Do not repeatedly restart a stalled motor.
Problem: The smoothie leaks around the blade lid.
Solution: Stop the blender and unplug it. Empty the cup, check that the seal is correctly seated and clean, then screw the lid on evenly. Replace a damaged seal or lid before using the blender again.
Problem: The smoothie has lumps or is too thick to pour.
Solution: Unplug the blender, add a small amount of liquid, secure the blade lid, and blend for another short run. If pieces remain stuck, open the cup only after unplugging and loosen them carefully.
What Success Looks Like
The finished smoothie has the desired thickness and no large unblended pieces. The blender has not leaked or stalled repeatedly, the motor base is dry, and the unit is unplugged before you handle the blade lid or clean its parts.
Next Steps
Write down ingredient amounts that gave you the texture you like so you can repeat the recipe. After each use, rinse the cup and blade lid promptly, wash them according to the manual, and check the seal for wear. If the blender repeatedly stalls, leaks, or makes unusual noises after you reduce the batch and follow the manual, stop using it and contact the manufacturer.
Frequently Asked Questions
How much liquid should I add to a personal blender smoothie?
Start with about ¾ cup for 1 to 1½ cups of fruit, then adjust for your cup size and the ingredients. Add liquid first and increase it a tablespoon or two at a time if the mixture will not circulate. Stay below the fill line.
Can I blend frozen fruit in a personal blender?
Most personal blenders can handle some frozen fruit, but capacity varies by model. Use small pieces, add liquid, and follow the manual. If the blender stalls, stop and unplug it before changing the mixture.
Can I put ice in a personal blender?
Only add ice if your blender manual says the model can crush it. Ice can strain a small motor and leave large pieces in the smoothie. Frozen fruit is a practical alternative when approved for your model.
Why is my smoothie not blending smoothly?
The cup may be overfilled, the fruit may be too large or tightly packed, or there may not be enough liquid. Stop and unplug the blender, reduce or loosen the ingredients, add a little liquid, and blend again briefly.
Can I clean the blade lid in the dishwasher?
Check the manual for your model before using a dishwasher. If dishwasher safety is not stated, wash the parts by hand and keep the motor base dry. Handle the blade assembly by its outer edges.