Ever thought about the process of turning raw cacao beans into luxurious, smooth dark chocolate? Well, my friend, I’m here to show you the way through this enchanting journey.
Picture yourself in a cozy kitchen, surrounded by the intoxicating aroma of roasted cacao beans. As you grasp the beans, you can feel their rough texture, knowing that within lies the potential for something extraordinary.
With each step, you’ll unlock the secrets of creating your own decadent treat.
First, we’ll carefully select the finest raw cacao beans, ensuring their quality and flavor.
Then, we’ll roast them to perfection, releasing their deep, complex notes.
Next, we’ll remove the outer shell, revealing the silky smooth nibs.
Grinding them into a luscious paste, we’ll add just the right amount of sweeteners and flavorings to create a harmonious blend.
Finally, through the process of conching and tempering, we’ll achieve a smooth, glossy finish.
So, are you ready to embark on this delectable journey with me? Let’s dive into the world of dark chocolate made from raw cacao!
Key Takeaways
- The selection of high-quality cacao beans from reputable growers is essential for making dark chocolate.
- Proper roasting and cooling techniques enhance the flavor and remove bitterness from the cacao beans.
- The process of cracking, winnowing, and grinding the beans improves the flavor and creates a smooth paste for chocolate making.
- Conching, a technique that involves grinding and refining the chocolate mixture, is crucial for enhancing the texture and flavor of dark chocolate.

Garden of Life Raw Organic Perfect Food Superfood Juiced Greens Powder, Original Stevia-Free, Dietary Supplement, 30 Servings
SUPERFOOD: This greens powder is packed with RAW organic greens, sprouts, and vegetable juices for vibrant, plant-powered goodness
As an affiliate, we earn on qualifying purchases.
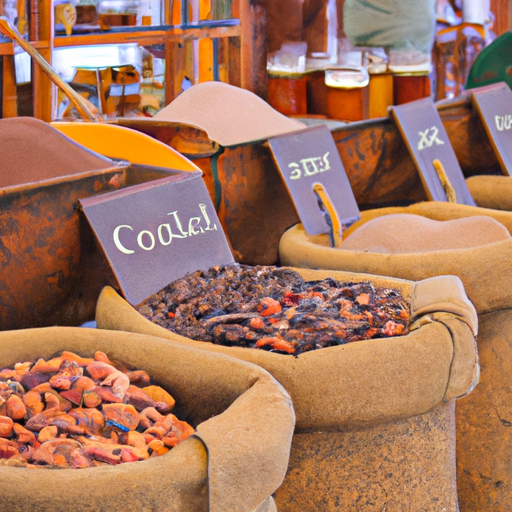
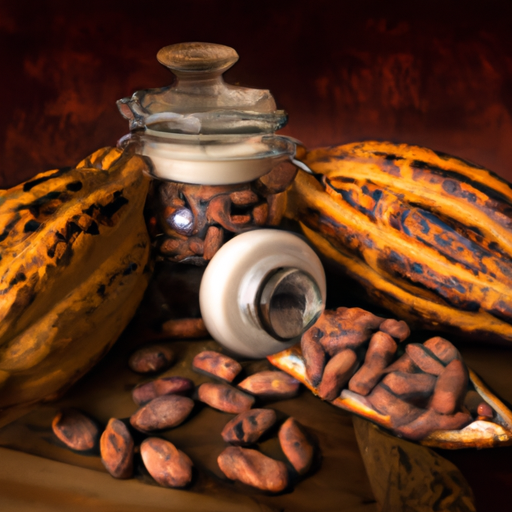
Selecting the right raw cacao beans
Now, let’s dive into the art of selecting the perfect raw cacao beans that will transform your dark chocolate into a decadent masterpiece.
When it comes to selecting the best cacao beans for dark chocolate, there are a few factors to consider. First and foremost, look for beans that are sourced from reputable growers known for their quality.
The origin of the beans can greatly affect the flavor profile of the chocolate, so it’s important to choose beans from regions known for producing rich and complex flavors.
Additionally, pay attention to the appearance of the beans. Look for beans that are uniform in size and have a glossy sheen, indicating that they are properly fermented and dried.
Lastly, consider the aroma of the beans. Sniff for notes of fruitiness, earthiness, or even floral hints.
Now that you’ve carefully selected your cacao beans, it’s time to move on to the next step: roasting.

Ancient Nutrition Super Greens Powder, Organic Superfood Powder with Probiotics Made with Spirulina, Chlorella, Matcha, and Digestive Enzymes, 25 Servings, 7.05oz
You will receive one (1) tub of Organic Super Greens Powder, 25 servings with 1 gram of sugar...
As an affiliate, we earn on qualifying purchases.
Roasting the cacao beans
To create a rich and decadent treat, you’ll need to start by roasting the beans from the cacao tree. Roasting is a crucial step in the process of making dark chocolate from raw cacao beans. Here are some important factors to consider when roasting the beans:
-
Cacao bean fermentation: Before roasting, it’s essential to properly ferment the cacao beans. This process enhances the flavor and removes any unwanted bitterness.
-
Importance of roasting temperature: The temperature at which the beans are roasted greatly affects the final taste and texture of the chocolate. It’s crucial to find the right balance between preserving the delicate flavors and achieving the desired depth and richness.
-
Roasting time: The duration of roasting also plays a significant role. It must be carefully monitored to prevent over-roasting, which can result in burnt flavors.
-
Cooling process: After roasting, the beans must be cooled gradually to preserve the delicate aromas and flavors.
-
Cracking and winnowing: Once the beans are properly roasted, the next step is to crack and remove the outer shell, revealing the prized cacao nibs.
Now, let’s move on to the subsequent section about removing the outer shell of the roasted beans.

Orgain Organic Vegan Protein + 50 Superfoods Powder, Vanilla Bean - 21g Plant Based Protein, 8g Prebiotic Fiber, No Lactose Ingredients, Gluten Free, No Added Sugar, Non-GMO, 2.02 lb
CLEANER INGREDIENTS: 21g plant protein and 1g sugar per serving. Our protein blend consists of Organic pea, brown...
As an affiliate, we earn on qualifying purchases.
Removing the outer shell of the roasted beans
Once the beans are perfectly roasted, you’ll want to crack open their protective shell, revealing the hidden treasure inside. Removing the outer shell is a crucial step in the process of making dark chocolate from raw cacao. There are various techniques and tools that can be used to accomplish this.
One common method is to use a small hammer or mallet to gently tap the roasted beans, causing the shell to crack and loosen. Another technique involves using a specialized machine that applies pressure to the beans, effectively separating the shell from the inner nibs.
Removing the outer shell has several benefits. It allows for easier grinding of the nibs into a smooth paste and enhances the overall flavor and texture of the final dark chocolate. With the outer shell removed, we can now move on to the next step of grinding the beans into a paste.

Orgain Organic Vegan Protein + 50 Superfoods Powder, Creamy Chocolate Fudge - 21g Plant Based Protein, 9g Prebiotic Fiber, No Lactose, Gluten Free, No Added Sugar, 2.02 lb (Packaging May Vary)
CLEANER INGREDIENTS: 21g plant protein and 1g sugar per serving. Our protein blend consists of Organic pea, brown...
As an affiliate, we earn on qualifying purchases.
Grinding the beans into a paste
Grinding the beans is a crucial step in the process, as it breaks down the solid particles into a smooth consistency. There are various grinding techniques you can employ, depending on the equipment you have available. One popular method is to use a high-powered blender or food processor. Simply add the roasted beans and blend until a thick, creamy paste forms.
Another option is to use a specialized stone grinder, which allows for more control over the texture and ensures a fine, silky finish. Grinding the beans thoroughly ensures that all the flavors and nutrients are released, resulting in a truly decadent chocolate experience.
Now that we have our silky paste, it’s time to move on to the next step of adding sweeteners and flavorings to enhance the taste.
Adding sweeteners and flavorings
Now it’s time to sweeten and enhance the flavor of our delectable concoction by adding some delightful ingredients.
When it comes to sweeteners, there are plenty of alternatives to choose from. You can use natural sweeteners like honey, maple syrup, or coconut sugar, which add a subtle sweetness to the dark chocolate without overpowering its rich flavor. Another option is to use stevia or monk fruit extract for a sugar-free alternative.
As for flavorings, there are endless possibilities. You can add a dash of vanilla extract, a sprinkle of sea salt, or even a pinch of cinnamon to give your dark chocolate a unique twist. These natural flavorings will complement the bitterness of the cacao and create a harmonious balance of flavors.
Now that we’ve added the sweeteners and flavorings, let’s move on to the next step of conching the chocolate mixture.
Conching the chocolate mixture
To transform our rich mixture into a velvety smooth delight, it’s time to conch the heavenly blend of flavors and sweeteners. Conching is a crucial step in the chocolate-making process that involves grinding and refining the mixture to enhance its texture and flavor.
Here are some conching techniques that can take your dark chocolate to the next level:
-
Continuous Conching: This method involves continuously stirring the chocolate mixture while gradually increasing the temperature. It allows for better flavor development and a smoother texture.
-
Vacuum Conching: By removing air from the conching chamber, this technique helps reduce oxidation and preserve the chocolate’s rich taste.
-
Long Conching: This process extends the conching time, resulting in a more refined and mellow flavor profile.
-
Multiple Stage Conching: Breaking down the conching process into stages allows for better control over flavor and texture development.
Conching not only refines the chocolate but also aerates it, giving it a smoother mouthfeel.
Once the conching is complete, we can move on to tempering the chocolate for a smooth finish.
Tempering the chocolate for a smooth finish
For a smooth finish, you’ll want to ensure that you temper the chocolate properly. Tempering is the process of heating and cooling chocolate to stabilize the cocoa butter crystals, resulting in a glossy and firm texture. Temperature control is crucial during tempering to achieve the desired results. The table below outlines the different techniques for achieving a smooth finish in tempered chocolate:
| Technique | Temperature Range | Method |
|---|---|---|
| Seeding | 84°F-90°F | Adding small pieces of already tempered chocolate |
| Tabling | 80°F-82°F | Pouring melted chocolate onto a cool surface and spreading |
| Silk | 88°F-89°F | Using a silk screen to create fine cocoa butter crystals |
| Marble Slab | 82°F-84°F | Pouring melted chocolate onto a cool marble surface |
| Seed and Heat | 88°F-90°F | Adding small pieces of untempered chocolate and heating |
By carefully controlling the temperature, you can achieve a smooth and shiny finish in your tempered chocolate. With the chocolate properly tempered, we can now move on to pouring it into molds for shaping and solidifying.
Pouring the chocolate into molds
As I carefully pour the molten chocolate into the awaiting molds, a world of delectable possibilities begins to shape and solidify before my eyes.
Molding techniques play a crucial role in achieving the desired outcome. Silicone molds are my go-to choice due to their flexibility and ease of release. Their intricate designs add an elegant touch to the finished product.
However, if you’re feeling adventurous, consider experimenting with alternative molds such as ice cube trays or even mini muffin tins. The key is to ensure that the molds are clean and dry before pouring the chocolate.
Gently tap the molds on the counter to remove any air bubbles and ensure even distribution.
Now, as the chocolate slowly cools and hardens, it transforms into a velvety masterpiece, ready to be enjoyed by chocolate enthusiasts everywhere.
Allowing the chocolate to cool and harden before enjoying
Once the chocolate has set, its smooth and rich texture becomes an irresistible invitation to indulge in the decadent pleasure it offers. To achieve this perfect consistency, the process of chocolate tempering is crucial.
Tempering involves carefully heating and cooling the chocolate to stabilize the cocoa butter crystals within, resulting in a glossy finish and a satisfying snap when bitten into. After pouring the melted chocolate into molds, it is important to allow it to cool gradually at room temperature.
This gradual cooling process ensures that the cocoa butter crystallizes properly, giving the chocolate its desired texture. Patience is key during this step, as rushing the cooling process can lead to uneven cooling and a dull appearance.
Once the chocolate has completely hardened, it is ready to be enjoyed – a reward for the meticulous process of cocoa butter extraction and tempering.
Frequently Asked Questions
Can I use any type of cacao beans to make dark chocolate?
Yes, you can use different types of cacao beans to make dark chocolate. Each type has its own unique flavor profile, ranging from fruity to nutty. To store raw cacao beans for long term use, keep them in a cool, dry place.
How long should I roast the cacao beans for?
Roasting cacao beans is an art. The perfect balance of time and temperature unlocks their rich flavors. Aim for 20-25 minutes at 250°F, allowing the beans to develop their complexity while preserving their natural essence.
Is it necessary to remove the outer shell of the roasted beans?
Yes, it is necessary to remove the outer shell of the roasted beans. This process enhances the flavor of the chocolate by reducing bitterness. Alternative methods include grinding the beans or using a winnowing machine.
Can I use a blender instead of a grinder to make the chocolate paste?
Using a blender instead of a grinder to make chocolate paste is not recommended. A grinder is preferable because it creates a smoother texture, better incorporates ingredients, and preserves the flavor and quality of the chocolate.
How long does it take for the chocolate to cool and harden before it’s ready to be enjoyed?
The cooling time for chocolate to harden and be ready to enjoy can vary, but it typically takes around 1-2 hours. This allows the chocolate to solidify and reach the desired texture for consumption.
Can the Process for Making Chocolate Chips from Raw Cacao Also Be Used for Making Dark Chocolate?
Yes, the process for making chocolate chips from raw cacao can also be used for making dark chocolate. The raw cacao beans are roasted, shelled, and ground into a paste called chocolate liquor. This paste is then mixed with sugar and other ingredients to create dark chocolate.
Conclusion
In conclusion, I hope you found this guide on how to make dark chocolate from raw cacao to be both enlightening and delectable.
By carefully selecting and roasting the cacao beans, removing their outer shells, and grinding them into a rich paste, we have embarked on a journey to create a truly exquisite treat.
With the addition of sweeteners and flavorings, the chocolate mixture is conched to perfection, resulting in a smooth and heavenly experience.
Finally, after pouring the chocolate into molds and allowing it to cool and harden, we are left with a delectable creation that is ready to be savored and enjoyed.