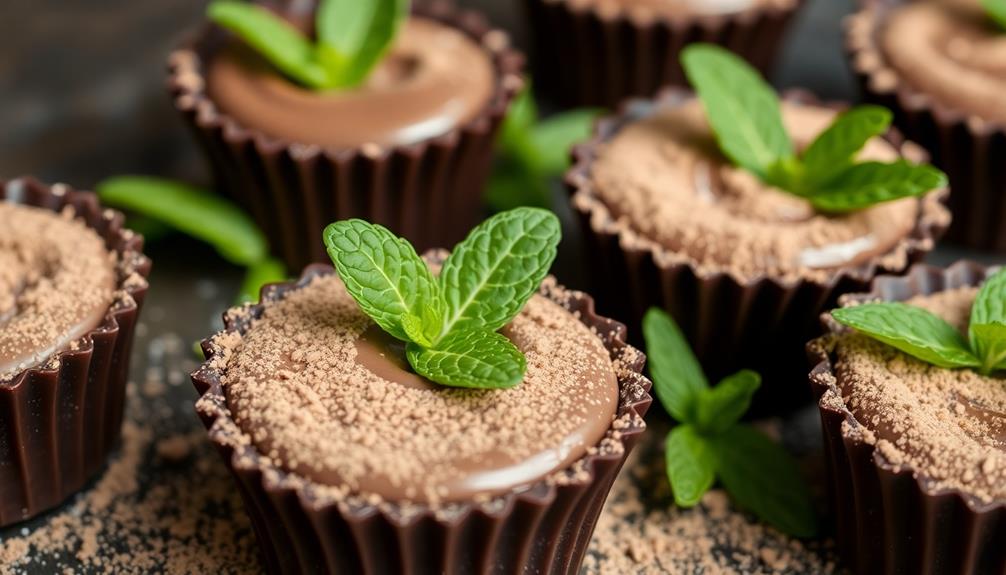
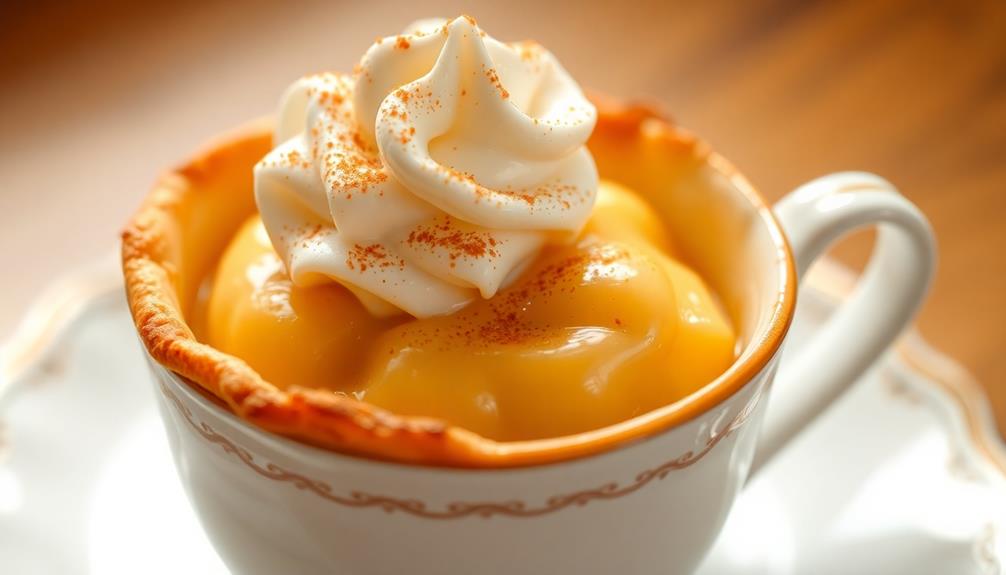
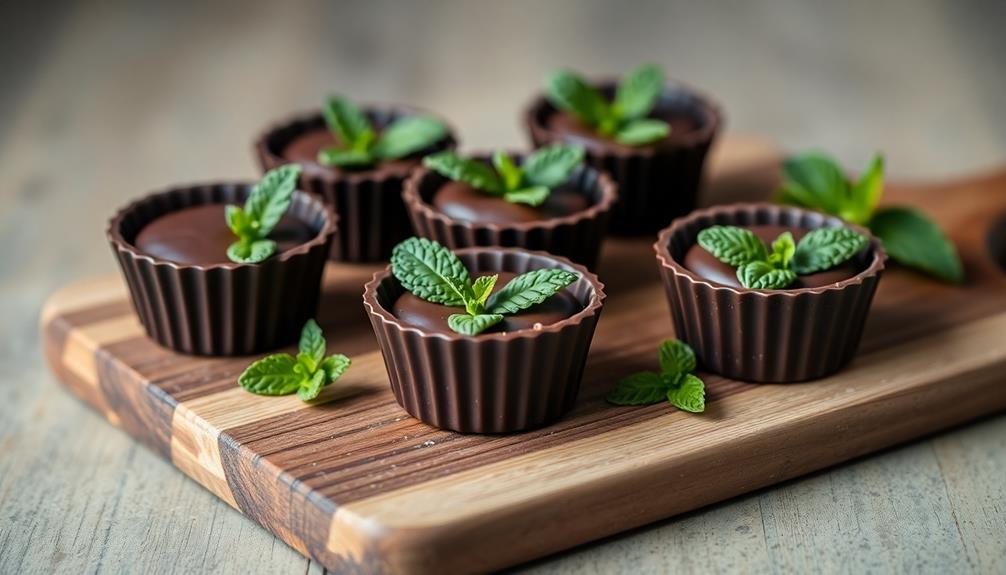
Immerse yourself in the rich, refreshing world of raw chocolate-mint cups! These no-bake treats blend the decadence of dark chocolate with the cool, invigorating flavors of fresh mint. Made with just a few wholesome ingredients, they provide a guilt-free indulgence you can feel great about. Pop one in your mouth and let the flavors dance on your tongue – the smooth, melty chocolate perfectly complemented by the bright, minty burst. Whether you're craving a post-meal delight or a rejuvenating snack, these delectable cups will satisfy your sweet tooth while nourishing your body. Curious to learn more about crafting these delightful creations?
Key Takeaways
- Raw chocolate-mint cups are a no-bake dessert made from raw cacao powder, coconut oil, maple syrup, almond milk, and fresh mint leaves.
- These cups provide a guilt-free, nutrient-rich indulgence with a refreshing contrast between the cool mint center and rich dark chocolate.
- The simple ingredients and easy preparation make raw chocolate-mint cups a convenient and satisfying sweet treat to enjoy at any time.
- Storing the cups in the freezer allows for optimal freshness and a refreshing texture when consumed directly from the freezer.
- The raw, wholesome ingredients in this dessert support health goals without compromising on taste, making it a healthier alternative to traditional chocolate-mint confections.
History
Raw chocolate and mint have a long history of being used together in confections. The combination of rich, velvety chocolate and refreshing mint has delighted taste buds for centuries.
In ancient Mesoamerica, the Aztecs and Mayans ground cacao beans into a bitter, spicy drink that they often flavored with vanilla and chili peppers. When the Spanish arrived, they discovered this delightful beverage and brought it back to Europe, where it became a popular treat among the aristocracy. The intriguing pairing of chocolate and herbs, such as mint, reflects the growing interest in herb-infused cocktails and fresh flavor profiles.
Over time, creative confectioners began experimenting with different flavor pairings, and the chocolate-mint duo emerged as a classic. The cool, invigorating taste of mint perfectly complements the deep, complex flavors of chocolate, creating a harmonious blend that has stood the test of time.
Today, you can find this timeless combination in everything from decadent truffles to refreshing ice creams, each offering a unique twist on a beloved classic.
Recipe
Raw Chocolate-Mint Cups
Indulge in a decadent and refreshing treat with these raw chocolate-mint cups. This no-bake dessert combines the rich, creamy flavors of raw chocolate with the invigorating essence of fresh mint.
Perfect for satisfying your sweet tooth while keeping things light and healthful. These cups can also complement your morning routine, especially when paired with high-protein breakfasts to kickstart your day.
These chocolate-mint cups are a breeze to prepare and require minimal ingredients. They offer a guilt-free indulgence that can be enjoyed anytime, whether as a post-meal delight or an afternoon pick-me-up.
Ingredients:
- 1 cup raw cacao powder
- 1/2 cup coconut oil, melted
- 1/4 cup maple syrup
- 1/4 cup almond milk
- 1/4 cup fresh mint leaves, finely chopped
- 1/8 teaspoon sea salt
Directions:
In a medium bowl, whisk together the raw cacao powder, melted coconut oil, maple syrup, and almond milk until smooth and well combined.
Fold in the chopped mint leaves and sea salt, mixing until evenly distributed.
Spoon the chocolate mixture into a mini muffin tin or silicone mold, filling each cup about 3/4 full. Freeze for 30 minutes, or until the cups are firm.
Tips:
For a firmer texture, you can increase the amount of coconut oil in the recipe.
Additionally, you can experiment with different types of nuts or seeds to create a variety of flavors and textures.
These chocolate-mint cups are best stored in the freezer and enjoyed straight from the cold for a refreshing and indulgent treat.
Cooking Steps

Alright, let's get cookin'!
First, you'll need to melt the chocolate and coconut oil together. Once it's all nice and smooth, scoop that delicious mixture into your molds.
Now, pop those babies in the fridge until they're firm as a rock.
Time to add a touch of peppermint extract to the chocolate, then get ready to layer on the minty goodness for the filling.
Yum, your raw chocolate-mint cups are almost ready to enjoy!
Step 1. Melt Chocolate and Coconut Oil
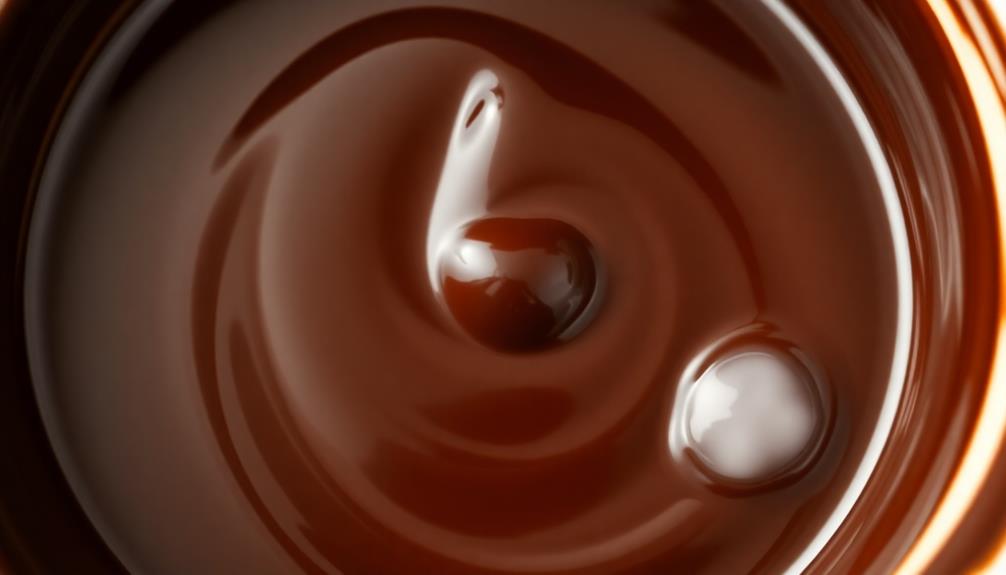
To begin crafting these decadent treats, you'll first want to melt the chocolate and coconut oil together. This process can be enhanced by ensuring you use high-quality ingredients, as the flavor will shine through in your final product.
In a double boiler or a heatproof bowl set over a saucepan of simmering water, combine the raw cacao or dark chocolate and the coconut oil. Gently stir the mixture as it melts, being careful not to overheat it. The chocolate should melt smoothly, and the coconut oil should blend in seamlessly.
Once the mixture is fully melted and well-combined, remove it from the heat.
Now, you can start pouring the chocolate-coconut mixture into the prepared muffin cups, filling them about halfway. Make sure to work quickly, as the chocolate will begin to set as it cools.
Once all the cups are filled, place them in the freezer for about 15 minutes to allow the chocolate to firm up. This step is crucial, as it will create the perfect base for the creamy mint filling that you'll add next.
For a delightful twist, consider pairing these treats with a trendy drink like a Pumpkin Spice Espresso Martini, which complements the rich flavors beautifully.
Step 2. Scoop Chocolate Mixture Into Molds
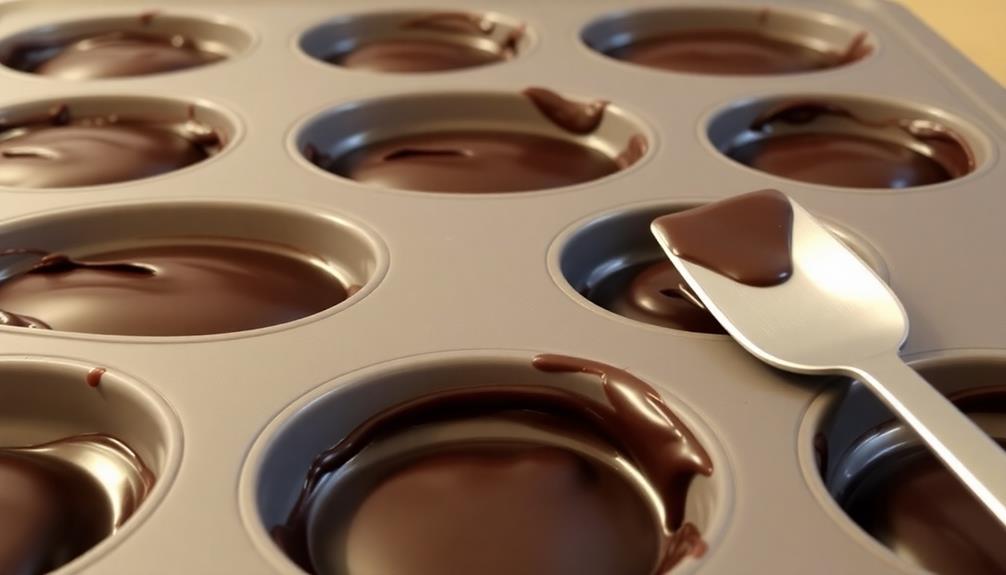
With the chocolate-coconut mixture now melted and ready, you can start scooping it into the prepared muffin cups.
Grab your spoon and scoop out a generous amount of the rich, glossy chocolate. Carefully drop it into the center of one of the cups, then use the back of the spoon to gently spread it out and up the sides, creating a little chocolate bowl.
Continue this process, filling each cup about three-quarters full.
Once all the cups are filled, pop the tray into the freezer for about 15 minutes. This will help the chocolate set up nicely.
While you wait, take a moment to admire your handiwork – those cups are looking mighty tempting!
After the chocolate has firmed up, you can move on to the next step: adding the cool, refreshing mint filling.
Get ready for a delightful treat that combines the deep, earthy flavors of raw cacao with the bright, invigorating taste of mint. Yum!
Step 3. Refrigerate Chocolate Mixture Until Firm
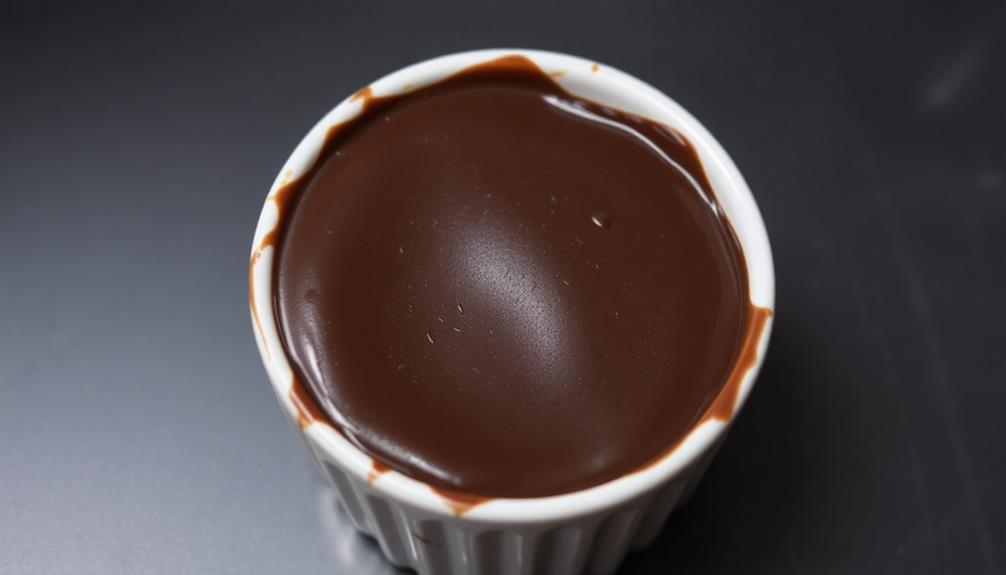
Now that you've filled the cups with the rich chocolate mixture, it's time to pop them into the fridge. This is an important step to ensure your raw chocolate-mint cups turn out perfectly.
Once the cups are filled, you'll want to place them in the refrigerator for at least 30 minutes, or until the chocolate has completely hardened.
As the chocolate cools, it will firm up and take on a smooth, glossy texture. This will help the cups hold their shape when you remove them from the molds.
The colder temperature also helps the flavors of the chocolate and mint to meld together, creating a delicious and refreshing treat.
Be sure to keep an eye on the cups, as you don't want them to stay in the fridge for too long.
Once the chocolate is firm, you can take them out and enjoy your homemade raw chocolate-mint cups! Mmm, can you already taste the rich chocolate and cool mint? It's going to be a real treat.
Step 4. Add Peppermint Extract to Chocolate
Adding the peppermint extract to the chocolate mixture is a straightforward step that brings the refreshing mint flavor to your raw chocolate-mint cups.
Simply pour a little peppermint extract into the chocolate and stir it in until it's evenly distributed. You'll want to use just a small amount, around 1/4 to 1/2 teaspoon, so the mint flavor doesn't overpower the chocolate.
Stir it in gently, making sure not to incorporate too much air, which could make the chocolate seize up. The peppermint extract will infuse the chocolate with a cool, refreshing aroma and taste that pairs perfectly with the rich, creamy texture.
Once you've added the extract and given the mixture a good stir, you're ready to spoon it into the prepared muffin cups and chill it until firm.
Get ready for a delightful burst of minty chocolate goodness in every bite!
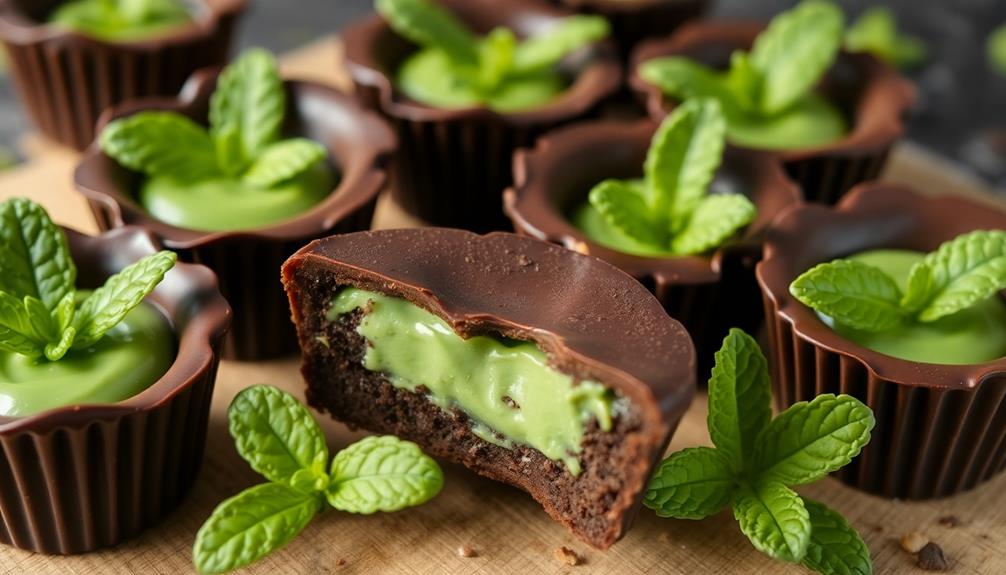
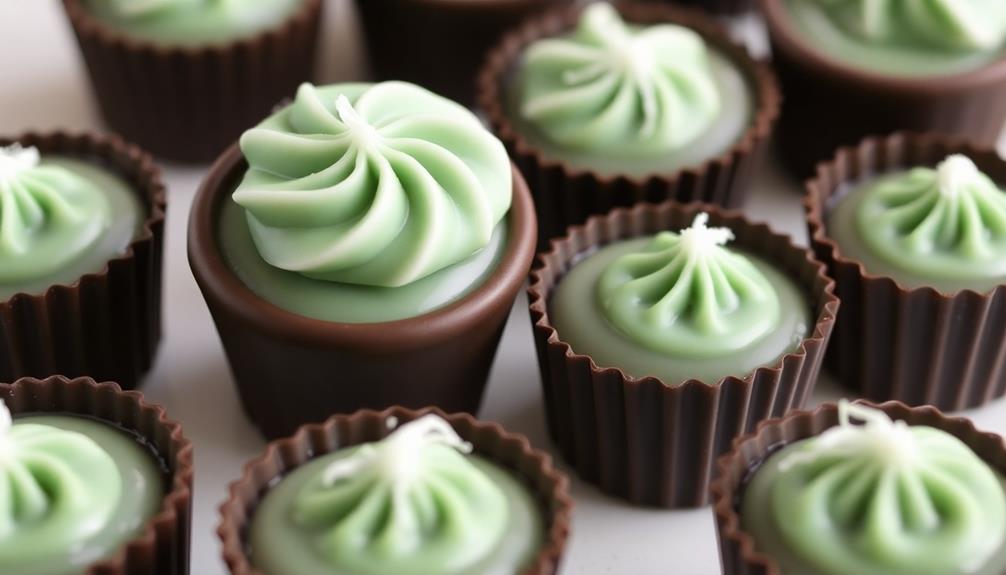
Step 5. Add Mint Filling

Prepare the mint filling by blending together the raw cashews, agave nectar, peppermint extract, and a pinch of salt in a high-powered blender or food processor until you achieve a smooth, creamy consistency.
This luscious filling will be the star of your raw chocolate-mint cups! Once blended, use a spoon to scoop the mint mixture into the center of each raw chocolate cup, smoothing the tops.
You'll want to work quickly before the chocolate hardens. Don't be afraid to get a little messy – the more mint filling you can pack in, the better!
After filling the cups, pop them in the freezer for about 15 minutes to allow the chocolate to set. Then, you're ready to enjoy your refreshing raw treats.
The cool, minty center pairs perfectly with the rich, dark chocolate. Mmm, can you almost taste them?
These chocolate-mint cups are sure to satisfy your sweet tooth and leave you feeling energized and nourished.
Final Thoughts
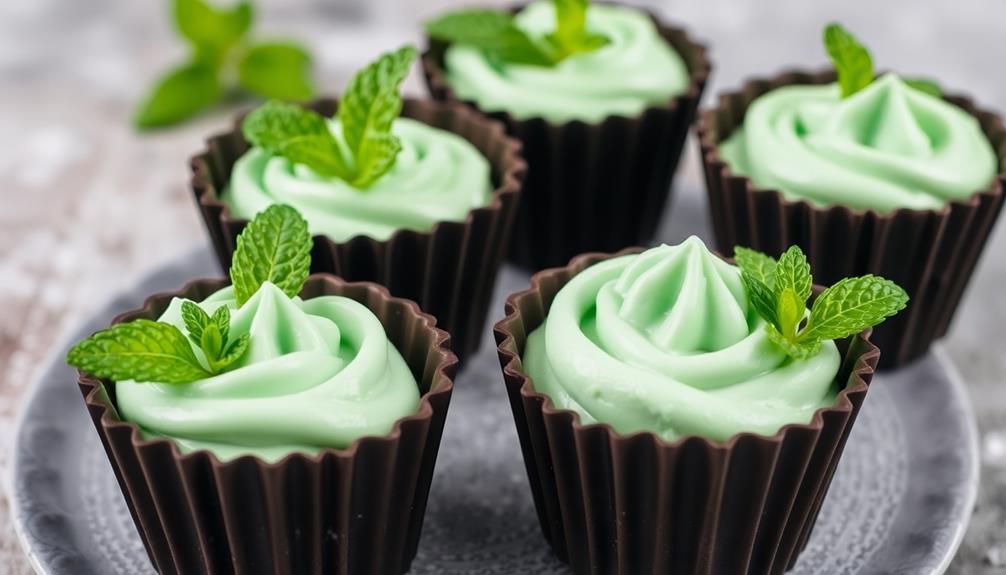
Indulging in these raw chocolate-mint cups is a satisfying way to curb your sweet cravings without compromising your health goals.
You'll love how the smooth, rich chocolate melts in your mouth, followed by the refreshing burst of cool mint.
These bites aren't only delightful to eat, but they're also a breeze to make. With just a few simple ingredients and a little time, you can whip up a batch and have a stash on hand whenever you need a healthy treat.
The best part? You can feel good about enjoying these cups, knowing they're made with wholesome, nutritious ingredients that nourish your body.
Frequently Asked Questions
Are the Raw Chocolate Cups Suitable for Vegans?
Yes, the raw chocolate cups are suitable for vegans. Since they're made without any animal products, they align with the vegan lifestyle. You can enjoy these guilt-free chocolate treats without compromising your plant-based dietary choices.
How Long Do the Raw Chocolate Cups Last?
The raw chocolate cups can last for up to a week when stored properly in the refrigerator. They'll stay fresh and delicious, but you'll want to consume them within that timeframe for the best taste and texture.
Can the Raw Chocolate Cups Be Frozen?
You can definitely freeze the raw chocolate cups. They'll stay fresh for several months in the freezer, though the texture may change slightly. Just be sure to store them properly in an airtight container.
What Are the Main Health Benefits of Raw Chocolate?
Raw chocolate provides several health benefits. It's packed with antioxidants that can improve heart health, boost brain function, and support the immune system. Plus, it's a natural mood booster and can even help manage weight due to its fiber content.
Can the Raw Chocolate Cups Be Made Without a Mold?
Yes, you can make raw chocolate cups without a mold. Simply use cupcake liners or silicone molds, and pour the melted chocolate into them. Allow the chocolate to set, and you'll have homemade raw chocolate cups.