Kitchen Essentials for Raw Food Preparation
Raw Food Safety: Essential Guidelines for Home Preparation
Commit to mastering raw food safety with essential guidelines that will transform your kitchen practices—learn how to prevent foodborne illnesses today!
![home raw food guidelines](https://rachaelsrawfood.com/wp-content/uploads/2024/11/home_raw_food_guidelines.jpg)
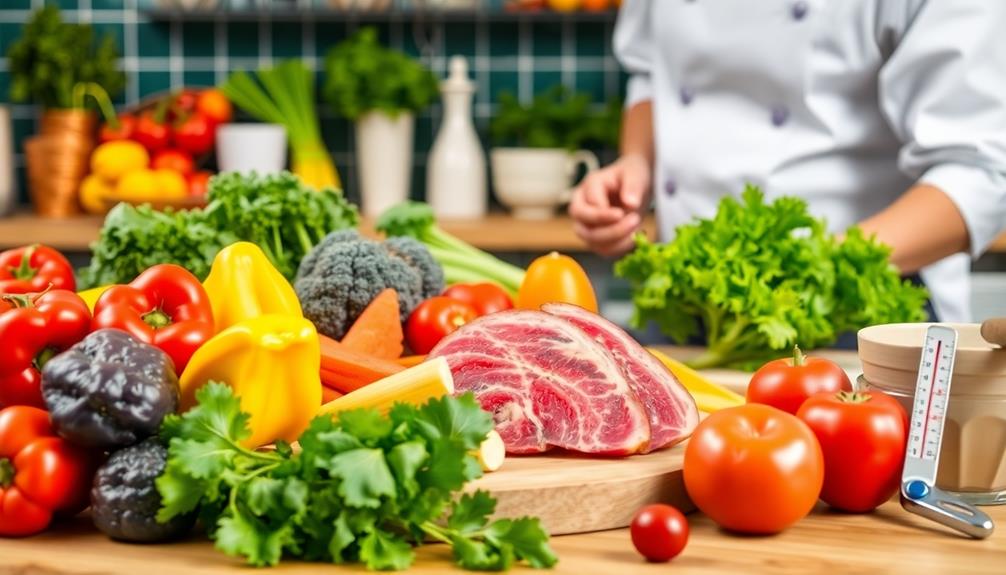
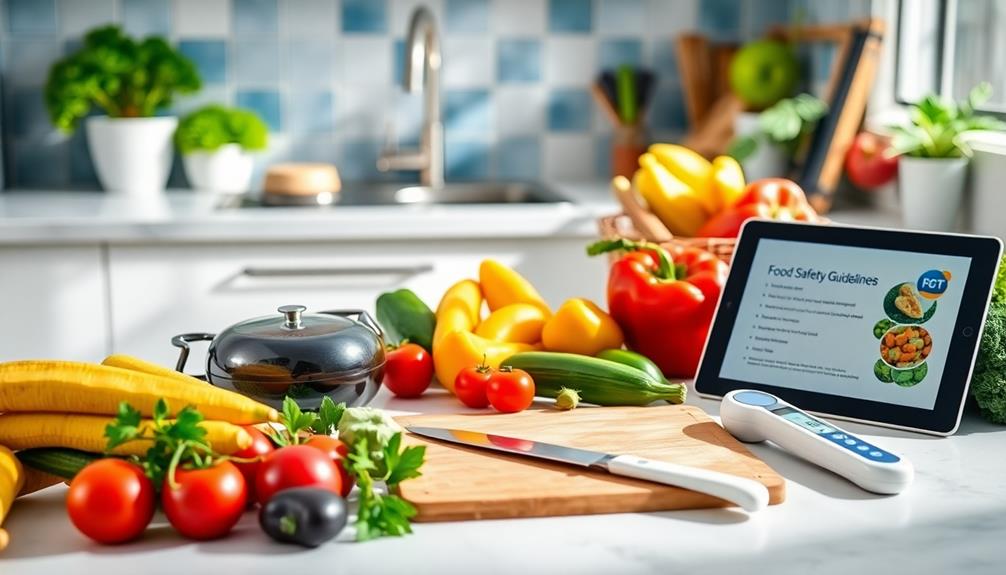
Ensuring raw food safety is crucial for preventing foodborne illnesses in your kitchen. Start by keeping everything clean; wash your hands and sanitize surfaces often. Always separate raw meats from ready-to-eat foods to avoid cross-contamination. When cooking, aim for safe internal temperatures—165°F for poultry and 145°F for other meats. Keep your refrigerator below 40°F to slow bacterial growth and store raw foods in their own containers. Use proper defrosting methods and avoid refreezing thawed raw items. Mastering these essential guidelines can enhance your confidence in handling raw ingredients. Stick around to discover even more tips for safe food preparation!
Key Takeaways
- Always wash hands and sanitize surfaces before and after handling raw foods to eliminate bacteria.
- Use separate cutting boards for raw meats and ready-to-eat foods to prevent cross-contamination.
- Store raw foods in containers and keep refrigerators at or below 40°F to inhibit bacterial growth.
- Use a food thermometer to ensure cooked foods reach safe internal temperatures for consumption.
- Follow safe defrosting methods, such as using the refrigerator, to minimize food safety risks.
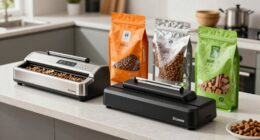
Understanding Food Safety Concerns
![food safety awareness education](https://rachaelsrawfood.com/wp-content/uploads/2024/11/food_safety_awareness_education.jpg)
Food safety concerns are often amplified by high-profile recalls and E. coli outbreaks, creating anxiety for many consumers. When it comes to raw food, you might worry about bacteria lurking in your ingredients.
It's essential to understand that foodborne illnesses can affect anyone, but at-risk populations like the elderly and pregnant women need extra precautions. Additionally, understanding the potential benefits of a raw food diet, such as increased energy and improved digestion, can help you appreciate the positive aspects of incorporating raw foods into your meals while being mindful of safety.
To minimize risks, you should familiarize yourself with important safety tips and proper handling practices. Always wash your hands and surfaces before preparing food, and verify your ingredients are sourced responsibly.
Remember the four core principles: clean, separate, cook, and chill.
You might think, "When you don't know, you throw," but this mindset can lead to unnecessary food waste and fear. Instead, educate yourself about ingredient storage and cooking techniques. By understanding and implementing these practices, you can greatly reduce your anxiety about food safety.
Being proactive not only protects your health but also boosts your confidence in the kitchen. With the right knowledge, you can enjoy raw food without compromising your safety or the well-being of those around you.
Key Principles of Food Safety
![essential guidelines for food safety](https://rachaelsrawfood.com/wp-content/uploads/2024/11/essential_guidelines_for_food_safety.jpg)
When preparing meals, understanding the key principles of food safety is crucial for preventing foodborne illnesses. By following these principles, you can greatly reduce the risk of harmful bacteria and guarantee your meals are safe to eat. Here are the four key principles to keep in mind:
1. Clean: Always wash your hands with warm, soapy water before, during, and after food preparation. Regularly sanitize kitchen surfaces to eliminate any bacteria that may be present.
Additionally, maintaining a clean environment helps to improve overall air quality, which is beneficial when using appliances like air purifiers to keep your kitchen fresh and free from airborne contaminants air purifier maintenance dos.
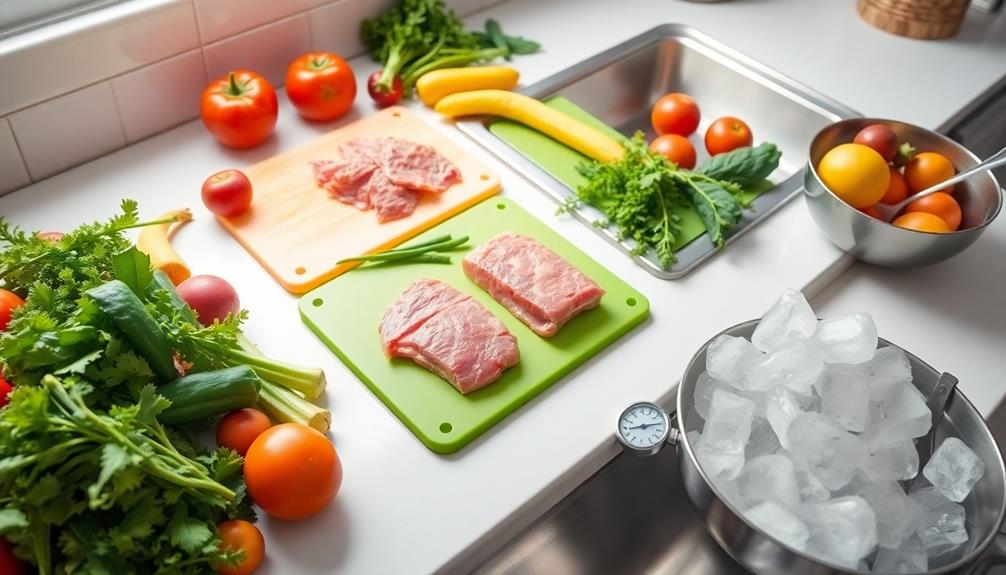
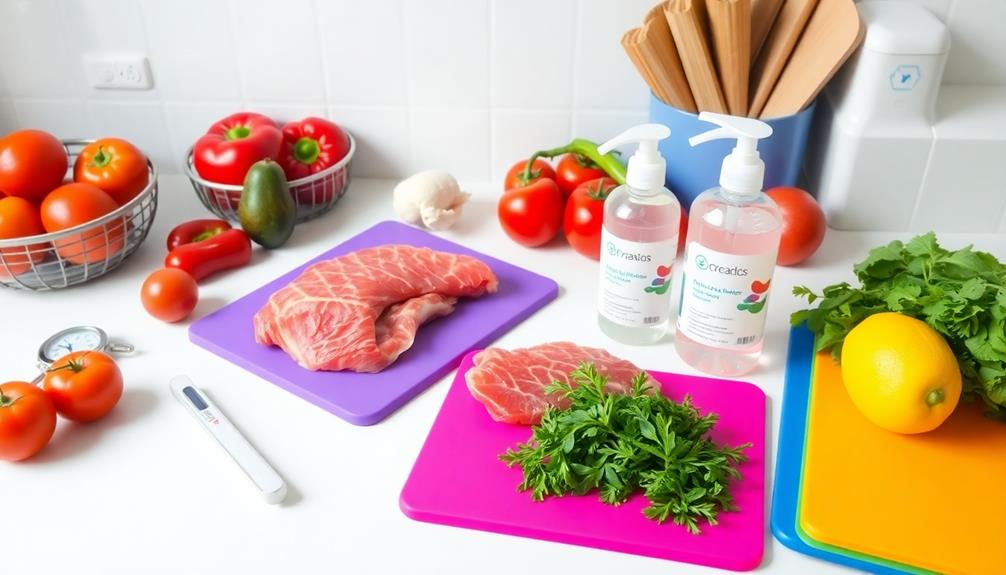
2. Separate: Use separate cutting boards and utensils for raw meat, poultry, and seafood. This helps prevent cross-contamination with ready-to-eat foods, keeping your meals safe.
3. Cook: Make sure to cook food to the appropriate internal temperatures—165°F for poultry and 145°F for whole cuts of meat. Cooking food thoroughly kills any harmful bacteria that may be lurking.
4. Chill: Keep food out of the danger zone (40°F to 140°F) where bacteria can multiply rapidly. Refrigerate leftovers promptly and guarantee your fridge maintains a safe temperature.
Safe Food Handling Practices
![proper food safety guidelines](https://rachaelsrawfood.com/wp-content/uploads/2024/11/proper_food_safety_guidelines.jpg)
To keep your food safe, hand hygiene is essential. Always wash your hands thoroughly before and after handling food to reduce the risk of spreading bacteria.
Additionally, using separate cutting boards for raw meats and ready-to-eat foods can help prevent cross-contamination in your kitchen.
Importance of Hand Hygiene
Effective hand hygiene is essential for ensuring safe food preparation and preventing foodborne illnesses. By consistently washing your hands, you can greatly reduce the risk of transferring harmful bacteria to your food.
Here are some key practices to follow:
- Wash hands before, during, and after food handling, especially after touching raw meat, poultry, or fish. This helps prevent cross-contamination.
- Use warm, soapy water for at least 20 seconds to thoroughly clean your hands. Don't forget to scrub between your fingers and under your nails.
- Hand sanitizers can be helpful, but they shouldn't replace washing hands when they're visibly dirty or greasy. Choose sanitizers with at least 60% alcohol for effectiveness.
- Always wash hands after handling pets, using the restroom, or touching surfaces that might harbor germs. These actions can introduce pathogens into your food.
Additionally, keeping nails short and avoiding jewelry can further minimize the risk of bacteria harboring on your hands during food preparation.
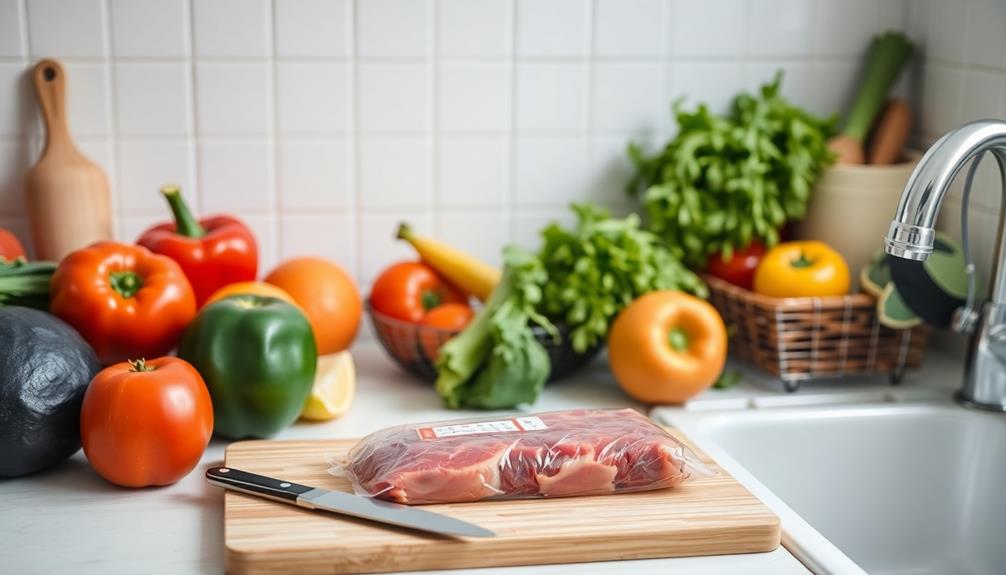
Preventing Cross-Contamination Risks
Preventing cross-contamination is vital for maintaining food safety in your kitchen. Start by using separate cutting boards for raw meat, poultry, and fish. This practice stops juices from contaminating ready-to-eat foods. After each use, make sure to clean and sanitize these boards thoroughly.
Additionally, proper handwashing practices can greatly reduce the risk of transferring harmful pathogens, which is particularly important when preparing a raw food diet.
Store raw meats on the bottom shelves of your refrigerator to prevent any drips from contaminating other foods. Keep them tightly wrapped to avoid cross-contamination.
Never reuse plates that held raw meat for cooked foods without proper cleaning and sanitization; this is essential to eliminate any residual bacteria.
Always wash your hands with warm, soapy water for at least 20 seconds before and after handling raw foods. This simple step greatly reduces the risk of transferring harmful pathogens.
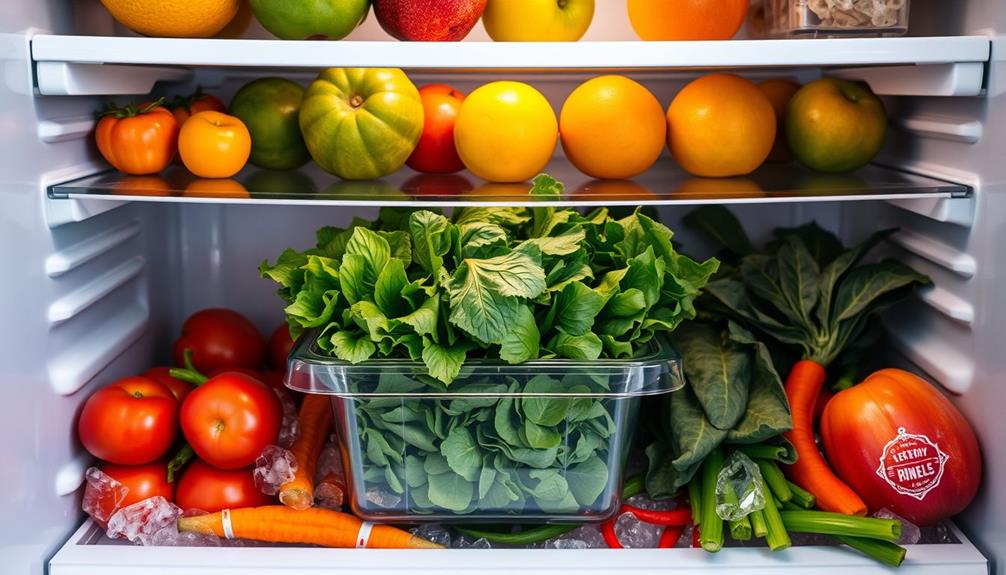
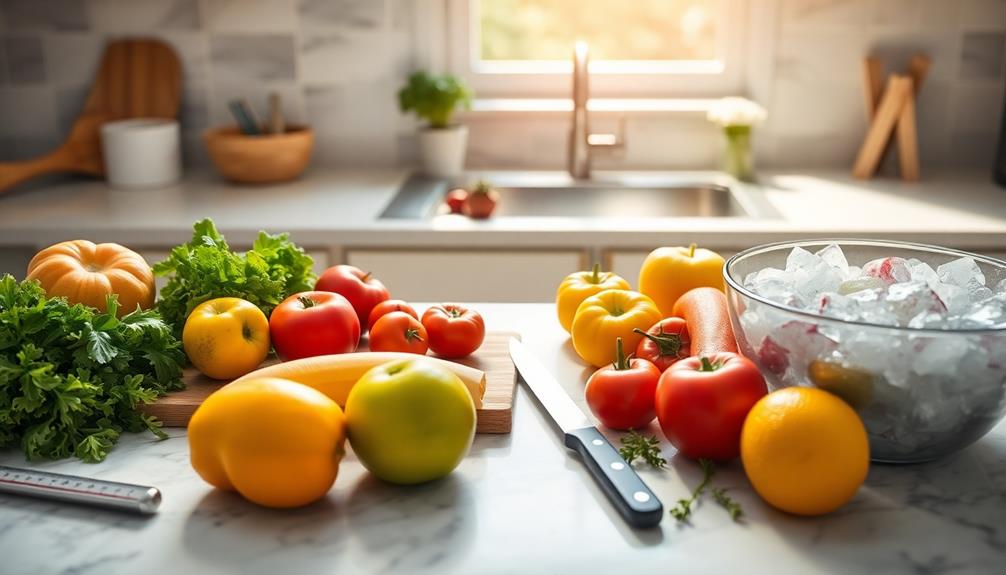
Best Storage and Serving Methods
![optimal storage and serving](https://rachaelsrawfood.com/wp-content/uploads/2024/11/optimal_storage_and_serving.jpg)
Properly storing and serving raw foods is essential for maintaining their safety and freshness. To guarantee food safety, follow these best practices:
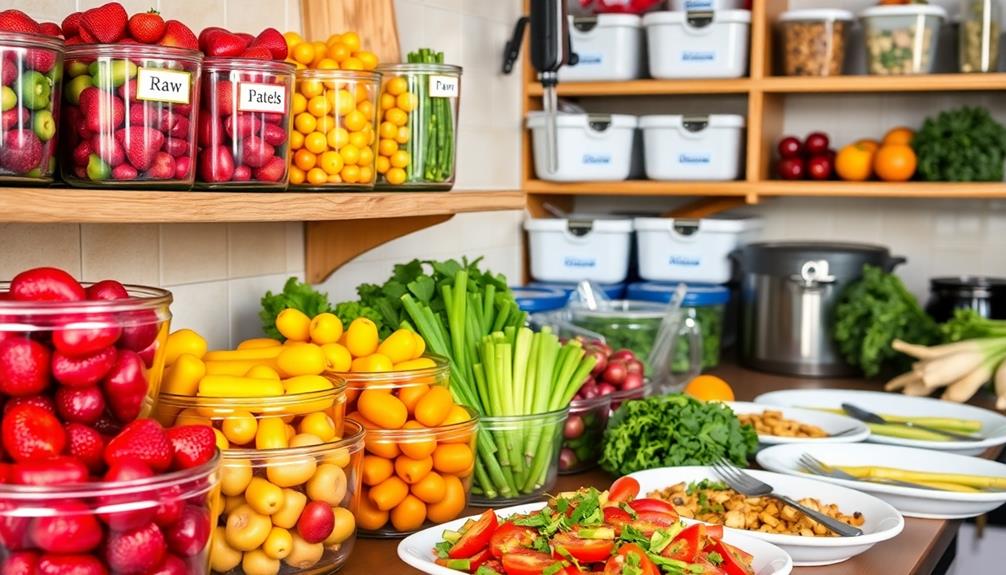
- Separate Containers: Store raw foods in separate containers to prevent cross-contamination. Always place raw meats on the lowest shelves of the refrigerator to avoid drips onto other foods.
- Refrigerator Temperatures: Keep your refrigerator at 40°F or below. This helps inhibit bacterial growth, assuring your raw foods remain safe for consumption.
- Check Expiration Dates: Always check the expiration dates on packaging and follow the storage instructions. This certifies that your raw foods stay fresh and safe.
- Serving Raw Foods: When serving raw foods, keep them chilled and limit exposure to room temperature to no more than two hours, especially in warmer conditions.
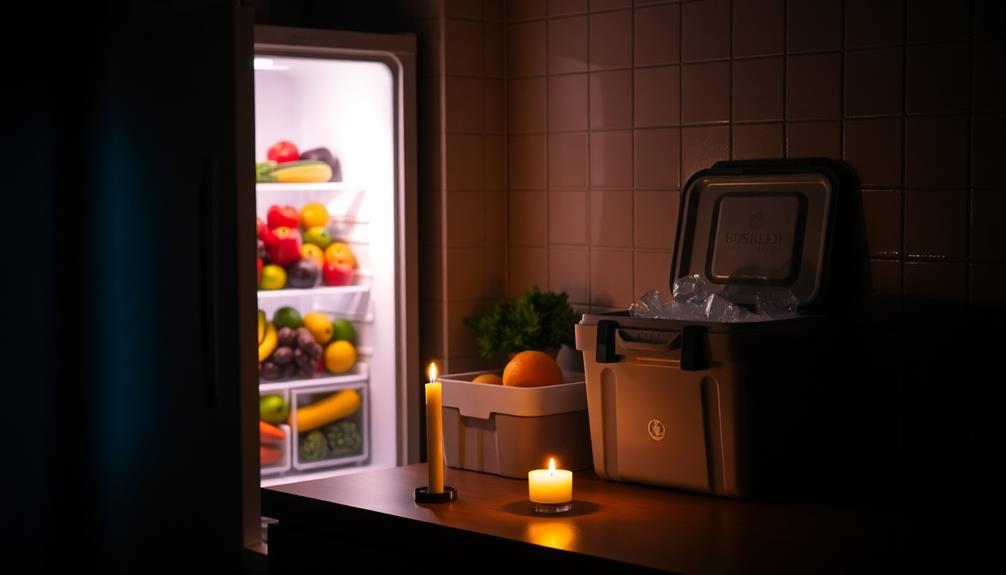
Defrosting and Re-freezing Tips
![safe thawing and freezing](https://rachaelsrawfood.com/wp-content/uploads/2024/11/safe_thawing_and_freezing.jpg)
When it comes to defrosting, always use the refrigerator or microwave, never room temperature, to keep your food safe.
Remember, you shouldn't refreeze raw meat, fish, or poultry after thawing, but cooked items can be refrozen if handled properly.
Let's explore these safe defrosting methods and the guidelines for refreezing to keep your meals free from foodborne illness.
Safe Defrosting Methods
Safe defrosting methods are essential for maintaining food safety and preventing bacterial growth. When you thaw food improperly, like leaving it at room temperature, you risk allowing harmful bacteria to thrive in the danger zone (40°F – 140°F).
To guarantee you defrost safely, follow these guidelines:
- Refrigerator: Always defrost raw meat and fish in the refrigerator. This keeps the temperature safe and minimizes bacterial growth.
- Cold Running Water: If you need to defrost quickly, use a sealed container under cold running water. This method maintains a safe temperature.
- Microwave: You can use a microwave for defrosting, but remember to cook food immediately after. This guarantees any bacteria that may have developed are eliminated.
- 24-Hour Rule: Once defrosted, cook raw meat, fish, or poultry within 24 hours to minimize food safety risks.
Re-freezing Guidelines Explained
Understanding how to handle food after defrosting is essential for maintaining safety in your kitchen. When it comes to raw meat, fish, and poultry, never refreeze them after defrosting. This practice can lead to foodborne illnesses. However, you can refreeze cooked meat, fish, and poultry, as long as they've been cooled and stored promptly.
To guarantee food safety, follow these guidelines:
Food Type | Refreezing Guidelines |
---|---|
Raw Meat, Fish, Poultry | Do NOT refreeze after thawing |
Cooked Meat, Fish, Poultry | Can be refrozen if cooled properly |
Thawed Foods (like ice cream) | Do NOT return to freezer |
Limit Refreezing | Only once to minimize foodborne risk |
Consumption Time | Cooked foods should be eaten within 24 hours |
Always use a food thermometer to check that your cooked foods reach safe temperatures. By following these re-freezing guidelines, you can protect yourself and your loved ones from foodborne illnesses while enjoying your meals safely.
Educational Resources for Food Safety
![food safety education materials](https://rachaelsrawfood.com/wp-content/uploads/2024/11/food_safety_education_materials.jpg)
Steering through the world of food safety can feel overwhelming, but there are plenty of reliable resources at your fingertips. Utilizing these educational resources can help you understand safe food handling practices, reduce the risk of foodborne illnesses, and protect at-risk populations from harmful bacteria.
Here are four valuable resources you should consider:
- AskKaren.com – This site offers accurate and up-to-date food safety information, including answers to your specific questions.
- USDA Meat and Poultry Hotline – Call this hotline for expert guidance on food safety issues, especially when it comes to cooking meat and poultry.
- NHS Inform – Access thorough food safety advice, focusing on safe food handling and guidelines tailored for at-risk populations.
- Community Cooking Classes – Participate in local workshops that emphasize food safety education, enhancing your culinary skills while ensuring the food you prepare is safe.
Regularly checking for product recalls and understanding expiration dates is also essential.
Engaging with local health departments can provide additional support tailored to your community's specific needs.
Frequently Asked Questions
What Are the 5 Most Important Food Safety Guidelines?
To guarantee food safety, you should always clean your hands, separate raw meats from produce, cook food to proper temperatures, chill perishables promptly, and avoid cross-contamination by using distinct utensils and surfaces.
What Are the 7 Golden Rules for Safe Food Preparation?
When preparing food, you should clean, separate, cook, chill, avoid cross-contamination, store properly, and sanitize regularly. Following these seven golden rules guarantees your meals are safe, enjoyable, and free from harmful bacteria.
What Are Three 3 of the Essential Food Safety Practices for the Safe Handling of Raw Eggs and Egg Products?
When handling raw eggs, always refrigerate them below 40°F, cook until firm at 160°F, and use separate utensils to avoid cross-contamination. Remember to wash your hands and surfaces thoroughly afterward. Stay safe!
What Are the Guidelines for Food Preparation?
When it comes to food preparation, you've got to guarantee cleanliness. Wash your hands, use separate boards for raw meats, scrub produce, cook to safe temperatures, and refrigerate leftovers promptly to keep bacteria at bay.
Conclusion
In wrapping up your journey through raw food safety, remember that a little care goes a long way in keeping your meals fresh and delightful. By embracing safe handling practices and smart storage solutions, you're not just avoiding potential pitfalls; you're crafting a culinary experience that's both nourishing and enjoyable. So, roll up your sleeves and immerse yourself in the world of raw food with confidence, knowing you've got the tools to keep your kitchen thriving!
Rachael, the Editor in Chief of RachaelsRawFood.com, is an inspiring and passionate individual who has dedicated her life to promoting the benefits of a raw food lifestyle. Known for her vibrant and energetic personality, Rachael has built a strong online presence that has transformed her personal journey into a thriving community of raw food enthusiasts.
Kitchen Essentials for Raw Food Preparation
Raw Food Preparation Tools: Cleaning and Sanitization
You’ll discover essential tips for cleaning and sanitizing raw food preparation tools that can drastically reduce foodborne illness risks. Stay tuned for expert advice!
![cleaning raw food tools](https://rachaelsrawfood.com/wp-content/uploads/2024/11/cleaning_raw_food_tools.jpg)
Cleaning and sanitizing your raw food preparation tools is essential to prevent foodborne illnesses. Always use hot, soapy water to clean surfaces and utensils immediately after use, especially after handling raw meat. Don't forget to apply a bleach solution for thorough sanitization—mix 1 tablespoon of bleach per gallon of water. Make certain you keep a separate cutting board for raw meats to avoid cross-contamination. Regularly inspect and replace sponges or cloths to minimize bacteria buildup. By following these practices, you'll guarantee a safe food prep environment and stay ahead of potential health risks, and there's much more to explore on this topic!
Key Takeaways
- Use distinct cutting boards and utensils for raw meat to prevent cross-contamination with other foods.
- Clean surfaces and tools with hot, soapy water immediately after use, especially post-raw meat handling.
- Sanitize with a bleach solution (1 tbsp bleach per gallon of water) after cleaning to reduce bacteria.
- Regularly inspect and replace sponges and cleaning cloths to prevent bacteria buildup.
- Store raw meat on the bottom shelf of the refrigerator to avoid drips onto other foods.
Importance of Cleaning and Sanitization
![essential for health safety](https://rachaelsrawfood.com/wp-content/uploads/2024/11/essential_for_health_safety.jpg)
Cleaning and sanitization are absolutely essential in raw food preparation to prevent harmful bacteria from contaminating your food. When you handle raw ingredients, it's imperative to understand that cross-contamination can easily occur if you don't take proper precautions.
Using hot, soapy water to clean surfaces and utensils that come into contact with raw foods is a must. Additionally, using proper cleaning techniques can greatly reduce the risk of foodborne illnesses. After cleaning, you should always sanitize these tools with a bleach solution to effectively reduce bacterial presence.
Regularly cleaning and sanitizing food preparation tools, like cutting boards and knives, is critical, especially when switching between raw and cooked items. This practice helps prevent the spread of pathogens that can lead to foodborne illnesses. You should also utilize separate tools for raw food preparation to further minimize risks.
Training in cleaning and sanitizing food procedures is important, as it helps you understand hygiene's role in food safety. By adhering to defined cleaning frequencies and maintaining sanitary food-contact surfaces, you protect not only your health but also that of your customers, fostering their trust in your establishment.
Safe Handling Practices
![proper safety procedures implemented](https://rachaelsrawfood.com/wp-content/uploads/2024/11/proper_safety_procedures_implemented.jpg)
Proper food safety starts with safe handling practices that work hand-in-hand with effective cleaning and sanitization. To minimize the risk of cross-contamination, always keep raw meat separate from other foods. Use distinct cutting boards and utensils specifically for raw meat to prevent harmful bacteria from spreading to other ingredients.
Before and after handling raw meat, wash your hands thoroughly with soap and hot soapy water for at least 20 seconds. This step is vital for reducing the spread of pathogens.
After preparing raw meat, clean all surfaces that came into contact with it using hot soapy water, and follow up with a disinfectant to eliminate lingering bacteria.
Don't forget to sanitize cutting boards and countertops with a bleach solution—mix 1 tablespoon of bleach per gallon of water and let it sit for several minutes.
Additionally, regularly replace sponges and cleaning cloths used for raw meat cleanup to avoid harboring bacteria. If you prefer, use disposable paper towels for added safety.
Effective Disinfection Techniques
![optimal cleaning practices guide](https://rachaelsrawfood.com/wp-content/uploads/2024/11/optimal_cleaning_practices_guide.jpg)
To guarantee a safe food preparation area, effective disinfection techniques are vital after handling raw food. Start by cleaning all surfaces with soap and water to remove any visible debris.
Once cleaned, apply EPA-approved disinfectants to those surfaces, making sure they remain wet for the recommended contact time. This step is significant as it allows the disinfectants to eliminate harmful pathogens effectively.
For a simple yet effective solution, prepare a bleach solution by mixing 1 tablespoon of bleach per gallon of water. Apply this solution to the surfaces, letting it sit for several minutes before rinsing with clean water to remove any residue.
After disinfection, either air dry the surfaces or use clean towels that haven't been in contact with raw food.
When cleaning, opt for non-porous sponges and cloths, as these materials don't harbor bacteria like porous ones do, reducing the risk of cross-contamination.
Cooking and Storage Guidelines
![food preparation and preservation](https://rachaelsrawfood.com/wp-content/uploads/2024/11/food_preparation_and_preservation.jpg)
When it comes to cooking and storing raw food, following guidelines can greatly reduce the risk of foodborne illnesses. Start by storing raw meat on the bottom shelf of your refrigerator to prevent drips from contaminating other foods. Confirm the fridge temperature stays below 40°F (4.5°C). Always cook meat to the appropriate internal temperature—use a food thermometer to confirm that poultry reaches at least 165°F (74°C) and ground meats reach a minimum of 160°F (71°C).
Label and date your raw meat items for proper rotation, consuming them within the recommended timeframes: 1-2 days for raw ground meats and 3-5 days for whole cuts. When thawing frozen raw meat, the refrigerator method is your safest option, keeping it below 40°F (4.5°C) and minimizing bacterial growth.
Here's a quick reference table to help you remember key points:
Task | Guideline |
---|---|
Storage of Raw Meat | Bottom shelf in fridge |
Cooking Temperature | Poultry: 165°F, Ground: 160°F |
Meat Labeling & Dating | 1-2 days for ground, 3-5 days for cuts |
Thawing Method | Refrigerator method |
Equipment Cleaning Procedures
![proper equipment hygiene practices](https://rachaelsrawfood.com/wp-content/uploads/2024/11/proper_equipment_hygiene_practices.jpg)
Effective cleaning of kitchen equipment is vital for maintaining food safety and preventing contamination. To achieve this, use the three-compartment sink method: designate one compartment for washing, another for rinsing, and the last for sanitizing.
Regular cleaning is important to guarantee that your tools remain effective and safe, similar to how air purifier maintenance secures peak performance in maintaining air quality. When cleaning food processors, disassemble them first and scrub each part with warm soapy water, guaranteeing all surfaces are sanitized to eliminate lingering bacteria.
For slicers, wash removable blades in a dishwasher and wipe down non-removable parts with a soapy cloth, paying extra attention to food-contact areas. Regularly inspect your kitchen equipment, like mixers and slicers, to guarantee peak performance. Worn or damaged components can lead to food contamination, so stay vigilant.
After cleaning, always follow proper sanitization procedures. Use a sanitizing spray on all equipment to uphold food safety standards in your kitchen environment.
Staff Training and Awareness
![employee skill development program](https://rachaelsrawfood.com/wp-content/uploads/2024/11/employee_skill_development_program.jpg)
Staff training is the backbone of food safety in any kitchen. By providing thorough training on proper cleaning and sanitization techniques, you greatly reduce the risk of cross-contamination.
Regular workshops on food safety and hygiene practices reinforce knowledge and compliance, fostering a culture of safety among your kitchen staff.
Utilizing manufacturer resources like charts and videos can enhance your team's understanding of effective cleaning and equipment care practices.
Make certain you engage your employees in continuous learning, keeping them updated on best practices to maintain high standards of hygiene and operational efficiency.
Encouraging staff to report safety concerns is crucial.
Implement daily checklists for cleaning tasks to guarantee everyone adheres to sanitation protocols, which minimizes risks in your kitchen environment.
Types of Food Soils
![varieties of soil types](https://rachaelsrawfood.com/wp-content/uploads/2024/11/varieties_of_soil_types.jpg)
Understanding the various types of food soils is vital for maintaining a clean and safe kitchen environment. Food soils can be categorized into four main types: fat-based, protein-based, carbohydrate-based, and mineral salt-based. Each of these requires specific cleaning methods to guarantee effective removal.
Fat-based soils are generally easy to tackle with hot water. However, if stubborn residues persist, alkaline detergents might be necessary for complete cleaning.
In contrast, protein-based soils pose a greater challenge. These often require highly alkaline detergents and wetting agents for effective removal, so be prepared to put in some extra effort.
Carbohydrate-based soils, which include simple sugars, can usually be cleaned with warm water. For starch residues, though, you may need to use mild detergents for a thorough clean.
Finally, mineral salt-based soils demand specialized cleaning approaches, depending on their solubility properties. Identifying the type of soil present is vital for successful cleaning, as each type requires a tailored approach to guarantee your kitchen tools remain safe and hygienic.
Chemistry of Cleaning Agents
![cleaning agents chemical composition](https://rachaelsrawfood.com/wp-content/uploads/2024/11/cleaning_agents_chemical_composition.jpg)
When you're cleaning your tools, understanding the active ingredients in your cleaning agents can make a big difference.
These ingredients not only help break down food soils but can also impact the environment, especially if they contain harmful components.
Active Ingredients Overview
Cleaning agents pack a punch thanks to their active ingredients, which play an essential role in removing dirt and grime from surfaces. One of the key components you'll find in these agents is surfactants. They help break down and lift soils from surfaces, making cleaning more effective.
In addition to surfactants, many detergents include sequestering agents like sodium tripolyphosphate. These ingredients bind metal ions in hard water, enhancing the overall cleaning effectiveness.
If you want to disinfect surfaces, look for cleaning agents with oxidizing agents such as hypochlorite. They destroy a wide range of microorganisms, ensuring your tools are sanitized.
Some detergents also contain enzyme ingredients like amylases, specifically designed to target food soils, particularly starches. The effectiveness of your cleaning agents can be influenced by factors like pH levels and water hardness.
Be aware that the presence of inactivators can also impact their ability to clean and sanitize effectively. By understanding these active ingredients, you can choose the right cleaning agents to keep your raw food preparation tools safe and hygienic.
Environmental Impact Considerations
Recognizing the significant environmental impact of cleaning agents is essential for anyone involved in food preparation. The chemistry behind these agents plays a significant role in their effectiveness and their potential harm to the environment.
To guarantee food safety and sanitation while minimizing ecological damage, consider these factors:
- Ingredient Composition: Many cleaning agents contain surfactants and phosphates that can adversely affect aquatic ecosystems. Choose products with environmentally friendly formulations.
- pH Levels: The pH of cleaning agents can influence their effectiveness and environmental impact. It's important to select products that maintain a balanced pH to reduce harmful effects during disposal.
- Regulatory Standards: Familiarize yourself with guidelines from agencies like the EPA, which govern the safety of detergents used in food processing. This helps promote compliance and responsible use.
Regular Maintenance Practices
![consistent upkeep and care](https://rachaelsrawfood.com/wp-content/uploads/2024/11/consistent_upkeep_and_care.jpg)
To guarantee your raw food preparation tools remain safe and effective, regular maintenance is essential. Start by inspecting your cutting boards, utensils, and other food preparation tools for any signs of wear or damage. If you notice anything concerning, replace those items immediately to guarantee safe food handling.
It's vital to clean and sanitize your food preparation tools right after each use, especially after handling raw meat. This practice helps prevent cross-contamination. Additionally, replace sponges and cleaning cloths every 1-2 weeks to eliminate harmful bacteria. Store your tools in a clean, dry environment to minimize exposure to contaminants.
To maintain high sanitation standards, consider scheduling a deep clean of all your food prep tools and surfaces weekly. This not only keeps everything hygienic but also guarantees compliance with health regulations.
Here's a quick reference table for your maintenance routine:
Maintenance Task | Frequency |
---|---|
Inspect tools | Weekly |
Clean and sanitize | After each use |
Replace sponges/cloths | Every 1-2 weeks |
Deep clean surfaces | Weekly |
Frequently Asked Questions
What Are the 4 Steps to Cleaning and Sanitizing Utensils and Equipment?
To clean and sanitize utensils and equipment, you should follow these four steps: clean with hot soapy water, rinse thoroughly, sanitize with an approved solution, and let them air dry completely to prevent contamination.
What Are the 5 Steps of Cleaning and Sanitizing?
To clean and sanitize effectively, you'll first remove food residues, rinse surfaces, apply sanitizer, let it sit for the required time, and rinse again if needed. Finally, air dry or wipe with clean towels.
What Are the 5 Steps to Cleaning and Sanitizing Food Surface Areas?
To clean and sanitize food surfaces, start by removing debris, wash with hot, soapy water, rinse thoroughly, apply an EPA-approved sanitizer, and let it air dry or use a clean towel to guarantee safety.
What Methods Should Be Used to Clean and Sanitize Food Processing Equipment?
Isn't it essential to keep your food processing equipment spotless? You should wash, rinse, and sanitize by disassembling parts, using a dishwasher, and following manufacturer guidelines to guarantee safety and extend equipment lifespan.
Conclusion
In the world of raw food preparation, neglecting cleaning and sanitization could spell disaster. As you implement safe handling practices and effective disinfection techniques, remember that each step you take protects not just the food, but everyone who consumes it. What if a single oversight leads to a foodborne illness outbreak? By fostering a culture of cleanliness and awareness, you can guarantee that your kitchen remains a safe haven for health. So, are you ready to elevate your standards?
Rachael, the Editor in Chief of RachaelsRawFood.com, is an inspiring and passionate individual who has dedicated her life to promoting the benefits of a raw food lifestyle. Known for her vibrant and energetic personality, Rachael has built a strong online presence that has transformed her personal journey into a thriving community of raw food enthusiasts.
Kitchen Essentials for Raw Food Preparation
Safe Sprouting Guide for Raw Food Enthusiasts
Get expert tips on safely sprouting seeds for a nutritious boost in your diet—discover essential techniques that will transform your raw food experience!
![raw food sprouting essentials](https://rachaelsrawfood.com/wp-content/uploads/2024/11/raw_food_sprouting_essentials.jpg)
To safely sprout seeds, start by soaking them in clean, filtered water for 12-24 hours based on their size. Rinse your seeds 3-4 times a day to keep them moist and promote healthy growth. Always sanitize your seeds and sprouting equipment to prevent foodborne illnesses. Maintain good air circulation during the sprouting process and store your sprouts in airtight containers in the fridge. Remember to monitor for spoilage and consume them within a week. Following these safety precautions will maximize the benefits of sprouts in your diet. Discover more techniques and tips to enhance your sprouting experience!
Key Takeaways
- Soak seeds in clean, filtered water for 12-24 hours to initiate germination and enhance safety.
- Rinse seeds 3-4 times daily to maintain moisture and prevent harmful bacteria growth.
- Sanitize seeds before sprouting using a hydrogen peroxide solution to reduce foodborne illness risks.
- Store sprouts in airtight containers and consume within a week for optimal freshness and safety.
- Monitor growing conditions, keeping sprouts in a well-ventilated area at ideal temperatures (60°F to 75°F) to prevent spoilage.
Understanding Sprouting Basics
![sprouting fundamentals overview guide](https://rachaelsrawfood.com/wp-content/uploads/2024/11/sprouting_fundamentals_overview_guide.jpg)
When it comes to sprouting, many people find it easier than they expected. The process starts with soaking seeds in water for 12-24 hours, allowing them to absorb moisture and begin germination. Mung beans are a popular choice due to their impressive nutritional benefits, including increased vitamins and protein.
After soaking, you'll drain the seeds and rinse them 3-4 times daily, which keeps them moist and promotes healthy growth. You can sprout almost any seed, grain, or legume at home using simple tools like a wide-mouth mason jar and breathable fabric.
The key is to guarantee proper sanitation of both the seeds and your sprouting equipment. This step is vital, as it helps prevent foodborne illness, making sure the sprouts you enjoy are safe to eat.
As sprouts develop, you'll notice they become rich in enzymes, enhancing digestibility and overall nutritional value compared to their unsprouted forms. By understanding these basics of sprouting, you can confidently begin your journey to enjoy fresh, nutritious sprouts right from your kitchen!
Advantages of Sprouting
![nutritional benefits of sprouting](https://rachaelsrawfood.com/wp-content/uploads/2024/11/nutritional_benefits_of_sprouting.jpg)
Sprouting is a nutritional powerhouse that boosts vitamins and fiber, making it a great choice for your diet.
In addition, sprouted grains can enhance the nutrient retention in your meals, similar to the benefits of a raw food diet, which emphasizes unprocessed, uncooked foods.
Plus, you can easily grow sprouts at home with just a mason jar and clean water, so you'll always have fresh ingredients on hand.
Their crunchy texture and versatile flavor can elevate any dish, giving you a healthy alternative to processed foods.
Nutritional Powerhouse
Discover the remarkable benefits of incorporating sprouts into your diet, as they serve as a concentrated source of essential vitamins and nutrients. Sprouts, especially when grown from organic seeds, often contain higher levels of vitamin C and B vitamins than their unsprouted counterparts. This means you're getting more nutrients packed into every bite.
Additionally, incorporating foods like apple cider vinegar can further enhance your digestion and nutrient absorption.
Not only do sprouts enhance your nutrient intake, but they also provide pre-digested proteins and natural sugars that boost your energy levels and overall vigor. This is particularly true for broccoli sprouts, which are rich in sulforaphane—a compound linked to cancer-reducing properties.
The sprouting process considerably improves digestibility by breaking down anti-nutrients found in grains and legumes. This means your body can absorb more nutrients efficiently, helping you feel your best.
Incorporating sprouts into your meals offers a low-calorie, nutrient-dense food option that can replace processed foods, making it easier to maintain a healthier diet.
Easy Home Cultivation
Growing your own sprouts at home isn't only simple but also a rewarding way to guarantee you have fresh, nutritious food at your fingertips. The sprouting process enhances the nutritional value of seeds, boosting essential vitamins, minerals, and dietary fiber while improving digestibility.
Sprouts are particularly beneficial as they contain higher enzyme content, which may aid in digestion and nutrient absorption making raw nutrition bars. Plus, it's easy to grow sprouts without any special equipment or a sunny window—perfect for your apartment or small space.
All you need is a mason jar, clean water, and your choice of seeds, whether they're legumes, grains, or herbs. The beauty of home sprouting lies in its versatility; you can experiment with various seeds to enjoy diverse flavors and health benefits. Fresh sprouts add a delightful crunch and serve as a healthy alternative to processed options.
While it's essential to follow proper hygiene practices to minimize the risk of harmful bacteria, the ease and cost-effectiveness of sprouting make it an accessible option for everyone.
In just a few days, you'll have a fresh supply of sprouts ready to elevate your meals, making it a fun and fulfilling way to cultivate your own nutritious food right at home.
Culinary Versatility
Elevate your meals with the culinary versatility of sprouts, which add a delightful crunch and vibrant flavor to a wide range of dishes.
Whether you're tossing them into salads, layering them in sandwiches, or incorporating them into stir-fries, edible sprouts are a fantastic ingredient for various culinary applications.
Sprouting seeds like lentils and chickpeas not only enhance your dishes but also offer high protein content, making them excellent meat substitutes in vegetarian and vegan meals.
This nutrient-dense addition boosts the overall health benefits of your meals.
Moreover, sprouting increases the bioavailability of essential vitamins and minerals, such as vitamin C and B vitamins, ensuring you get the most out of your food.
The natural enzymes in sprouts also aid digestion, making it easier to enjoy these raw ingredients without the discomfort often associated with raw grains and legumes.
Feel free to mix different types of sprouts—like alfalfa, broccoli, and radish—to create unique flavor profiles and add visual appeal to your dishes.
This encourages creative culinary experimentation, allowing you to explore the endless possibilities that sprouts offer in your cooking.
Step-by-Step Sprouting Process
![detailed seed germination guide](https://rachaelsrawfood.com/wp-content/uploads/2024/11/detailed_seed_germination_guide.jpg)
To successfully sprout seeds, you'll need to start by soaking them in clean, filtered water for 12 to 24 hours, depending on the type of seeds you're using. After soaking, drain the water and rinse the seeds thoroughly. Place them in a jar or sprouter that allows for good air circulation and drainage. Remember to rinse and drain your sprouts 3-4 times daily to keep them moist but not soggy.
Tip | Benefit |
---|---|
Keep rinsing regularly | Prevents mold growth |
Good air circulation | Promotes healthy growth |
Store in the fridge | Maintains freshness |
Maintain the sprouting jar in a well-ventilated area away from direct sunlight. This helps with growing sprouts efficiently. Once the sprouts reach the desired length (usually a few days), perform a final rinse. Drain your sprouts well, then store them in an airtight container in the refrigerator. Consume them within a week for peak freshness. Following these steps guarantees you get the most from your sprouting experience, making it enjoyable and rewarding!
Essential Resources for Sprouting
![key supplies for germination](https://rachaelsrawfood.com/wp-content/uploads/2024/11/key_supplies_for_germination.jpg)
When you're diving into the world of sprouting, having the right resources at your fingertips can make all the difference.
Start with informative books like *How Can I Grow and Use Sprouts as Living Food* or *The Sprout Book*. These guides not only explain how to sprout but also highlight the benefits of using high-quality organic seeds.
You can find popular sprouting beans such as alfalfa, mung beans, and lentils from retailers like Sproutman.com, TrueLeaf Market, or even Amazon for easy access.
Online platforms are also invaluable. Join Facebook groups or check out YouTube channels for community support and visual tutorials that can help you navigate the sprouting process.
You'll learn how to optimize your germination rate and guarantee your sprouts grow strong and healthy.
Community and Lifestyle Benefits
![community engagement and wellbeing](https://rachaelsrawfood.com/wp-content/uploads/2024/11/community_engagement_and_wellbeing.jpg)
Sprouting offers a myriad of community and lifestyle benefits that can enhance your overall well-being. By growing your own sprouts, you're not just cultivating nutritious food; you're also integrating a healthy practice into your living space, perfect for apartment dwellers. This hands-on approach fosters a deeper connection to plant-based eating, allowing you to truly appreciate the nutritional benefits of fresh, raw foods.
Engaging in home sprouting can also connect you to a vibrant community. Online social media groups are filled with fellow enthusiasts keen to share tips, recipes, and encouragement. This support can be invaluable, especially if you're considering shifting to a vegan lifestyle. Mentorship from experienced members often paves the way for sustainable dietary changes.
Additionally, sprouting can be a fun and educational family activity. It fosters togetherness and teaches children about food sources and nutrition, creating lasting lessons in health and sustainability.
Safety Precautions for Sprouting
![sprouting safety measures explained](https://rachaelsrawfood.com/wp-content/uploads/2024/11/sprouting_safety_measures_explained.jpg)
When it comes to sprouting, proper seed sanitization is essential to prevent contamination.
You should always soak your seeds in a sanitizing solution before starting the sprouting process.
Additionally, keeping an eye on the growing conditions will help guarantee your sprouts remain safe and healthy.
Proper Seed Sanitization
Guaranteeing your seeds are properly sanitized is essential for a safe and successful sprouting experience. The U.S. FDA recommends soaking seeds to reduce the risk of foodborne illnesses. When you soak seeds, be mindful of the time; excessive soaking can hinder germination rates, while insufficient soaking mightn't effectively eliminate harmful contaminants.
For proper sanitization, consider using disinfecting agents like hydrogen peroxide or calcium hypochlorite. While vinegar is a common choice, it can damage vulnerable seeds, such as broccoli, so it's better to opt for gentler methods.
In addition to sanitizing seeds, make certain all your equipment—like jars and lids—is thoroughly cleaned and sanitized before use. This practice helps prevent cross-contamination and guarantees a safe environment for home sprouters.
Monitor Growing Conditions
Creating a safe environment for your sprouts is essential for their healthy growth. Here are three key factors to take into account:
- Ventilation: Make sure your sprouting area is well-ventilated. Stagnant air can promote harmful bacteria, so avoid direct sunlight to prevent overheating.
- Water Management: Rinse and drain your sprouts 3-4 times daily. This keeps them moist but not waterlogged, which helps prevent rot and bacterial contamination. Always use clean, filtered, or distilled water for soaking and rinsing.
- Temperature Control: Monitor the temperature of your sprouting area closely. Keep it between 60°F and 75°F (15°C to 24°C) for ideal growth conditions.
If you notice any foul odors, slimy textures, or signs of spoilage, don't hesitate to discard those sprouts. These signs indicate potential bacterial growth that could compromise your safety.
Disinfecting Sprouting Seeds
![cleaning germinating seedlings safely](https://rachaelsrawfood.com/wp-content/uploads/2024/11/cleaning_germinating_seedlings_safely.jpg)
Disinfecting sprouting seeds is essential for preventing contamination from harmful bacteria like E. coli and salmonella. The U.S. FDA recommends soaking and sanitizing your seeds to minimize health risks associated with home sprouting. You can use common disinfecting agents like vinegar, hydrogen peroxide, or calcium hypochlorite to clean your seeds effectively.
When soaking seeds, remember that the duration varies by type. Small seeds typically require about 4 hours, while larger seeds should soak for 8 to 10 hours. However, avoid excessive soaking, as it can negatively impact germination rates.
Be cautious when disinfecting broccoli seeds with vinegar, as it may damage them; consider alternative sanitization methods to maintain seed viability.
Implementing proper sanitation practices is just as important. Always clean your equipment thoroughly and use filtered water to reduce the risk of contamination.
Proper Storage Techniques
![effective preservation methods guide](https://rachaelsrawfood.com/wp-content/uploads/2024/11/effective_preservation_methods_guide.jpg)
To keep your sprouts fresh and safe for consumption, proper storage techniques are essential. Follow these tips to maintain their quality and prevent spoilage:
- Rinse and Drain: Always thoroughly rinse your sprouts before storage to eliminate any residual bacteria. After rinsing, make sure to thoroughly drain them to avoid excess moisture.
- Use an Airtight Container: Store your fully sprouted seeds in an airtight container to maintain freshness. This helps prevent contamination and keeps your sprouts crisp in the refrigerator.
- Monitor for Spoilage: Check your sprouts regularly. Consume sprouts within a few days for ideal flavor and nutrition. Discard any that emit foul odors or show signs of spoilage, as these can indicate mold growth.
Line your storage container with a clean tea towel to absorb excess moisture, which further reduces the risk of mold growth.
Keep your sprouts in a cool, dark, and dry location within the refrigerator to extend their shelf life. By following these proper storage techniques, you can enjoy safe and delicious sprouts for your meals!
Frequently Asked Questions
Can I Sprout Seeds From My Kitchen Pantry?
You can sprout seeds from your kitchen pantry, but make certain they're suitable for sprouting. Rinse them well, provide moisture, and watch for growth. It's an easy, rewarding way to enhance your meals with fresh nutrients.
How Long Do Different Sprouts Take to Grow?
Growing sprouts is like watching a garden awaken. Depending on the type, sprouts usually take anywhere from 3 to 14 days. Just water them regularly, and you'll see your kitchen transform into a mini farm!
Can Sprouts Be Grown Without Sunlight?
Yes, you can grow sprouts without sunlight. They thrive in dark, moist environments. Just keep them in a jar, rinse regularly, and within a few days, you'll have fresh, delicious sprouts ready to enjoy!
Are There Any Non-Seed Options for Sprouting?
You might think sprouts only come from seeds, but you can also sprout grains like quinoa or legumes like lentils! These options offer unique flavors and nutrients, expanding your sprouting adventure beyond traditional seeds.
What Are the Best Types of Seeds for Beginners?
For beginners, alfalfa, mung bean, and broccoli seeds are fantastic choices. They sprout quickly and require minimal care, making them perfect for your first sprouting experience. You'll love the fresh flavors they add to your meals!
Conclusion
So there you have it—your ticket to becoming a sprouting savant! With all the precautions you've learned, you can now grow your own mini salad factory right at home. Just remember, if your sprouts start plotting world domination, it might be time to reassess your techniques. Embrace the crunchy goodness, and may your kitchen be filled with life (and maybe a little chaos). Who knew being a raw food enthusiast could come with a side of adventure? Happy sprouting!
Rachael, the Editor in Chief of RachaelsRawFood.com, is an inspiring and passionate individual who has dedicated her life to promoting the benefits of a raw food lifestyle. Known for her vibrant and energetic personality, Rachael has built a strong online presence that has transformed her personal journey into a thriving community of raw food enthusiasts.
Kitchen Essentials for Raw Food Preparation
Raw Food Storage: Temperature and Time Guidelines
Find out how to store raw foods safely by mastering temperature and time guidelines to keep them fresh and flavorful for longer. Discover more essential tips!
![raw food storage guidelines](https://rachaelsrawfood.com/wp-content/uploads/2024/11/raw_food_storage_guidelines.jpg)
To store raw foods safely, keep meats at 1°C to 3°C (34°F to 37°F) and fresh poultry at 2°C to 4°C (36°F to 39°F). Seafood should be maintained at -1°C to 2°C (30°F to 34°F) for quality. Consume raw meats and seafood within 1 to 2 days of refrigeration to prevent spoilage. Fresh vegetables last up to a week, while ripe fruits like apples can last about a month. Always monitor your fridge temperature, aiming for 4°C (39°F) or lower, to guarantee safety and freshness. There's so much more to discover about effective storage methods.
Key Takeaways
- Store raw meats at 1°C to 3°C (34°F to 37°F) to prevent spoilage and foodborne illnesses.
- Fresh poultry should be kept at 0°C to 2°C (32°F to 36°F) and consumed within 1 to 2 days.
- Seafood should be stored on ice at -1°C to 2°C (30°F to 34°F) and used as soon as possible.
- Keep raw dairy products between 2°C to 4°C (36°F to 39°F) and consume them promptly to avoid spoilage.
- Monitor refrigerator temperatures regularly, ensuring they remain at or below 4°C (39°F) to minimize risks.
Importance of Proper Food Storage
![safe food preservation techniques](https://rachaelsrawfood.com/wp-content/uploads/2024/11/safe_food_preservation_techniques.jpg)
Proper food storage is essential for keeping your meals safe and fresh. It plays an important role in food safety by minimizing the risk of foodborne illnesses. By guaranteeing proper food storage, you greatly reduce the chances of cross-contamination between raw and cooked foods.
For instance, you should store meats at temperatures between 1°C to 3°C (34°F to 37°F) to maintain ideal freshness and limit bacterial growth. Similarly, dairy products need to be kept at 2°C to 4°C (36°F to 39°F) to preserve their quality and prevent spoilage. Additionally, utilizing efficient heating solutions, like wood-burning stoves, can help create a comfortable environment for food storage by maintaining consistent temperature levels.
When it comes to fresh fruits and vegetables, it's essential to keep them at the same temperature range and promptly remove any rotting items to protect the rest.
For your frozen foods, maintaining a freezer temperature of -18°C (0°F) or lower is important. This prevents freezer burn, which happens when moisture escapes from improperly wrapped products.
Temperature Guidelines for Raw Foods
![raw food temperature safety](https://rachaelsrawfood.com/wp-content/uploads/2024/11/raw_food_temperature_safety.jpg)
Maintaining the right temperature for raw foods is vital for guaranteeing their freshness and safety. For raw meats, you should keep them in your storage areas at temperatures between 1°C to 3°C (34°F to 37°F) in walk-in refrigerators. This range helps prevent spoilage and keeps the quality intact.
Fresh poultry needs slightly higher temperatures, ideally between 2°C to 4°C (36°F to 39°F), and it's best to pack it in ice for peak preservation.
When it comes to seafood, aim to store it at temperatures ranging from -1°C to 2°C (30°F to 34°F). This not only maintains its freshness but also preserves its quality.
Raw dairy products should be kept at 2°C to 4°C (36°F to 39°F) to prevent spoilage and guarantee safety.
Following these temperature guidelines is essential for minimizing the risk of foodborne illnesses. Proper storage at the recommended temperatures not only preserves the integrity of your food but also safeguards your health.
Always stay vigilant about these temperature ranges to enjoy fresh, safe raw foods.
Time Guidelines for Fresh Ingredients
![fresh ingredient storage tips](https://rachaelsrawfood.com/wp-content/uploads/2024/11/fresh_ingredient_storage_tips.jpg)
Storing fresh ingredients at the right temperature is just the start; knowing how long you can keep them is equally important for preserving their quality and safety.
Fresh vegetables should ideally be consumed within a week when stored in the refrigerator at 40°F. Incorporating low carb high protein breakfast ideas can help you make the most of your fresh produce by creating nutritious meals. This guarantees you enjoy their best freshness and nutritional value.
Ripe fruits like apples can last about a month, while grapes and plums can be kept unwashed in the fridge for about a week.
When it comes to raw meats, you'll want to use them within 1 to 2 days of refrigeration, depending on the cut. This helps prevent spoilage and guarantees safety in your food storage practices.
Fresh seafood is even more time-sensitive; it's best used as soon as possible, ideally within 1 to 2 days of purchase.
For dry goods like whole wheat flour, you can store it at room temperature for 3 to 6 months. However, refrigerating or freezing it extends its shelf-life to up to a year.
Best Practices for Safe Storage
![safe storage best practices](https://rachaelsrawfood.com/wp-content/uploads/2024/11/safe_storage_best_practices.jpg)
Ensuring the safety of your food begins with the right storage techniques. When dealing with raw poultry and ground meat, it's essential to follow specific guidelines.
Store these foods at a temperature between 1°C to 3°C (34°F to 37°F) in your refrigerator to keep them fresh and minimize bacterial growth. Poultry should ideally be kept between 0°C to 2°C (32°F to 36°F), and it's best if you pack it in ice for ideal conditions.
Remember, foods should be stored on the lower shelves of your refrigerator to prevent cross-contamination. Cooked items should always be placed above raw products.
Individual cuts of meat should be used within a few days, while boned meat can last up to three days in the refrigerator before cooking or freezing.
Regularly monitor and maintain the refrigerator's temperature, ensuring it stays at or below 4°C (39°F). This simple practice will help keep your raw food items safe and reduce the risk of spoilage, ensuring that your meals are both delicious and safe to eat.
Managing Food Safety Risks
![ensuring safe food practices](https://rachaelsrawfood.com/wp-content/uploads/2024/11/ensuring_safe_food_practices.jpg)
Food safety risks can arise even when you're diligent about storage practices.
It's vital to be proactive in managing these risks, especially with raw meats and other perishables.
Here are some essential tips to keep in mind:
- Store raw meats at temperatures between 34°F to 37°F.
- Consume fresh poultry within one to two days of refrigeration.
- Keep seafood on ice and use it as soon as possible.
- Prevent cross-contamination by placing raw products on lower shelves.
Frequently Asked Questions
What Temperature Should Raw Food Be Stored At?
To keep raw food safe, store meats between 1°C to 3°C, poultry below 4°C, seafood on ice or at -1°C to 2°C, and dairy between 2°C to 4°C for best freshness.
What Is the Temperature Limit for Raw Food?
The temperature limit for raw food is 4°C (39°F). You should keep it below this threshold to prevent spoilage and minimize the risk of foodborne illnesses. Regularly check your refrigerator's temperature to guarantee safety.
What Is the FDA Storage Temperature Requirement?
The FDA storage temperature requirement varies by food type. For raw meat, keep it between 32°F and 36°F. Seafood needs -1°F to 34°F, while raw eggs should stay between 33°F and 41°F in your refrigerator.
What Are the FDA Guidelines for Cooking Temperatures?
When cooking, think of your food as a treasure needing the right heat. The FDA says cook ground meats to 160°F, poultry to 165°F, and whole cuts to 145°F for safety. Enjoy your culinary adventure!
Conclusion
So, you think you can just toss your raw foods anywhere and hope for the best? Think again! Ignoring temperature and time guidelines isn't just a bold culinary experiment; it's a one-way ticket to a food safety disaster. Remember, those fresh ingredients aren't just waiting around to become science experiments. Proper storage isn't just a suggestion; it's your ticket to avoiding a dinner party of regret. So, treat your food right, or it might just treat you wrong!
Rachael, the Editor in Chief of RachaelsRawFood.com, is an inspiring and passionate individual who has dedicated her life to promoting the benefits of a raw food lifestyle. Known for her vibrant and energetic personality, Rachael has built a strong online presence that has transformed her personal journey into a thriving community of raw food enthusiasts.
-
Raw Food Recipes2 months ago
How Much Raw Food to Feed a Dog: Use This Calculator
-
Raw Food Recipes2 months ago
Raw Food Vs. Kibble: Which Is Better for Your Dog?
-
Raw Food Recipes2 months ago
Can You Switch a Dog From Raw Food to Kibble? What to Consider
-
Raw Food Recipes2 months ago
How to Make Raw Food for Dogs: Easy Recipes
-
Raw Food Recipes2 months ago
What Is a Balanced Raw Food Diet for Dogs? Discover the Basics
-
Health and Wellness2 months ago
Can You Eat Raw Food? What You Need to Know
-
Raw Food Recipes2 months ago
Can a Dog Eat Raw Food? Essential Tips and Information
-
Raw Food Recipes2 months ago
What Is Raw Food for Dogs? A Complete Guide