Getting Started with Raw Food
Using My Food Saver – What Is The Best Way To Vacuum Seal Raw Hamburger Patties
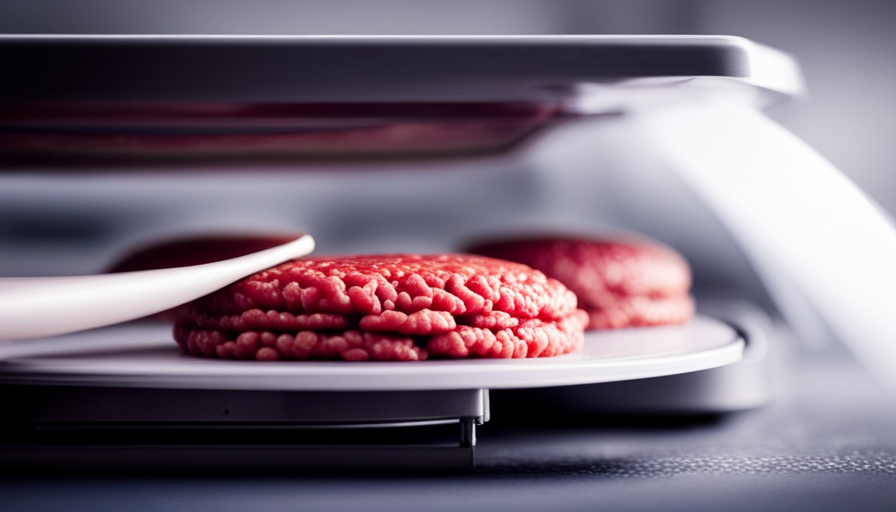
When it comes to maintaining the freshness and flavor of raw hamburger patties, my preferred method is using a food saver. This convenient tool allows me to vacuum seal my patties, keeping them fresh for extended periods of time. So, what is the most effective way to do this? Allow me to share some tips and tricks to help you achieve the best results.
First things first, selecting the right packaging material is crucial. You want something sturdy and airtight, like high-quality vacuum-seal bags. Once you’ve got that covered, it’s time to prepare your patties. Make sure they’re properly shaped and seasoned to your liking.
Next, arrange the patties in a single layer inside the bag, leaving some space between each one. This allows for even freezing and thawing. Now comes the fun part – removing excess air from the bag. Using the food saver, suck out all the air until the bag tightly hugs the patties.
Sealing the bag properly is essential to maintain the vacuum seal. Double-check that the seal is secure and airtight. Now, it’s time to store those vacuum-sealed patties. Place them in the freezer, making sure they’re in a flat, stable position.
When you’re ready to enjoy your delicious burgers, simply thaw and cook the vacuum-sealed patties as you normally would. But remember, safety first! Follow the recommended thawing and cooking guidelines to ensure your patties are safe to eat.
Lastly, let’s talk shelf life. When vacuum-sealed and stored properly, raw hamburger patties can last up to three to four months in the freezer. However, always trust your senses – if the patties have an off smell or appear discolored, it’s best to discard them.
Now that you’re armed with these tips and tricks, go ahead and confidently vacuum seal your raw hamburger patties with your trusty food saver. Your taste buds will thank you!
Key Takeaways
- Select high-quality vacuum-seal bags made from multilayer materials and suitable for freezing.
- Shape and season the hamburger patties before vacuum sealing, ensuring even distribution of seasoning and a slight indentation in the center.
- Remove excess air from the bag using a food saver to create a tight seal and maintain freshness.
- Properly label and date the vacuum-sealed patties to track freshness, prioritize use, and reduce the risk of spoilage.
Selecting the Right Packaging Material
Now, let’s talk about finding the perfect packaging material to keep your raw hamburger patties fresh and delicious. When it comes to vacuum sealing techniques, selecting the right packaging material is crucial. The benefits of vacuum sealing include extending the shelf life of your patties, preventing freezer burn, and preserving the flavor and juiciness.
For vacuum sealing raw hamburger patties, it’s recommended to use high-quality vacuum sealing bags or rolls specifically designed for food preservation. These bags are made from multilayer materials that provide a barrier against moisture and oxygen, which are the primary culprits behind food spoilage. Look for bags that are BPA-free and have a thickness of at least 3 mil to ensure maximum protection and durability.
When selecting the packaging material, make sure it’s compatible with your food saver machine. Some machines require specific types of bags or rolls, so it’s essential to check the manufacturer’s recommendations. Additionally, opt for bags that are suitable for freezing, as raw hamburger patties will most likely be stored in the freezer.
Now that you’ve selected the perfect packaging material, let’s move on to preparing the hamburger patties for vacuum sealing.
Preparing the Hamburger Patties
To prepare your hamburger patties for vacuum sealing, you’ll want to make sure they are shaped evenly and have a slight indentation in the center to prevent them from puffing up during cooking. This will ensure that the patties freeze well and maintain their shape.
When it comes to freezing techniques, it’s important to handle the raw meat with care to maintain its quality. After shaping the patties, you can choose to season them before vacuum sealing. This step allows the flavors to penetrate the meat, enhancing the taste when you cook them later. Some popular seasoning options include salt, pepper, garlic powder, or even a dash of Worcestershire sauce.
To add depth to this discussion, here’s a table showcasing different seasoning options you can use for your hamburger patties:
Seasoning Option | Description |
---|---|
Salt and Pepper | Classic and simple |
Cajun Seasoning | Adds a spicy kick |
Italian Seasoning | Infuses a herbaceous flavor |
Barbecue Rub | Gives a smoky taste |
After seasoning, arrange the patties in a single layer in your food saver bag or roll. This will ensure that they freeze evenly and maintain their shape.
Arrange the Patties in a Single Layer
Once you’ve shaped your evenly sized and seasoned hamburger patties, make sure to arrange them in a single layer. This step is crucial for maximizing freshness and ensuring the best results when vacuum sealing with your food saver. Here are some packing techniques to help you achieve optimal results:
-
Use a flat surface: Place the hamburger patties on a flat surface, like a baking sheet or cutting board, to ensure they are arranged in a single layer. This will prevent any patties from sticking together during the freezing process.
-
Leave space between patties: Make sure there is enough space between each patty to allow for proper airflow. This will help the patties freeze evenly and prevent ice crystals from forming, which can affect the texture and taste.
-
Avoid overlapping patties: Overlapping patties can cause uneven freezing and potential damage. Arrange them so they are not overlapping or touching each other.
-
Place a sheet of parchment paper: To further prevent sticking, you can place a sheet of parchment paper between each layer of hamburger patties. This will make it easy to separate them when it’s time to cook.
By following these packing techniques, you’ll be able to freeze your hamburger patties evenly and maintain their shape. Next, we’ll discuss how to remove excess air from the bag to preserve freshness and prevent freezer burn.
Removing Excess Air from the Bag
Ensure you remove excess air from the bag to preserve the freshness and prevent freezer burn, so your hamburger patties stay delicious and ready to cook whenever you desire.
When using a food saver to vacuum seal raw hamburger patties, it’s crucial to eliminate any excess air inside the bag. This step not only helps in maintaining the quality and taste of your patties but also extends their shelf life. By removing the air, you prevent the growth of bacteria and the oxidation process that can lead to spoilage.
To remove excess air from the bag, first, ensure that the vacuum sealer is in good working condition. Regular maintenance of your vacuum sealer will guarantee optimal performance.
Once you have arranged the patties in a single layer, carefully place the open end of the bag into the vacuum sealer. Activate the vacuum seal function, and the machine will start removing the air from the bag. As the air is removed, you’ll notice the bag tightly wrapping around the patties, creating a seal that locks in the freshness.
Properly sealing the bag is essential to maintain the vacuum seal and prevent any air from re-entering. This will further enhance the benefits of vacuum sealing, such as preventing freezer burn and preserving the flavor and texture of your hamburger patties.
With the excess air removed and the bag sealed securely, your patties are now ready to be stored in the freezer or cooked right away.
Sealing the Bag Properly
Properly sealing the bag is key to preserving the freshness and flavor of your mouthwatering hamburger patties, ensuring they stay delicious until you’re ready to cook them.
When using a food saver to vacuum seal raw hamburger patties, it’s essential to follow the correct procedures to achieve an airtight seal. If you don’t have a vacuum sealer, there are alternative methods you can use. One option is to use a zip-top bag and remove as much air as possible by hand before sealing it tightly. Another option is to use a straw to suck out the excess air before sealing the bag.
If you’re experiencing sealing issues with your vacuum sealer, there are a few troubleshooting steps you can take. First, make sure that the bag is properly positioned in the sealer and that the sealing strip is clean and free from any debris. If the bag isn’t sealing properly, you may need to adjust the sealing time or temperature settings on your machine. It’s also important to check for any wrinkles or folds in the bag that may be preventing a proper seal.
In the next section, we’ll discuss the importance of labeling and dating the vacuum-sealed patties to keep track of their freshness and ensure you use them in a timely manner.
Labeling and Dating the Vacuum-Sealed Patties
Labeling and dating the vacuum-sealed patties is a simple yet crucial step in keeping track of their freshness and ensuring they’re used within the optimal time frame. By labeling the packages, you can easily identify the contents without having to open them, saving time and reducing the risk of spoilage.
Additionally, dating the patties allows you to prioritize their use based on the date of sealing. This ensures that older patties are used first, minimizing waste and maintaining quality.
When labeling the vacuum-sealed patties, it’s important to include essential information such as the date of sealing and the type of meat. This helps you keep track of when the patties were prepared and identify any potential issues in case of a recall or foodborne illness. You can use waterproof labels or permanent markers to ensure the information remains intact and legible throughout the storage period.
Proper storage recommendations for vacuum-sealed patties include keeping them in a freezer set at or below 0°F (-18°C). This temperature ensures that the patties remain frozen and maintain their quality and taste for an extended period. It’s important to stack the patties flat and avoid overpacking to allow for efficient air circulation and even freezing.
In the subsequent section about storing the vacuum-sealed patties, we’ll discuss the importance of proper packaging and the ideal storage duration to maintain the best quality.
Storing the Vacuum-Sealed Patties
To store your vacuum-sealed patties, remember to follow these important guidelines for optimal freshness and taste.
When storing frozen patties, it’s crucial to keep them in a well-organized freezer. This will not only ensure easy access but also prevent any potential cross-contamination with other food items.
Start by designating a specific area in your freezer for the patties, preferably on a lower shelf, away from raw meats and other perishable items. This will help maintain a consistent temperature and prevent any accidental thawing.
To further protect the patties, place them in a sturdy plastic container or ziplock bag before placing them in the designated area. This will provide an extra layer of protection against freezer burn and help maintain their shape. Additionally, make sure to label and date each package to keep track of their freshness.
When organizing the freezer, it’s best to stack the patties in a way that allows for easy retrieval. Place the oldest packages at the front, so they’re used first, while keeping the newer ones towards the back. This rotation system will ensure that you consume the patties in the order they were stored, minimizing any potential waste.
By properly storing your vacuum-sealed patties in an organized freezer, you can maintain their quality and taste for an extended period.
Now, let’s move on to the next step: thawing and cooking the vacuum-sealed patties.
Thawing and Cooking the Vacuum-Sealed Patties
After storing the vacuum-sealed patties, it’s important to know the proper way to thaw and cook them. When it’s time to enjoy those juicy hamburgers, I recommend thawing the patties in the refrigerator overnight. This slow thawing method ensures even defrosting and minimizes the risk of bacterial growth.
Once thawed, it’s time to fire up the grill or heat up the skillet. Before cooking, you can season the patties according to your taste preferences. From classic salt and pepper to more adventurous spice blends, the possibilities are endless. Just make sure to evenly distribute the seasoning on both sides of the patty for maximum flavor.
When it comes to cooking temperature, the USDA recommends cooking ground beef to an internal temperature of 160°F (71°C) to ensure it’s safe to eat. This temperature kills any potential bacteria present in the meat.
Now that we’ve covered thawing and cooking, let’s move on to the next section about shelf life and safety guidelines. It’s important to understand how long vacuum-sealed hamburger patties can be stored and the proper safety measures to follow.
Shelf Life and Safety Guidelines
To ensure the safety of your vacuum-sealed hamburger patties and prolong their shelf life, it’s crucial to follow these guidelines and take the necessary precautions. Factors affecting the shelf life of vacuum-sealed hamburger patties include temperature, moisture, and oxygen exposure. Proper handling and storage are of utmost importance for food safety in vacuum-sealed patties.
Temperature plays a key role in the shelf life of vacuum-sealed hamburger patties. It is recommended to store them at or below 40°F (4°C) to inhibit bacterial growth. Moisture can lead to spoilage, so it’s essential to remove excess moisture from the patties before sealing. Additionally, exposure to oxygen can cause oxidation and deterioration of the meat, resulting in a shorter shelf life. By vacuum sealing, you can effectively remove oxygen from the packaging, extending the quality and freshness of the patties.
To better understand the impact of these factors, refer to the table below:
Factors | Shelf Life Impact |
---|---|
Temperature | Prolongs shelf life when kept at or below 40°F (4°C) |
Moisture | Excess moisture leads to spoilage |
Oxygen exposure | Oxidizes meat, causing deterioration |
By following these guidelines and considering these factors, you can maximize the shelf life and ensure the safety of your vacuum-sealed hamburger patties. Now, let’s explore additional tips and tricks for vacuum sealing raw hamburger patties.
Additional Tips and Tricks for Vacuum Sealing Raw Hamburger Patties
Now that we understand the shelf life and safety guidelines for vacuum sealing raw hamburger patties, let’s explore some additional tips and tricks to ensure the best results.
When it comes to vacuum sealing raw hamburger patties, there are a few things to keep in mind. First, it’s essential to handle the patties with clean hands and ensure they’re properly shaped and sized for your needs. Here are some additional tips to consider:
-
Freeze patties before vacuum sealing: Freeze the patties for about 30 minutes prior to vacuum sealing. This will help maintain their shape and prevent them from getting squished during the sealing process.
-
Use parchment paper: Place a small piece of parchment paper between each patty before vacuum sealing. This can prevent them from sticking together, making it easier to separate and thaw only the desired amount.
-
Vacuum seal fruits: Utilize your food saver for vacuum sealing fruits as well. This’ll help preserve their freshness and extend their shelf life, making them perfect for smoothies or baking.
-
Vacuum seal leftovers: Don’t limit your food saver to just raw patties. Vacuum sealing leftovers like cooked hamburger patties can help maintain their flavor and juiciness, allowing you to enjoy the same deliciousness even after some time.
By following these additional tips and tricks, you can maximize the benefits of using your food saver and ensure that your vacuum-sealed raw hamburger patties stay fresh and delicious for an extended period.
Frequently Asked Questions
Can I vacuum seal my hamburger patties with regular plastic wrap?
No, regular plastic wrap isn’t suitable for vacuum sealing hamburger patties. Vacuum sealing offers several benefits such as preventing freezer burn, extending the shelf life, and maintaining the freshness of food. To properly vacuum seal raw hamburger patties, it’s recommended to use a food saver or vacuum sealer machine. Alternatively, you can store the patties in airtight containers or freezer bags to maintain their quality and prevent spoilage.
How long can I store vacuum-sealed hamburger patties in the freezer?
When it comes to storing vacuum-sealed hamburger patties in the freezer, you’ll be pleased to know that they can last for an extended period of time. The airtight seal created by vacuum sealing ensures minimal exposure to air and prevents freezer burn. As a result, you can safely store your vacuum-sealed hamburger patties for up to 6-12 months in the freezer.
This same technique can also be applied to vacuum sealing fruits and cheese, extending their shelf life and preserving their freshness.
Can I use the food saver to vacuum seal cooked hamburger patties?
Yes, you can use the Food Saver to vacuum seal cooked hamburger patties. This is a great cooking tip for burger storage. To do so, make sure the cooked patties have completely cooled down before sealing them. Place each patty in a separate vacuum seal bag, removing as much air as possible. This will help prevent freezer burn and extend the shelf life of your cooked hamburger patties.
What is the recommended temperature for thawing vacuum-sealed hamburger patties?
The recommended thawing methods for vacuum-sealed hamburger patties depend on the desired meat quality. Thawing at room temperature isn’t recommended as it can promote bacterial growth. Instead, it’s best to thaw the patties in the refrigerator.
This slow thawing process helps maintain the meat’s texture and flavor. Thawing at higher temperatures, such as in a microwave, can negatively impact the quality of the meat, resulting in a less desirable texture and taste.
Are there any safety guidelines I should follow when vacuum sealing raw hamburger patties?
When vacuum sealing raw hamburger patties, it’s important to follow safety guidelines and best practices. Firstly, make sure the patties are fresh and properly handled to minimize the risk of contamination.
Secondly, ensure that the sealing bags or containers are clean and free from any debris.
Lastly, when sealing, remove as much air as possible to maintain the quality and extend the shelf life of the patties.
By adhering to these safety guidelines, you can ensure the safety and freshness of your vacuum-sealed raw hamburger patties.
How Can Vacuum Sealing Help with Raw Food Diet?
Vacuum sealing can preserve the freshness of raw food, maintaining its nutrients and flavors. By removing excess air, vacuum sealing prevents the growth of bacteria and mold, extending the shelf life of food. This method can contribute to achieving the projected results raw food diet enthusiasts aim for in terms of food preservation.
Conclusion
In conclusion, my experience with using the Food Saver to vacuum seal raw hamburger patties has been nothing short of extraordinary.
The careful selection of packaging material, the precise arrangement of the patties, and the meticulous removal of excess air from the bag have all contributed to the perfect preservation of my precious patties.
With the proper sealing and storage techniques, I can confidently say that my vacuum-sealed patties will remain fresh and delicious for an extended period of time.
So go forth, my fellow hamburger enthusiasts, and embark on your own vacuum sealing adventure! Your taste buds will thank you.
With her ability to convey complex concepts in a clear and accessible manner, Belinda ensures that readers of all backgrounds can grasp the benefits and techniques of raw food. She excels at breaking down scientific information into digestible pieces, allowing readers to understand the impact of raw food on their bodies and encouraging them to make informed choices about their diet.
One of Belinda’s notable contributions to rachaelsrawfood.com is her collection of mouthwatering recipes. She delights in experimenting with various combinations of raw ingredients, exploring innovative ways to create delicious and nutritious meals. Belinda’s recipes showcase the incredible flavors and textures of raw food and emphasize its versatility, dispelling any misconception that a raw food diet is limited or monotonous.
In addition to her writing responsibilities, Belinda actively engages with the raw food community, attending workshops, seminars, and conferences to expand her knowledge and network. She enjoys connecting with like-minded individuals, exchanging ideas, and staying up to date with the latest trends and advancements in the field of raw food nutrition.
Getting Started with Raw Food
Does Raw Food Make Dogs Constipated? Find Out Here
Observe the signs of constipation in dogs on a raw food diet; discover how to ensure their digestive health. What solutions exist?
Feeding your dog a raw food diet can indeed cause constipation if it isn't balanced right. Excessive bone content might lead to hard stools, while not including enough fiber from fruits and vegetables can worsen the issue. Dehydration is also common with raw diets, contributing to stool hardness. If you notice signs like straining to defecate or rock-hard stools, it's important to adjust the diet. Adding fiber-rich foods like pumpkin and keeping your dog hydrated are key. There's more you can do to guarantee a healthy digestion for your dog, so keep exploring options for their diet.
Key Takeaways
- Raw diets can lead to constipation due to excessive bone content resulting in hard stools.
- Insufficient fiber from a lack of fruits and vegetables can exacerbate digestive issues.
- Dehydration is common in raw diets, which contributes to stool hardness.
- Rapid transitions to a raw diet without gradual adjustments may disrupt a dog's digestion.
- Regular monitoring of stool consistency and dietary balance is essential for preventing constipation.
Understanding Dog Constipation
Constipation in dogs can be a concerning issue for pet owners, and it's important to recognize the signs early. You might notice that your dog hasn't had a bowel movement for over 24 hours, is straining while trying to defecate, or producing rock-hard stools. These symptoms indicate that your dog's digestive tract needs attention.
Diet plays an essential role in your dog's bowel health, and understanding proper hamster care can help you appreciate the importance of nutrition in pet health. If your dog is on a raw diet, insufficient fiber and excessive bone content can contribute to constipation. It's crucial to provide enough fiber to help your dog maintain regular bowel movements. Foods like pumpkin and leafy greens can be excellent additions to their diet.
Additionally, keep an eye on your dog's hydration and make sure they get plenty of exercise. Both of these factors are significant for promoting healthy digestion and preventing constipation.
If you're concerned about your dog's condition, consider adjusting their diet by reducing bone content and incorporating fiber-rich foods. By taking these steps, you can help your dog overcome constipation and support their overall health.
Causes of Constipation in Raw Diets
A raw diet can sometimes lead to constipation in dogs, primarily due to excessive bone content. When the diet consists of too many bones, it can result in hard stools that hinder regular bowel movements.
Additionally, insufficient fiber intake from a lack of fruits and vegetables can exacerbate the problem. It's essential to incorporate fiber-rich foods like pumpkin and leafy greens to support healthy digestion, as recommended in gout nutrition guidelines.
Dehydration also plays a significant role in constipation. Since raw diets often contain less moisture than processed foods, your dog may not be drinking enough water, further contributing to hard stools.
Stress, changes in routine, or dietary imbalances can influence gut motility, leading to irregular bowel movements as well.
Moreover, if you shift your pet to a raw diet too quickly without a gradual introduction of new foods, it can disrupt their digestive system. This sudden change may result in constipation or other gastrointestinal issues.
To prevent these causes of constipation, verify that your dog's raw diet is balanced and includes sufficient fiber and hydration. This way, you can help maintain your dog's digestive health.
Signs and Symptoms to Observe
Recognizing the signs and symptoms of constipation in your dog is essential for timely intervention. Pay close attention to any lack of stool for over 24 hours, as this can be a clear indication that your dog is experiencing constipation.
If you notice your dog is straining during defecation, it's vital to take action. Straining often accompanies hard stools that resemble pebbles, signaling that your dog may be in discomfort. Additionally, providing your dog with healthy snacks can promote better digestion and overall health, potentially mitigating constipation issues.
Behavioral changes can also be significant. If your dog seems reluctant to move, avoids activities they usually enjoy, or shows signs of discomfort while attempting to relieve themselves, these may be warning signs of constipation.
It's important to monitor stool consistency regularly. Hard stools can lead to further complications, so keeping an eye on your dog's bathroom habits is key.
Dietary Adjustments for Relief
Making dietary adjustments can greatly help alleviate your dog's constipation. Start by reducing the frequency of raw meaty bones in their diet, as these can lead to drier, harder stools.
Instead, focus on incorporating extra fruits and vegetables, like pumpkin or leafy greens, which provide essential fiber that aids in regulating bowel movements. Additionally, guaranteeing proper hydration is vital; consider how air quality considerations can parallel maintaining your dog's overall health, including digestive wellness.
Feeding a balanced raw diet consisting of 80% muscle meat, 10% bone, and 10% offal guarantees your dog gets adequate moisture and nutrients, promoting healthy digestion.
Pureed pumpkin or canned unsweetened pumpkin can be particularly effective, thanks to its high fiber content, making it easier for your dog to defecate without straining.
Don't forget about hydration! Make sure your dog has access to fresh water or bone broth, as regular hydration is essential for maintaining stool consistency and preventing constipation.
By making these dietary adjustments, you'll create a more balanced raw food experience that supports your dog's digestive health and helps alleviate constipation.
Supplement Options for Digestive Health
How can you enhance your dog's digestive health while minimizing constipation? Exploring effective supplement options can make a significant difference. Here are some to evaluate:
- Probiotics: These promote a diverse gut microbiome, which is essential for good digestion and can help mitigate issues such as gastrointestinal issues.
- Digestive enzymes: They help break down raw proteins and fats, improving nutrient absorption.
- Slippery elm: This natural remedy soothes the gastrointestinal tract and creates a protective mucous lining. A dosage of ¼ teaspoon per 10 lbs of body weight is recommended.
- Leafy greens: Incorporating fiber-rich foods like kale or spinach can regulate bowel movements, alleviating constipation.
- Omega-3 oil: Regular supplementation with this healthy oil supports overall digestive health and improves stool consistency.
When to Consult a Veterinarian
If your dog hasn't had a bowel movement in over 24 hours, it's time to consult a veterinarian.
It's important to keep an eye on your dog's overall behavior and health, as changes can indicate underlying issues that may require immediate attention.
Look out for persistent straining, discomfort, or any behavioral changes that indicate pain.
Addressing these signs early can help prevent more serious health issues down the line.
Additionally, emotional and psychological support available for families can be beneficial during such stressful times.
Persistent Lack of Stool
When your dog goes more than 24 hours without a stool, it's time to consult a veterinarian to rule out any serious health issues. A persistent lack of stool can indicate underlying problems that need addressing.
Here are some signs to watch for:
- Decreased energy levels or reluctance to move
- Hard, rock-like stools that signal constipation
- Straining to defecate with little or no output
- Signs of pain during attempts to relieve themselves
- Changes in appetite or behavior, indicating discomfort
If your dog's raw food diet lacks fiber, it could cause constipation, leading to infrequent dogs' bowel movements. Adding vegetables such as spinach, carrots, and sweet potatoes to their diet can help increase the fiber content and improve their digestion. It is important to consult with a veterinarian before switching to raw dog food, as they can provide guidance on the best diet for your dog’s specific needs. In some cases, adding a fiber supplement may also be necessary to ensure your dog’s digestive health.
Creating a personal budget for your pet's dietary needs can guarantee they receive the right nutrients. Loose stools can also disrupt gut health, making it essential to maintain a balanced diet.
If you notice any of these symptoms, don't hesitate to seek veterinary advice. Early intervention is key to identifying and treating the root cause of your dog's persistent lack of stool.
Delaying could complicate the situation, so it's best to act promptly. Remember, your dog's well-being depends on your vigilance in recognizing these signs!
Straining and Discomfort Signs
Straining to defecate can be a clear sign that your dog is experiencing constipation, and it's important to recognize this symptom early.Breast cancer symptoms in dogs can sometimes mimic signs of discomfort, so it's vital to differentiate between the two. If you notice your dog straining excessively or having difficulty passing stool, it's necessary to consult a veterinarian, especially if this persists. Signs of discomfort, like whining or trembling while attempting to defecate, should prompt an immediate visit to the vet.
A lack of bowel movements for more than 24 hours is a significant indicator of constipation and requires professional evaluation to rule out any underlying issues. Additionally, if your dog produces rock-hard stool consistently, this often signifies constipation, and you should seek veterinary advice.
Keep an eye on any changes in your dog's behavior; decreased activity levels or reluctance to move may also signal discomfort related to being constipated.
Addressing these signs of discomfort promptly can help prevent more serious health problems down the line. Remember, when in doubt about your dog's bowel habits or overall well-being, don't hesitate to reach out for a veterinary consultation. Your dog's health and comfort should always come first.
Behavioral Changes and Pain
Recognizing behavioral changes in your dog can provide important clues about their health, especially regarding constipation.
Similar to individuals with BPD dynamics in relationships, dogs may exhibit changes in behavior when experiencing discomfort or pain. If your dog exhibits any of the following signs, it's time to reflect on a vet consultation:
- Reluctance to move or play
- Straining and difficulty when trying to defecate
- Whining or trembling during attempts to have a bowel movement
- Rock-hard stools that are difficult to pass
- An absence of bowel movements for more than 24 hours
These signs of pain and discomfort can indicate that your dog needs immediate attention.
Straining to defecate is a clear indicator of constipation, and if your pet struggles for over a day, it may suggest a more serious underlying issue. Obvious signs of distress during defecation, such as whining, should never be ignored.
If you notice any of these behavioral changes, don't hesitate to consult your vet.
Early intervention can prevent complications and guarantee your dog's digestive health is maintained.
Frequently Asked Questions
Is It Normal for Dogs to Poop Less on a Raw Diet?
It's normal for dogs to poop less on a raw diet. You'll notice smaller, firmer stools due to higher digestibility. Just keep an eye out for any signs of constipation or distress in your dog.
How Do You Soften a Dog's Poop on a Raw Diet?
Did you know that 60% of dog owners notice firmer stools on a raw diet? To soften your dog's poop, balance their meals, add fiber, guarantee hydration, and encourage daily exercise for ideal digestive health.
What Foods Cause Dogs to Be Constipated?
Certain foods can cause constipation in dogs. High bone content, low-fiber diets, dry kibble, excessive lean meats, and non-digestible items like toys can all contribute to hard stools. Guarantee a balanced diet to prevent this.
How Long Does It Take for a Dog to Digest Raw Food and Poop?
It usually takes your dog 12 to 24 hours to digest raw food, depending on their age and size. You might notice smaller, less frequent stools due to improved nutrient absorption from the diet.
Conclusion
To sum up, while a raw food diet can be beneficial for many dogs, it can also lead to constipation if not balanced properly. Keep an eye on your pup's signs and symptoms, and make dietary adjustments as needed. If the issue persists, don't hesitate to consult your veterinarian, who can help you navigate this digestive maze. Remember, with the right approach, you can keep your dog's tummy happier than a kid in a candy store!
With her ability to convey complex concepts in a clear and accessible manner, Belinda ensures that readers of all backgrounds can grasp the benefits and techniques of raw food. She excels at breaking down scientific information into digestible pieces, allowing readers to understand the impact of raw food on their bodies and encouraging them to make informed choices about their diet.
One of Belinda’s notable contributions to rachaelsrawfood.com is her collection of mouthwatering recipes. She delights in experimenting with various combinations of raw ingredients, exploring innovative ways to create delicious and nutritious meals. Belinda’s recipes showcase the incredible flavors and textures of raw food and emphasize its versatility, dispelling any misconception that a raw food diet is limited or monotonous.
In addition to her writing responsibilities, Belinda actively engages with the raw food community, attending workshops, seminars, and conferences to expand her knowledge and network. She enjoys connecting with like-minded individuals, exchanging ideas, and staying up to date with the latest trends and advancements in the field of raw food nutrition.
Getting Started with Raw Food
Why Is Raw Food Bad for Cats? Essential Information
Overlooking the dangers of raw food diets for cats can lead to serious health risks; discover what you need to know for your feline’s safety.
Feeding your cat a raw food diet can be risky due to harmful bacteria like Salmonella and E. coli, which can cause severe gastrointestinal issues such as vomiting and diarrhea. About 25% of raw pet food samples have tested positive for these pathogens. Additionally, raw diets often lack essential nutrients like taurine, which can lead to serious health problems over time. Contamination during preparation increases health risks not just for your cat but for humans as well. Safety practices are vital if you decide to go this route, but there are safer, balanced alternatives that might better meet your cat's needs.
Key Takeaways
- Raw food diets can expose cats to harmful pathogens like Salmonella and E. coli, posing health risks to both pets and humans.
- Nutritional deficiencies are common in raw diets, lacking essential nutrients necessary for a cat's overall health and development.
- Improper preparation and handling of raw food increase the risk of contamination, leading to severe gastrointestinal issues in cats.
- Cats can be asymptomatic carriers of pathogens, increasing the risk of transmitting infections to humans through raw food.
- High-quality commercial cat foods offer balanced nutrition and are safer alternatives, minimizing health risks associated with raw diets.
Health Risks of Raw Food
When considering a raw food diet for your cat, it's vital to understand the health risks involved. Raw food diets can carry significant contamination risks with harmful pathogens such as Salmonella and E. coli. Studies indicate that nearly 25% of raw pet food samples test positive for these bacteria. The CDC estimates that there are about 1.2 million annual cases of foodborne salmonellosis in the U.S., and your cat could act as an asymptomatic carrier, increasing the risk of human exposure.
Additionally, just as in financial planning for elderly care, understanding the long-term impact of dietary choices is important for maintaining overall health and well-being.
Moreover, Listeria monocytogenes, another pathogen found in raw diets, poses serious dangers, especially for vulnerable populations like pregnant women and newborns. Cats fed raw diets may experience gastrointestinal issues such as vomiting and diarrhea, which can lead to severe health consequences for both them and their human caregivers.
Veterinary organizations like the CDC and AVMA strongly advise against raw diets due to these health risks. They emphasize the importance of safe handling practices to minimize contamination, but even with precautions, the dangers of raw pet food remain significant.
Ultimately, you must weigh these risks carefully when considering your cat's diet.
Nutritional Concerns
Cats thrive on balanced nutrition, but raw food diets often fall short in providing essential nutrients. Many raw food diets lack essential components like taurine, vitamins A, D, and E, which are critical for your cat's health. Without these essential nutrients, your feline friend could face serious nutritional deficiencies that lead to health issues over time.
Furthermore, it's important to understand the implications of dietary choices on overall health and wellness, as proper budgeting for pet care guarantees your cat receives the best nutrition possible.
Homemade raw diets frequently miss the mark on meeting complete and balanced nutritional requirements. This oversight can result in calcium imbalances, affecting bone health and overall development, particularly in growing cats. In adult cats, these imbalances can also lead to significant health concerns.
Additionally, without veterinary guidance, feeding your cat a raw food diet can be risky. Only a small percentage of analyzed homemade raw diets have been found to be complete and balanced. The potential for harmful bacteria in raw diets can further complicate nutritional adequacy, as it may contribute to nutrient loss.
To guarantee your cat receives the balanced diet they need, consult with a veterinarian before making any changes to their diet, especially if you're considering raw food options.
Pathogen Contamination
Feeding your cat a raw food diet can open the door to serious health risks, particularly due to pathogen contamination. Studies show that nearly 25% of raw cat food samples are contaminated with harmful bacteria, including Salmonella and Listeria.
These pathogens can pose significant risks not only to your cat but also to your household. Pets with emotional dysregulation, such as those with BPD dynamics in relationships, may also exhibit increased anxiety, making them more vulnerable to health issues.
Salmonella, for instance, causes around 1.2 million human infections each year, with cats often acting as asymptomatic carriers, increasing the chance of transmission to humans.
Listeria monocytogenes, another common threat in raw diets, leads to severe foodborne illnesses, contributing to approximately 1,600 cases and 260 deaths annually in the US. The risks escalate, especially in households with young children or immunocompromised individuals, as they're more vulnerable to these pathogens.
Improper preparation and handling raw food can exacerbate the risks of contamination, making it critical to understand the serious implications of a raw diet.
While your cat may enjoy the taste, the potential health hazards from contaminated raw cat food can lead to dire consequences for both your pet and your family.
Safe Handling Practices
Practicing safe handling techniques is vital to minimize the risks associated with feeding your cat a raw food diet. As a pet parent, you need to be vigilant about harmful bacteria like Salmonella and Listeria that can thrive in raw cat food.
Regularly monitoring your cat's health for any signs of illness can also be beneficial, as certain dietary choices may impact their well-being, including ultimate hamster care. Always wash your hands thoroughly with soap and water after handling any raw food. This simple step helps prevent the spread of these pathogens.
To guarantee a safe environment, clean and disinfect all surfaces, utensils, and feeding dishes that come into contact with raw food. Remember to store raw cat food in the freezer until you're ready to use it, and thaw it safely in the refrigerator or microwave. This prevents bacterial growth and keeps your cat's nutritional needs in check.
Keep raw cat food separate from human food items during storage and preparation to avoid cross-contamination. It's also important to avoid rinsing raw meat before preparation, as this can cause splashing and spread bacteria to surrounding surfaces and utensils.
Alternatives to Raw Diets
When considering alternatives to raw diets, many pet owners find themselves weighing the benefits of high-quality commercial foods. These commercially prepared options, formulated by veterinary nutritionists, provide a complete and balanced diet that meets your cat's nutritional needs without the risks associated with raw feeding.
Additionally, some commercial diets are specifically designed to support urinary health, which is essential for preventing common feline health issues recommendations for usage based on symptoms.
Cooked food is another excellent choice. It can be tailored to eliminate harmful bacteria, making it a safer alternative to raw diets. High-quality canned cat foods often have higher moisture content, supporting hydration and benefiting your cat's urinary health.
If your cat has food sensitivities or allergies, you might explore limited ingredient diets (LID) or hypoallergenic commercial foods. These options provide safe alternatives without the dangers linked to raw diets.
It's vital to consult with a veterinarian when making dietary changes. They can guide you in selecting high-quality commercial diets or cooked homemade meals that align with your cat's health needs.
Frequently Asked Questions
Why Is Raw Food Bad for Cats?
Raw food diets can expose your cat to harmful bacteria and nutritional deficiencies. They often lack essential nutrients, and unprocessed bones might cause serious injuries. It's best to stick to balanced, vet-recommended diets for your cat's health.
Why Do Vets Say Raw Food Is Bad?
Oh sure, let's serve your cat raw meat like a gourmet delicacy! Vets warn against it because of bacteria, nutrient deficiencies, and potential harm to both your pet and your family. Cooked food's safer, trust them!
Do Vets Recommend a Raw Diet for Cats?
Most vets don't recommend a raw diet for cats due to health risks like bacterial contamination and nutritional imbalances. They suggest opting for high-quality commercial cat foods to guarantee your pet's health and well-being.
What Are the Dangers of Raw Food?
Raw food diets can expose your cat to harmful bacteria like Salmonella and E. coli, leading to severe illness. They might also cause nutrient deficiencies and pose choking hazards from unprocessed bones, risking your cat's health. Additionally, raw food diets can lead to potential dental issues and digestive problems for cats. In fact, some studies have linked raw food diets to an increased risk of tooth decay and gum disease in cats. Furthermore, it’s important to note that raw food and dog constipation can also be a concern, as the lack of fiber in raw diets can lead to bowel irregularities and discomfort for pets. Therefore, it’s crucial to carefully consider the potential risks before deciding to switch your cat to a raw food diet.
Conclusion
In the grand tapestry of feline nutrition, raw food might seem like a tempting thread, but it can unravel quickly with health risks and nutritional concerns. While the allure of a raw diet is strong, remember the hidden dangers lurking within pathogens that can harm your cat. By exploring safer alternatives, you can guarantee your furry friend thrives. After all, a happy cat is a healthy cat, and that's the purrfect goal for every pet owner!
With her ability to convey complex concepts in a clear and accessible manner, Belinda ensures that readers of all backgrounds can grasp the benefits and techniques of raw food. She excels at breaking down scientific information into digestible pieces, allowing readers to understand the impact of raw food on their bodies and encouraging them to make informed choices about their diet.
One of Belinda’s notable contributions to rachaelsrawfood.com is her collection of mouthwatering recipes. She delights in experimenting with various combinations of raw ingredients, exploring innovative ways to create delicious and nutritious meals. Belinda’s recipes showcase the incredible flavors and textures of raw food and emphasize its versatility, dispelling any misconception that a raw food diet is limited or monotonous.
In addition to her writing responsibilities, Belinda actively engages with the raw food community, attending workshops, seminars, and conferences to expand her knowledge and network. She enjoys connecting with like-minded individuals, exchanging ideas, and staying up to date with the latest trends and advancements in the field of raw food nutrition.
Kitchen Essentials for Raw Food Preparation
Which Raw Food Should Be Stored Above? Essential Tips
Learn the crucial hierarchy of raw food storage to prevent cross-contamination and ensure safety—discover the essential tips that could change your kitchen practices!
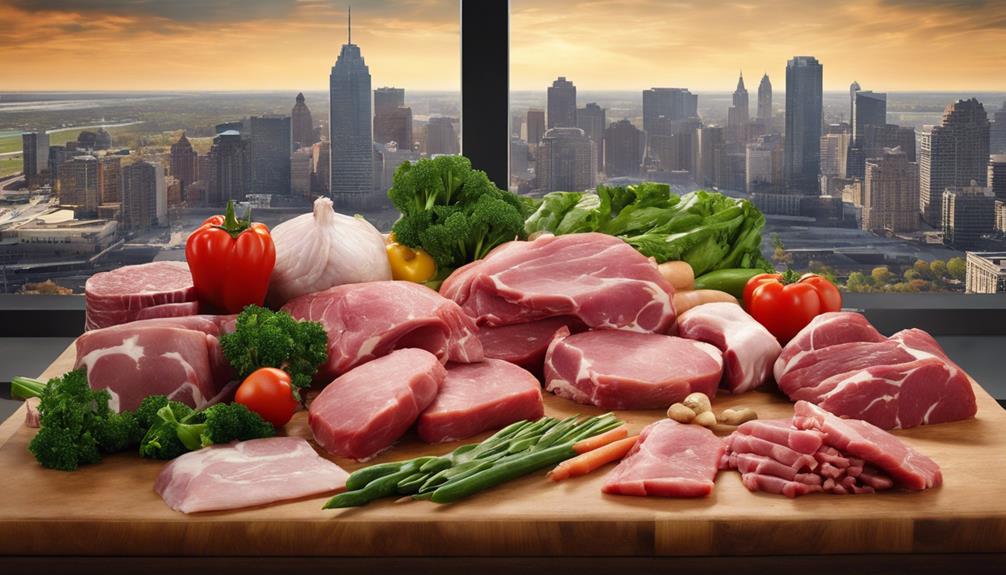
When organizing your refrigerator, always store raw fish on the top shelf. This placement minimizes the risk of cross-contamination with other foods. It's essential to wrap the fish tightly in plastic wrap or foil and keep it in a sealed container to prevent exposure to contaminants. Below the fish, you can store whole cuts of beef and pork on the middle shelf, while ground meats go lower. Finally, raw poultry should be on the bottom shelf to avoid any leakage. Understanding these storage tips can greatly enhance your food safety practices. You'll discover even more helpful advice ahead.
Key Takeaways
- Store raw fish on the top shelf to minimize the risk of cross-contamination with other foods.
- Whole cuts of beef and pork should be placed directly below fish on the middle shelf.
- Ground meats must be stored on the lower middle shelf, beneath whole cuts of beef and pork.
- Raw poultry should always be kept on the bottom shelf to prevent juices from contaminating other items.
- Use sealed containers for all raw foods to further reduce the risk of contamination.
Importance of Food Hierarchy
When it comes to food storage, understanding the importance of food hierarchy is vital for maintaining safety in your kitchen. By organizing your refrigerator correctly, you can minimize the risk of cross-contamination, which is essential for raw food safety. Proper food storage practices can help ward off foodborne illnesses, similar to how cold medications should be chosen for effective relief.
Start with seafood, which should always be stored on the top shelf. It's the most perishable and should be kept above other raw foods to prevent any juices from dripping down.
Next, place whole cuts of beef and pork on the middle shelf. This keeps them safely above ground meats and seafood, adhering to the food storage hierarchy. Ground meats and fish should be stored on the lower middle shelf, where they can be contained separately from poultry, which you must always put on the bottom shelf. This prevents any juices from raw poultry from contaminating other foods, markedly reducing cross-contamination risks.
Following this organization not only minimizes the chances of foodborne illnesses but also makes it easier to access your ingredients when cooking. By adhering to these guidelines, you guarantee that your kitchen remains safe and efficient while handling raw foods.
Storing Fish Correctly
When storing fish, it's vital to prioritize proper storage techniques to keep it fresh and safe.
You should always maintain the right temperature and take steps to prevent cross-contamination, especially with other raw foods.
Regular cleaning of storage areas is essential to guarantee hygiene and minimize the risk of foodborne illnesses.
Importance of Proper Storage
Storing fish correctly is essential for maintaining its freshness and guaranteeing food safety. To prevent contamination, always place fish on the top shelf of your refrigerator. This helps minimize the risk of juices leaking from raw meats or poultry stored below, which could spoil your fish.
Additionally, consider incorporating aquatic exercise into your routine, as it promotes overall health which is beneficial when handling and preparing food. Wrapping your fish tightly in plastic wrap or aluminum foil is important, as it prevents exposure to contaminants and helps maintain its quality.
Be certain to store fish in a sealed container, keeping it separate from raw meats and poultry. This extra layer of protection further reduces the risk of cross-contamination.
Regularly check the use-by dates on your fish to verify you're consuming it while it's still safe. Proper refrigeration is essential; keep your fish at or below 5 °C to inhibit harmful bacteria growth.
Temperature Control Guidelines
Maintaining the right temperature is essential for guaranteeing your fish stays fresh and safe to eat. Store your fish on the top shelf of the fridge to avoid cross-contamination with other raw foods like beef and pork. The ideal storage temperature for fish is below 5 °C, which helps minimize bacterial growth and keeps it fresh.
Here's a quick overview of proper fish storage:
Storage Guidelines | Details |
---|---|
Ideal Temperature | Below 5 °C |
Storage Location | Top shelf of the fridge |
Wrap | Tightly in plastic wrap or aluminum foil |
Below Fish | Whole cuts of beef and pork |
Always check the temperature of your fridge regularly to guarantee it stays at or below that critical level. Wrapping your fish tightly prevents exposure to contaminants, further maintaining its quality. Following these temperature control guidelines will help keep your fish safe and delicious for you and your family.
Cross-Contamination Prevention Strategies
To keep your fish safe from cross-contamination, always place it on the top shelf of your refrigerator. This prevents fish juices from dripping onto other raw foods, reducing the risk of spoilage and bacteria spreading.
Proper food handling and storage practices are fundamental to maintaining a safe kitchen environment, especially when it comes to preventing cross-contact with other raw ingredients.
Here are three fundamental strategies for storing fish correctly:
- Use a Sealed Container: Store your fish in a well-sealed container or tightly wrapped to minimize any leakage. This is critical in preventing cross-contamination with other foods.
- Separate Storage: Always keep fish separate from raw poultry and meats. These should be placed on the lower shelves to avoid any drips that could contaminate the fish.
- Monitor Temperature: Verify your refrigerator maintains a temperature of 5 °C or below. This is essential for temperature management and helps inhibit bacterial growth, keeping your fish fresh longer.
Regularly check your fish for signs of spoilage and consume or cook it within a safe timeframe.
Poultry Safety Practices
When it comes to poultry safety, proper storage is key to preventing foodborne illnesses. Always store raw poultry on the bottom shelf of your fridge to avoid cross-contamination, and make sure it's in a sealed container.
Additionally, understanding the importance of budgeting for food expenses can help you manage your grocery costs effectively.
Keeping poultry at safe cooking temperatures is just as important—let's explore how to do this effectively.
Proper Storage Hierarchy
Properly organizing your refrigerator is vital for poultry safety and overall food hygiene. Establishing a clear storage hierarchy helps prevent cross-contamination and guarantees your food stays safe.
For instance, keeping your raw meats properly stored can greatly reduce the risk of foodborne illnesses, as noted in hamster care and costs regarding proper food handling.
Here's how you can organize your raw foods effectively:
- Top Shelf: Store whole fish here. Keeping it above all other raw foods minimizes cross-contamination risks.
- Middle Shelf: Place whole cuts of beef and pork on this level, guaranteeing they're below fish but above ground meats. This organization helps maintain proper cooking temperature guidelines.
- Bottom Shelf: Raw poultry belongs here to prevent its juices from dripping onto other foods, especially ready-to-eat items located above.
Always wrap your raw foods securely in plastic wrap or aluminum foil to prevent leakage and contamination within the fridge.
By following this structured organization, you greatly reduce the chances of harmful bacteria spreading among your food.
Avoid Cross-Contamination Techniques
Cross-contamination is a serious concern in the kitchen, especially with raw poultry. To guarantee food safety, always store raw poultry on the bottom shelf of your refrigerator. This prevents its juices from dripping onto other foods, which can lead to harmful bacteria spreading. Use a sealed container or plastic bag to minimize any risk of leakage.
Early detection of foodborne illnesses can be vital, much like the importance of mammography for early detection in breast cancer.
It's essential to follow the food hierarchy; store raw poultry above raw meats and seafood. This simple step can considerably reduce the risk of cross-contamination. When preparing meals, always use separate cutting boards for raw poultry and other ingredients to avoid cross-contact of pathogens like Salmonella.
Maintaining proper refrigeration temperatures is vital, too—ideally below 5 °C. This inhibits the growth of harmful bacteria that can thrive in warmer environments. Regularly check your refrigerator to guarantee it's keeping the right temperatures.
Safe Cooking Temperatures
Cooking poultry safely is vital for preventing foodborne illnesses. To guarantee you're cooking your poultry properly, always check the internal temperature with a food thermometer. The safe cooking temperature for all poultry products, including whole birds and ground poultry, is 165°F (74°C).
It's essential to maintain a clean cooking environment and utilize proper food storage practices for peak safety, especially if you have pets that might introduce allergens into your home, as best vacuums for dust removal in 2024 can help eliminate any lingering particles.
Here are some key tips to follow:
- Store Raw Poultry: Always keep raw poultry on the bottom shelf of your fridge to prevent juices dripping onto other foods and causing cross-contamination.
- Thawing Methods: Thaw frozen poultry safely in the refrigerator, in cold water, or in the microwave. Avoid thawing at room temperature to minimize bacterial growth.
- Leftover Cooked Poultry: Refrigerate any leftover cooked poultry within two hours of cooking. Consume it within 3-4 days for peak food safety.
Managing Raw Meat Storage
When it comes to managing raw meat storage, organization is key to ensuring food safety.
Start by storing fish on the top shelf of your refrigerator. This placement minimizes the risk of contamination with other raw foods.
It's also important to maintain a clean refrigerator environment to prevent any airborne bacteria from settling on surfaces, much like the air purifier maintenance dos and don'ts.
Below the fish, place whole cuts of beef and pork on the middle shelf. This arrangement prevents any drips that could potentially contaminate lower shelves.
Ground meats, including beef and pork, should occupy a lower shelf to reduce the risk of bacterial spread from their juices.
Preventing Cross-Contamination
Maintaining a safe food environment means taking steps to prevent cross-contamination in your kitchen. To keep harmful bacteria at bay, you need to store raw foods correctly and guarantee that they're separate from cooked foods. Here are some essential tips to help you achieve that:
1. Store Raw Foods in Order: Always place fish at the top, followed by whole cuts of beef or pork, ground meats, and finally poultry at the bottom. This arrangement minimizes the risk of drips and leakage contaminating other items. Additionally, it’s important to store raw foods in sealed containers or leak-proof bags to further prevent cross-contamination. When storing raw foods in the refrigerator, always keep them separate from ready-to-eat items, and use different cutting boards and utensils for preparing raw meats and other foods. Following these raw food storage tips can help reduce the risk of foodborne illness and keep your kitchen safe.
Additionally, just as proper maintenance is vital for heat pumps to function effectively, maintaining proper food storage practices is fundamental for food safety.
2. Use Sealed Containers: Keep raw foods in sealed containers or plastic bags. This greatly reduces the chances of leakage, which can spread harmful bacteria and lead to foodborne illnesses.
Using sealed containers is similar to how energy-saving features in heat pumps help minimize inefficiencies and enhance performance.
3. Organize Food Storage: Regularly check and organize your food storage. Confirm that cooked foods are always stored above raw items to maintain that vital separation.
Food Safety Guidelines
Food safety guidelines are essential for guaranteeing that your raw ingredients remain safe to eat and won't lead to foodborne illnesses. To maintain a safe storage hierarchy, place raw fish at the top of your refrigerator. This minimizes the risk of cross-contamination from its juices.
Additionally, understanding the importance of proper food handling can greatly reduce health risks associated with foodborne pathogens, similar to the ways caregivers manage financial considerations for elderly care to guarantee safety and well-being.
Below the fish, store whole cuts of beef and pork, which are less likely to harbor harmful bacteria compared to ground meats. Ground meats, like ground beef and pork, should be stored beneath whole cuts to prevent bacterial spread.
Finally, keep raw poultry—such as whole and ground chicken—on the bottom shelf, as it poses the highest risk of carrying pathogens like salmonella.
Always wrap your raw foods securely in aluminum foil or plastic wrap. This prevents exposure to contaminants and avoids any leakage that could affect other foods in your fridge.
Best Storage Containers
Choosing the right storage containers can make a big difference in keeping your raw foods safe and fresh. To effectively prevent cross-contamination and maintain the quality of your ingredients, consider these tips:
- Use airtight containers: Opt for glass or BPA-free plastic containers with tight-fitting lids. They not only prevent leaks but also keep odors from mingling and help maintain freshness.
- Label everything: Clearly label your storage containers with the contents and date of storage. This practice guarantees you track use-by dates and minimizes the risk of using spoiled food.
- Create visual distinction: Utilize separate colored containers for different food groups like raw meat, poultry, and seafood. This method aids in easily identifying contents and greatly reduces cross-contamination risks.
For freezer use, choose thicker food storage bags designed for that purpose. They're less likely to puncture or leak, guaranteeing your raw foods stay safe.
Frequently Asked Questions
Which Raw Food Should Be Stored Above?
When storing raw foods, you should place whole fish on the top shelf. This helps reduce cross-contamination risks. Remember to wrap them securely to prevent any leaks that could affect other items below.
Which Food Should Be Stored Above?
Imagine the chaos of a kitchen gone wrong. You should store fish on the top shelf to prevent cross-contamination. It's essential for maintaining safety, ensuring your meals are delicious and free from any harmful bacteria.
Which Food Should Be Stored Above Others in the Refrigerator?
When storing food in your refrigerator, always place fish on the top shelf. It minimizes cross-contamination risks. Below that, keep whole cuts of beef and pork, followed by ground meats and poultry on the bottom.
What Is the Proper Way of Storing Raw Food?
Imagine your fridge as a well-organized library. When storing raw food, wrap it tightly, use sealed containers, and arrange by type. This keeps everything fresh and prevents contamination, just like protecting valuable books from damage.
Conclusion
By understanding the importance of food hierarchy and proper storage techniques, you can keep your kitchen safe and your meals delicious. Just like stacking building blocks, each layer of food needs to be placed thoughtfully to prevent disaster. Remember to store fish above poultry, and always keep raw meat at the bottom. With these tips, you'll guarantee freshness while protecting your loved ones from cross-contamination. Your kitchen can be a safe haven for healthy eating!
Rachael, the Editor in Chief of RachaelsRawFood.com, is an inspiring and passionate individual who has dedicated her life to promoting the benefits of a raw food lifestyle. Known for her vibrant and energetic personality, Rachael has built a strong online presence that has transformed her personal journey into a thriving community of raw food enthusiasts.
-
Kitchen Essentials for Raw Food Preparation2 months ago
Can You Cook Raw Food in an Air Fryer? Discover the Possibilities
-
Kitchen Essentials for Raw Food Preparation2 months ago
Which Raw Food Should Be Stored Above? Essential Tips
-
Raw Food Recipes1 month ago
How Much Raw Food Do You Feed Your Dog? A Calculator Guide
-
Raw Food Recipes2 months ago
Raw Food Vs. Cooked Food: What’S Best for Your Dog?
-
Getting Started with Raw Food1 month ago
Why Is Raw Food Bad for Cats? Essential Information
-
Getting Started with Raw Food2 months ago
Can I Switch My Dog to Raw Food? What You Need to Know
-
Raw Food Recipes2 months ago
Raw Food Vs. Kibble Cost: a Comprehensive Comparison
-
Raw Food Recipes2 months ago
How Much Raw Food Do I Feed My Dog Calculator: Find the Right Amount