
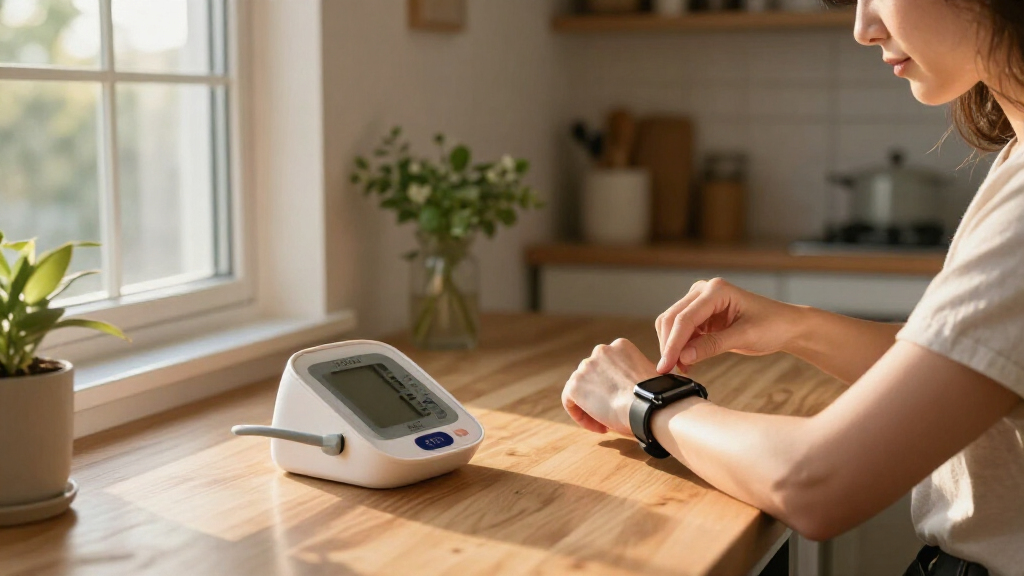
Set up a smart blood pressure monitor, scale, thermometer, pulse oximeter, or similar home health device so it can record readings and, if you choose, share them with a health app or clinician. This guide is for beginners who can use a smartphone and home Wi-Fi. Allow 30-60 minutes, including time to charge the device, pair it, and take a first reading.

Get health and wellness essentials delivered free with Prime
- Fast, free delivery on millions of items
- Prime Video, Amazon Music and more included
- Member-only deals all year
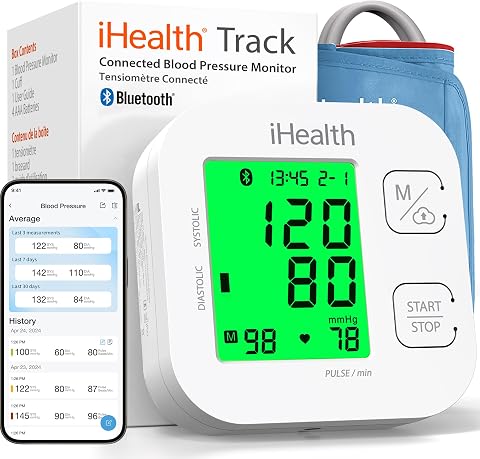
iHealth Track Smart Upper Arm Blood Pressure Monitor with Wide-Range Cuff
- ✔ Measurement: Upper-arm blood pressure
- ✔ Operation: Two-button
- ✔ Display: Large, multi-color backlit display

RENPHO MorphoScan Nova Smart Body Composition Scale with TFT Handle Display
- ✔ Measurement method: Eight-electrode dual-frequency BIA
- ✔ Display: 4.3-inch TFT-LCD handle display
- ✔ Weight capacity: 400 lb (180 kg)
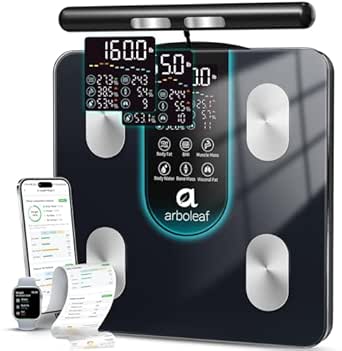
arboleaf Smart Body Composition Scale with Dual-Frequency BIA
- ✔ Model: CS10K
- ✔ Technology: Eight-electrode dual-frequency BIA
- ✔ Display: LED; seven key measurements
A connected device can help you track changes, but it does not replace medical advice or emergency care. Follow the device instructions and your clinician’s guidance when interpreting measurements.
Difficulty: Beginner | Time: 30-60 minutes
What You’ll Need
Tools & Materials:
- Smart health device and its user manual
- Compatible smartphone or tablet
- Device’s official app, downloaded from the Apple App Store or Google Play
- Home Wi-Fi details if the device uses Wi-Fi
- Charger or fresh batteries, as specified by the manufacturer
Knowledge:
- Basic ability to install an app and use Bluetooth or Wi-Fi settings
- The correct way to take a measurement with your device, as described in its manual
Check the box or manufacturer’s website for phone, operating system, network, and account requirements. Have your app-store account ready. Use only the manufacturer’s app or a health platform you trust. If readings will be used for care decisions, ask your clinician which device and measurement schedule they recommend.
iHealth Track Smart Upper Arm Blood Pressure Monitor with Wide-Range Cuff
When our priority is blood pressure rather than body composition, the iHealth Track fills a different role from both scales and earns the top spot for that specific need. Its two-button operation and large, color-coded backlit display make readings easier to check at home, while a cuff that fits upper arms from 8.7 to 16.5 inches accommodates a broad range of users. It stores up to 99 readings on the monitor, so a phone is not necessary just to look back at recent results.Bluetooth syncing to the iHealth app adds longer-term recordkeeping, but the app requires a compatible smartphone. That makes this pick less self-contained than the RENPHO scale, whose handle shows its measurements, and less informative about body composition than either scale. The monitor also flags detected heart rhythm disturbances; we should regard that as an alert rather than a diagnosis. Its strongest case is focused, repeatable blood pressure tracking, not an all-purpose health dashboard.For better measurement consistency, we should follow the manual’s positioning and use instructions. The supplied product details say it meets ESH 2010 performance standards, but that does not replace clinical advice or validate every individual reading. Buyers seeking a scale with weight and body composition metrics should choose one of the other picks instead.
Pros:
- Large backlit display uses color-coded reading ranges.
- Stores up to 99 readings on the device.
- Wide-range upper-arm cuff fits 8.7–16.5 inches.
- Can sync readings to iHealth apps over Bluetooth.
Cons:
- App syncing requires a compatible smartphone and Bluetooth.
- Careful setup and use of the cuff matter for reliable readings.
- The rhythm disturbance alert is not a diagnosis.
Best for: People who want to record blood pressure at home and review readings on the monitor or through the iHealth app.
Not ideal for: Anyone primarily looking for weight or body composition tracking, or who does not have a compatible phone for Bluetooth app syncing.
Bottom line: For home blood pressure records, we would choose this focused monitor over either scale, while keeping its app dependency and alert limitations in mind.
“For home blood pressure records, we would choose this focused monitor over either scale, while keeping its app dependency and alert limitations in mind.”
RENPHO MorphoScan Nova Smart Body Composition Scale with TFT Handle Display
Among the two scales, the MorphoScan Nova makes results easiest to review without picking up a phone. Its 4.3-inch handle display presents measurements and trends, and voice guidance helps users follow a scan. That is a meaningful difference from the arboleaf CS10K, which places seven core readings on a scale display but does not list a handle screen or voice prompts. Both offer eight electrodes and dual-frequency BIA; RENPHO adds segmental muscle and fat analysis in a more guided format.The experience comes with an important qualification: these are still BIA estimates. Hydration and other conditions can influence readings, so the app’s 50-plus metrics and segmental breakdowns are best used to observe trends under similar conditions over time. They should not be treated as professional body composition analysis. If we want a basic view of weight and a handful of metrics without an elaborate interface, the arboleaf may be the more proportionate choice.USB-C rechargeable power, a specified battery life of up to 150 days, and compatibility with Apple Health, Google Fit, and MyFitnessPal give the RENPHO a broader connected setup. However, initial Bluetooth pairing is required, and its richer data view may be more than some households need. For users who value guided scans and on-device access to results, this is the most complete scale in the lineup; for blood pressure, the iHealth monitor remains the relevant pick.
Pros:
- 4.3-inch handle display shows measurements and trends.
- Voice guidance supports the scan process.
- Eight-electrode, dual-frequency BIA includes segmental estimates.
- USB-C rechargeable battery is specified for up to 150 days.
Cons:
- Requires Bluetooth pairing with the app before the first measurement.
- Body composition readings are BIA estimates and can vary.
- Its many metrics and guided features may be unnecessary for basic weighing.
Best for: People who want guided body composition scans, segmental estimates, and a display that makes results accessible without opening the app each time.
Not ideal for: Buyers who only need basic weight tracking, want to avoid BIA estimates, or prefer a simple battery-powered scale.
Bottom line: We recommend the MorphoScan Nova when on-scale guidance and richer body composition views matter more than simplicity.
“We recommend the MorphoScan Nova when on-scale guidance and richer body composition views matter more than simplicity.”
arboleaf Smart Body Composition Scale with Dual-Frequency BIA
The arboleaf CS10K is the more straightforward household scale in this comparison. Its LED display shows seven key measurements, including weight, BMI, body fat, and muscle mass, so we can check a useful snapshot without navigating an app first. Up to eight profiles are stored on the scale, with support for unlimited users, making it a practical fit for shared use. Compared with RENPHO, it gives up the handle display and voice guidance but still offers eight-electrode, dual-frequency BIA and segmental views through its app.That app expands the experience with more than 50 metrics, trend charts, reports, and syncing with popular health apps. For readers who want to follow changes over time, the combination is more useful than a weight-only display. But a larger set of numbers does not make the estimates clinically definitive: BIA is best treated as a trend tool, and readings can differ from professional analysis. The scale is also the only one here whose supplied specs list alkaline batteries; RENPHO instead recharges over USB-C.Initial app pairing and profile setup add friction before the first use. The product is not intended for people with a pacemaker or during pregnancy, according to the supplied information. If we want a guided scan and a large display at the scale, RENPHO is the stronger pick. If the goal is shared tracking with core results visible immediately, arboleaf has the clearest case. Neither scale replaces the iHealth monitor for blood pressure.
Pros:
- Shows seven key measurements directly on its LED display.
- Eight-electrode dual-frequency system provides full-body and segmental estimates.
- App offers more than 50 metrics, charts, and reports.
- Supports stored profiles for up to eight users and unlimited users overall.
Cons:
- BIA results are estimates for trend tracking, not professional analysis.
- Requires app pairing and profile setup before first use.
- Not for use by people with a pacemaker or during pregnancy.
Best for: Households that want several users to track body composition trends and see core measurements directly on the scale.
Not ideal for: People seeking professional body composition analysis, those who need a guided handle display, or users with a pacemaker or during pregnancy.
Bottom line: We would choose the CS10K for shared, app-connected trend tracking when an at-a-glance scale display matters more than RENPHO’s guided interface.
“We would choose the CS10K for shared, app-connected trend tracking when an at-a-glance scale display matters more than RENPHO’s guided interface.”
As an Amazon Associate we earn from qualifying purchases.
Before You Start
Read the device’s safety and measurement instructions before pairing it. Remove packaging, place the device on a stable surface, and charge it or install batteries. Keep the device close to your phone during setup. Do not use a reading to change medication or delay care unless a clinician has told you to follow a specific plan.
Decide who should be able to see the data. Health readings can be sensitive. Review app permissions and account-sharing settings before connecting another service or inviting a family member.
Step-by-Step Instructions
Step 1: Check the device and phone requirements
Find the model name and number on the device or its packaging. Open the manufacturer’s support page or manual and check that your phone’s operating system, Bluetooth version, Wi-Fi band, and region are supported. Confirm whether the device needs an internet connection during setup or only for later syncing.
Tip: Some devices connect directly to Wi-Fi, while others send data through your phone. Follow the instructions for your model; a 5 GHz-only network may not work with devices that require 2.4 GHz Wi-Fi.
Check: You know which app and connection type the device requires, and your phone meets the listed requirements.
Step 2: Install the official app
Search the app store for the manufacturer’s exact name. Check the publisher before installing, then open the app and create an account or sign in. Use a unique password and turn on two-step verification if available. Enter only the personal details the app requires for setup.
Tip: Avoid app links from unsolicited messages or unfamiliar websites. If you use a health platform such as Apple Health or Google Health Connect, you can decide whether to connect it after the device works on its own.
Check: The official app opens and shows your signed-in account or a clear prompt to add a device.
Step 3: Prepare the device for pairing
Charge the device or install the specified batteries. Turn it on, then put it into pairing mode using the manual’s steps. Keep it beside your phone. If you are reconnecting a used device, remove its previous owner or reset it only as the manual directs.
Tip: A Bluetooth device may leave pairing mode after a short time. Start pairing in the app promptly, and do not reset the device unless the normal pairing steps fail.
Check: The device is powered on, has enough charge, and displays the pairing symbol or status described in its manual.
Step 4: Add the device in the app
In the app, choose the option to add or set up a device. Select the correct model and follow the prompts. Approve Bluetooth access when requested. If the device uses Wi-Fi, enter the network name and password exactly as used at home; connect your phone to the requested network during setup.
Tip: Grant only the permissions needed for setup and syncing. If a permission is denied by mistake, change it in your phone’s settings and retry from the app.
Check: The app displays the device as connected or ready, and the device no longer shows an unresolved pairing error.
Step 5: Set the user and measurement preferences
Choose the correct profile or create one for the person who will use the device. Check units, time zone, date, and measurement settings. For a shared device, assign readings to the right person each time if the model cannot identify users automatically.
Tip: Do not rely on automatic user recognition for clinical records unless the manual explains how it works and you have confirmed it identifies each person correctly.
Check: The profile name and units match the intended user, and the displayed date and time are correct.
Step 6: Take a first reading using the manual
Follow the device’s positioning and preparation instructions. Sit or stand as directed, place the sensor or cuff correctly, and remain still during the measurement. Take one reading and wait for the result to appear on the device or in the app. If the manual recommends repeating a measurement, follow its timing guidance.
Tip: Do not compare a reading taken under different conditions as if the values were directly equivalent. For example, body position and rest time can affect some measurements.
Check: A result appears with the expected unit and timestamp. The app identifies the correct user and does not show a measurement error.
Step 7: Confirm syncing and review sharing controls
Open the app’s history and confirm the first reading appears. If syncing is delayed, wait a few minutes and keep the phone near the device. Then review connected services, data export, family access, and clinician-sharing settings. Turn on only the sharing you intend to use.
Tip: Read the app’s privacy information before granting access to another service. You can usually change sharing permissions later in the app or phone settings.
Check: The reading is saved in the app with the correct date and user, and the app shows which services or people can access it.
Step 8: Choose a repeat schedule and storage routine
Ask your clinician how often to take readings if you are monitoring a health condition. Otherwise, follow the device’s intended use and avoid taking repeated measurements just to chase a particular result. Store the device as the manual directs and keep its charger, cleaning supplies, and instructions nearby.
Tip: Contact a clinician about results that concern you. Seek urgent care for severe symptoms or an emergency, even if the device reading appears normal.
Check: You have a clear measurement routine, know where readings are stored, and know how to get help for concerning results.
Common Mistakes to Avoid
- Installing an unofficial or similarly named app. — Verify the app publisher against the device maker’s manual or official support site before installing.
- Pairing the device while it is undercharged or outside pairing mode. — Charge it first, follow the model’s pairing instructions, and keep it close to the phone.
- Recording a reading under the wrong user profile. — Check the selected user before each measurement, especially on shared devices.
- Treating one device reading as a diagnosis or changing treatment based on it. — Use the device for tracking and follow your clinician’s instructions for interpreting results and deciding what to do.
Troubleshooting
Problem: The app cannot find the device.
Solution: Move the phone close to the device, confirm Bluetooth is enabled, and put the device back into pairing mode. Close and reopen the app. Check the manual for a reset procedure only if pairing still fails.
Problem: The device connects but readings do not appear in the app.
Solution: Keep the phone near the device, open the app, and wait several minutes. Check that Bluetooth or Wi-Fi is active and that the app has permission to use it. Review the app’s sync status and follow its troubleshooting instructions.
Problem: Wi-Fi setup fails.
Solution: Confirm the password and network name, then check the manual’s supported Wi-Fi bands and security settings. If required, use a 2.4 GHz network and keep the phone on that network during setup.
Problem: Readings seem inconsistent or an error appears.
Solution: Check placement, posture, batteries, and the device’s error-code list. Repeat the measurement only as the manual or clinician directs. Contact the manufacturer for device faults and a clinician for medical concerns.
What Success Looks Like
The device appears as connected in its official app, a first reading is saved under the correct user with the expected unit and timestamp, and you can see whether it is shared with another service or person. You also know the device’s measurement instructions and where to find support. If any of these checks fail, use the troubleshooting steps before relying on the device for routine tracking.
Next Steps
Keep the device charged and clean it as directed by the manufacturer. Install app and device updates through official channels, and review account access when someone stops using a shared device. Bring or share readings with a clinician only through a method they approve. If the device is damaged, gives repeated errors, or produces results that conflict with symptoms, contact the manufacturer or a health professional.
Frequently Asked Questions
Do smart health devices need Wi-Fi?
Not always. Some devices sync to a phone over Bluetooth and use the phone’s internet connection later. Others connect directly to Wi-Fi. Check the manual for your model’s requirements.
Can I use one device for several people?
Some models support multiple profiles; others do not identify users reliably. Check the manual and select the right profile before each reading. Do not assume a measurement was assigned correctly just because the app saved it.
Why is my reading missing from the app?
The device may not have synced yet, the phone may be out of range, or the app may lack Bluetooth or network access. Open the app near the device, check its connection status, and follow the model’s sync instructions.
Can I share readings with my doctor?
Some apps offer sharing or export. Ask your clinician which format or service they accept, then check the recipient and privacy settings before sharing health data.
Should I act on a single unusual result?
Follow the device instructions and any measurement plan from your clinician. Contact a health professional about concerning results. Seek urgent care for severe symptoms or an emergency, regardless of a device reading.