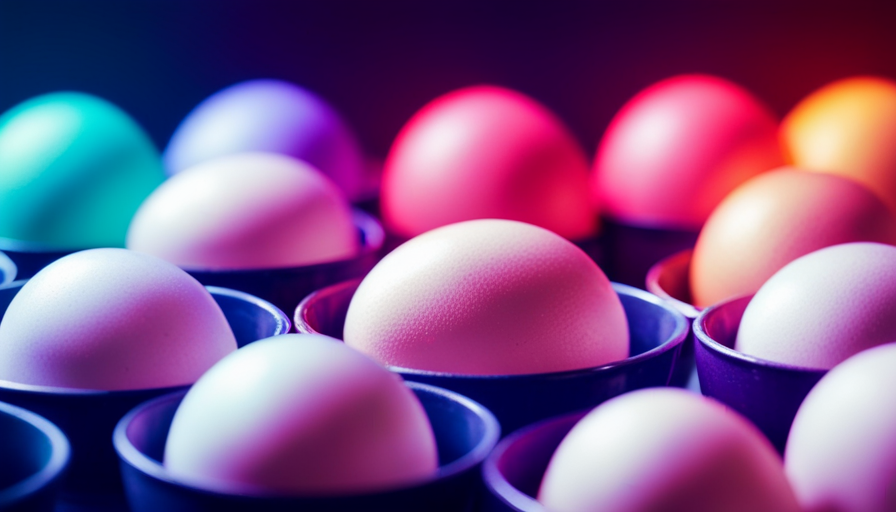
When dyeing raw eggs with food coloring, you have the ability to turn plain shells into colorful works of art. Just like an artist with a brush, you can craft beautiful pieces that bring happiness and amazement to those who see them.
With a few simple supplies and a little guidance, you can unlock the secrets of this centuries-old tradition and unleash your creativity.
Gather your materials – eggs, food coloring, vinegar, and cups – and prepare to embark on a journey of color exploration. As you carefully select your colors, envision the possibilities that lie within each drop of dye. With precision and finesse, you will create a dye solution that will envelop the eggs in a vibrant hue, allowing their natural beauty to shine through.
Submerge the eggs, watch as the colors envelop them, and witness the magic unfold before your eyes. Take it a step further by adding patterns and designs, turning each egg into a unique work of art. With experimentation and practice, you may discover new techniques that will elevate your creations to extraordinary heights.
Once your eggs have dried, proudly display them for all to admire. Bask in the satisfaction of a job well done, and revel in the beauty you have brought to life. As you clean up, remember to cherish the memories and joy that this artistic endeavor has brought you.
Now, are you ready to embark on this colorful journey of egg dyeing? Let’s dive in and unleash your inner artist!
Key Takeaways
- Dyeing raw eggs with food coloring is a centuries-old tradition for color exploration and creativity.
- Different decorating techniques can be used, including traditional dyeing, tie-dye, marble effect, and natural dye options.
- Eggs are submerged in a dye solution and absorb colors at different rates, creating unique patterns.
- Adding patterns or designs to eggs enhances their visual appeal and showcases creativity.
Gathering Supplies
Now you’re gonna need to gather up all the supplies for dyeing your raw eggs with food coloring. Before you start, it’s a good idea to have some decorating ideas in mind and some egg dyeing tips up your sleeve.
First off, you’ll need a dozen raw eggs. Make sure they’re clean and free from any cracks. You’ll also need food coloring in various colors. The traditional liquid food coloring works well, but you can also use gel or paste food coloring for more vibrant colors.
Next, you’ll need some vinegar as it helps the dye adhere to the eggshell. Grab a few bowls or cups to hold the dye mixtures. You’ll also need some spoons or tongs to handle the eggs while dyeing.
Lastly, have some paper towels or a drying rack handy to place the dyed eggs on to dry.
With all these supplies in hand, you’re ready to move on to the next step: preparing the dye mixtures.
Preparing the Eggs
To get started, let’s whip up a quick and easy concoction for our vibrant egg transformation. First, gather the necessary materials: boiled eggs, food coloring, vinegar, and water. Now, let’s dive into the decorating techniques.
-
Traditional Dye Method: In a bowl, mix 1/2 cup of boiling water, 1 teaspoon of vinegar, and 10-20 drops of food coloring. Gently place the boiled eggs into the mixture and let them soak for at least 5 minutes. For a more intense color, leave them in for 30 minutes to an hour.
-
Tie-Dye Technique: Wrap a rubber band tightly around the egg, creating different sections. Apply different colors of food coloring to each section, allowing the colors to blend together. Let the egg dry completely before removing the rubber bands.
-
Marble Effect: Fill a bowl with shaving cream or whipped cream. Drop different colors of food coloring onto the cream and swirl them together with a toothpick. Roll the eggs in the colorful cream mixture and let them dry before gently wiping off the excess.
-
Natural Dye Options: Experiment with alternative dye options such as beet juice, turmeric, or red cabbage. Boil these natural ingredients with water and a splash of vinegar, then strain the liquid and use it as a dye.
Now that you know the decorating techniques and alternative dye options, you’re ready to create beautifully dyed eggs for any occasion. Happy coloring!
Choosing Your Colors
Amidst a vibrant palette of possibilities, let your imagination swirl and dance as you select the hues to adorn your eggs. When choosing your colors, consider color mixing to create unique shades that’ll make your eggs stand out.
Experiment with different combinations of food coloring to achieve your desired effect. For example, mixing red and blue will create a stunning purple, while blending yellow and red will result in a vibrant orange. Don’t be afraid to mix and match until you find the perfect color palette for your eggs.
If you prefer a more natural approach, there are alternatives to traditional food coloring. Natural dyes can be created using ingredients found in your kitchen, such as onion skins, beets, or spinach. Boil these ingredients with water and vinegar to extract the colors, and then strain the liquid to remove any particles. This’ll give you a range of earthy tones that’ll add a unique touch to your eggs.
Remember, the colors you choose will determine the overall aesthetic of your dyed eggs. So, take your time, explore different options, and let your creativity flow as you select the perfect hues to make your eggs truly breathtaking.
Creating the Dye Solution
As you mix and blend various ingredients, a vibrant and colorful solution begins to form, bringing life and character to your egg decorating experience. Creating a dye solution is an essential step in achieving beautiful and eye-catching eggs. To create gradient effects, where colors blend seamlessly from light to dark, you will need to prepare multiple concentrations of the dye solution. This can be done by adding varying amounts of food coloring or natural dyes to each mixture.
To assist you in creating the perfect dye solution, refer to the following table:
| Dye Solution | Food Coloring/Natural Dyes | Water |
|---|---|---|
| Light | Few drops | 1 cup |
| Medium | Several drops | 1 cup |
| Dark | Many drops | 1 cup |
By adjusting the amount of food coloring/natural dyes in each mixture, you can achieve a smooth transition of colors on your eggs. Experiment with different ratios to create unique and stunning gradient effects. Additionally, if you prefer using natural dyes, consider ingredients such as beet juice, turmeric, or spinach. These natural dyes can be mixed with water to create equally beautiful and environmentally-friendly dye solutions. Enjoy the process of creating your dye solution and unleash your creativity to make your eggs truly one-of-a-kind.
Submerging the Eggs
When you immerse the eggs in the vibrant solution, you’ll notice that they absorb the colors at different rates, resulting in unique and unpredictable patterns. This is because the porous nature of the eggshell allows it to absorb the dye, creating a beautiful and intricate design.
To achieve the best results, follow these egg painting techniques:
- Gently place the eggs into the dye solution using a slotted spoon to ensure even coverage.
- Leave the eggs in the dye bath for at least 5 minutes, but feel free to experiment with longer or shorter periods for different effects.
- For a more intense color, you can gently roll the eggs in the dye solution using a spoon.
- To create patterns or designs on the eggs, use a paintbrush or a cotton swab dipped in dye.
- For a marbled effect, you can gently crack the eggshell before submerging it in the dye solution.
If you prefer to use natural dye alternatives, there are several options available. You can use ingredients such as red cabbage, turmeric, beets, or onion skins to create different hues. Simply boil these ingredients with water and vinegar, strain the liquid, and then proceed with the dyeing process.
Remember to have fun and experiment with different techniques and colors to create your own unique and stunning dyed eggs.
Allowing the Eggs to Soak
Now that you have successfully submerged the eggs in the food coloring mixture, it’s time to move on to the next step: allowing the eggs to soak. This step is crucial in order to achieve vibrant and evenly colored eggs.
One important factor to consider is the temperature of the water. It is recommended to use warm water for soaking the eggs. Warm water helps the dye penetrate the eggshell more effectively, resulting in brighter and more vibrant colors.
To ensure vibrant colors, it is also important to let the eggs soak for an adequate amount of time. The longer the eggs soak, the deeper and more intense the color will be. However, be careful not to leave them for too long, as it could cause the colors to become too dark or even muddy.
To help you keep track of the soaking time, here is a useful table that provides guidelines for achieving vibrant colors:
| Soaking Time | Color Intensity |
|---|---|
| 5 minutes | Light |
| 15 minutes | Medium |
| 30 minutes | Dark |
| 1 hour | Intense |
| 2 hours | Maximum |
By following these tips and allowing the eggs to soak in warm water for the appropriate amount of time, you will be able to achieve beautifully colored eggs that are sure to impress.
Adding Patterns or Designs
To make your eggs truly stand out, you’ll want to add captivating patterns or designs that will leave your audience in awe. Adding unique designs is a great way to make your eggs visually appealing and showcase your creativity.
One option is to use natural dyes to create interesting patterns on the eggs. Natural dyes can be made from ingredients such as fruits, vegetables, and spices, and they can produce beautiful and vibrant colors.
To create patterns or designs, start by gathering materials such as rubber bands, stickers, or tape. You can use these to create different shapes on the eggs. For example, you can wrap rubber bands around the eggs to create stripes or use stickers to create fun shapes. Another technique is to use tape to cover certain areas of the egg, leaving exposed areas where the dye can penetrate. This can create unique patterns and designs.
Once you have your materials ready, prepare your natural dyes according to the instructions. Dip the eggs into the dye and let them soak for the recommended amount of time. You can experiment with different colors and techniques to achieve the desired effect. Remember to handle the eggs carefully to avoid smudging or smearing the designs.
Adding patterns or designs to your dyed eggs can elevate them to the next level. By using natural dyes and getting creative with different techniques, you can create eggs that are not only visually stunning but also environmentally friendly.
So go ahead and let your imagination run wild as you decorate your eggs with captivating patterns and designs.
Experimenting with Different Techniques
Get creative and try out various methods to achieve unique and eye-catching designs on your beautifully decorated Easter eggs. Experimenting with different techniques can lead to stunning results that will impress your friends and family. One way to create interesting designs is by using color blending techniques. Combine different colors of food coloring to create new shades and gradients on your eggs. For example, mix blue and yellow to create a vibrant green. Another option is to use natural dyes, which can produce stunning and unexpected colors. Try using ingredients like beet juice, turmeric, or red cabbage to create beautiful and organic hues on your eggs.
To help you visualize the possibilities, here is a table showcasing some color blending techniques and natural dyes you can experiment with:
| Color Blending Techniques | Natural Dyes |
|---|---|
| Marbling | Beet Juice |
| Dip Dyeing | Turmeric |
| Sponging | Red Cabbage |
| Stenciling | Spinach |
By trying out these techniques and exploring different color combinations, you can create one-of-a-kind Easter eggs that will be the highlight of your holiday celebration. Have fun and let your creativity shine!
Drying and Displaying the Eggs
Once your beautifully decorated Easter eggs are complete, it’s time to dry them and find the perfect way to display them.
To ensure that your eggs dry properly, it’s important to consider different drying techniques. One popular method is air drying, where you simply place the eggs on a wire rack or in an egg carton and let them sit at room temperature until they are completely dry. Another option is to use a hairdryer on a low heat setting to speed up the drying process. Be sure to hold the hairdryer a few inches away from the eggs to avoid cracking them.
Once your eggs are dry, it’s time to get creative with your egg displays. One idea is to use a decorative bowl or basket filled with Easter grass or shredded paper as a base for your eggs. Arrange the eggs in the bowl or basket, making sure to mix and match colors and patterns for an eye-catching display.
Another option is to use an egg holder or stand to showcase your eggs individually. These holders come in a variety of designs and materials, allowing you to choose the perfect one to complement your eggs. You can also consider hanging your eggs from a tree branch or stringing them together to create a festive garland.
By using these drying techniques and getting creative with your egg displays, you can showcase your beautifully dyed Easter eggs in a unique and captivating way.
Cleaning Up and Enjoying Your Masterpieces
After all the hard work and creativity, it’s time to tidy up and fully enjoy the beautiful Easter egg masterpieces you’ve created. Cleaning up is an important step to ensure that your eggs stay vibrant and intact for as long as possible. Here are some tips to help you clean up and display your eggs with ease:
-
Gently rinse the dyed eggs under cool running water to remove any excess dye. Avoid using warm or hot water as it can cause the dye to bleed and fade.
-
Pat the eggs dry with a clean towel or let them air dry naturally. Avoid rubbing the eggs too vigorously as it can smudge the colors.
-
Once the eggs are dry, you can apply a thin layer of clear varnish or shellac to give them a glossy finish and protect the colors from fading.
Now that your eggs are clean and dry, it’s time to get creative with how you display them. Consider using a decorative Easter egg tree, a simple egg holder, or even a basket filled with Easter grass to showcase your beautiful creations. Get inspired by different decorating ideas online or create your own unique display. Remember to handle the eggs with care and enjoy the vibrant colors you’ve achieved through your hard work and dedication. Happy Easter!
Frequently Asked Questions
Can I use natural food coloring instead of artificial food coloring?
Using natural food coloring instead of artificial food coloring to dye raw eggs has its pros and cons. One major advantage is that natural food coloring is made from plant-based sources, so it’s considered healthier and safer. However, the color results may not be as vibrant or intense as those achieved with artificial food coloring.
It’s important to note that natural food coloring may require more time and effort to achieve desired colors.
How long should I allow the eggs to soak in the dye solution for a vibrant color?
To achieve vibrant egg dye colors, it’s essential to allow the eggs to soak in the dye solution for the right amount of time. For optimal results, let the eggs sit in the dye for at least 10-15 minutes.
However, if you want a more intense color or a marbled effect, extend the soaking time to 30-60 minutes. Keep in mind that the longer the eggs soak, the deeper and more vibrant the colors will be.
Can I use brown eggs instead of white eggs for dyeing?
Yes, you can use brown eggs instead of white eggs for dyeing. While it may not give you the same vibrant colors as white eggs, it can still create a unique and rustic look.
However, if you want to achieve vibrant colors without artificial food coloring, you can try alternative methods like using natural food coloring. This not only adds a touch of eco-friendliness, but also provides the benefits of using natural ingredients for dyeing eggs.
Are there any alternative methods to dyeing eggs without using food coloring?
To dye eggs without using food coloring, you can explore alternative methods such as natural dyeing techniques. These methods involve using ingredients from nature, such as fruits, vegetables, spices, and even flowers, to create vibrant and unique colors on your eggs.
For example, you can use beets for a deep red hue, turmeric for a bright yellow, or red cabbage for a beautiful blue. These natural dyeing techniques offer a fun and eco-friendly way to decorate your eggs.
How long will the dyed eggs last before they start to spoil?
To preserve dyed eggs for a longer shelf life, there are a few methods you can try. First, make sure to store the eggs in the refrigerator at all times. This will help slow down the spoilage process.
Another technique is to coat the eggs with a layer of food-grade wax or oil to create a protective barrier. Additionally, you can use natural dyes made from fruits, vegetables, or spices to dye your eggs for a unique effect. These natural dyes often have antimicrobial properties that can help extend the shelf life of the eggs.
Can I Use Food Coloring to Dye Raw Eggs While Heating Them?
Yes, you can use food coloring to dye raw eggs while heating them. Simply mix the food coloring with water and vinegar, then pour it over the raw eggs before heating them. This is a creative way to add color to your eggs using heating raw food techniques.
Conclusion
Congratulations on successfully dyeing your raw eggs with food coloring! By following the steps outlined in this article, you’ve transformed ordinary eggs into vibrant, eye-catching masterpieces.
Each stage, from gathering supplies to cleaning up, was carefully explained to ensure accuracy and achieve the desired results. Now, proudly display your creatively decorated eggs and enjoy the fruits of your labor.
Your dedication and attention to detail have resulted in truly breathtaking designs that are sure to impress. Well done!
