Picture immersing yourself in a luxurious pool of pure indulgence, where the silkiness of chocolate twirls on your palate like a harmonious symphony. This is the enchantment of crafting your own raw cacao chocolate bars.
Hi there, I’m here to guide you on this delectable journey, where we will transform a handful of simple ingredients into irresistible treats. With my step-by-step instructions, you’ll be amazed at how easy it is to create your very own chocolate bars that are not only rich in flavor but also packed with wholesome goodness.
We’ll start by gathering the finest ingredients, melting them into a luscious blend, and then carefully pouring the mixture into molds or a dish. After a short spell of setting and chilling, the moment of truth arrives as we remove our creations.
And the best part? These homemade chocolate bars can be personalized to suit your every whim. So, let’s dive in and unlock the secrets of making raw cacao chocolate bars that will leave you craving for more.
Key Takeaways
- Raw cacao chocolate bars can be made using organic cacao beans, cocoa butter, and sweeteners like honey or maple syrup.
- Different flavors can be achieved by using different cacao varieties such as Criollo or Forastero.
- It is important to melt the ingredients carefully, avoiding high heat and water to prevent scorching or seizing.
- Additional ingredients like dried cranberries or nuts can be added for texture, and the mixture can be poured into molds or a lined baking dish for shaping.

Orgain Organic Vegan Protein + 50 Superfoods Powder, Creamy Chocolate Fudge - 21g Plant Based Protein, 9g Prebiotic Fiber, No Lactose, Gluten Free, No Added Sugar, 2.02 lb (Packaging May Vary)
CLEANER INGREDIENTS: 21g plant protein and 1g sugar per serving. Our protein blend consists of Organic pea, brown...
As an affiliate, we earn on qualifying purchases.
Gather Your Ingredients
Now it’s time to gather all of your ingredients and get ready to embark on your delicious cacao chocolate bar adventure!
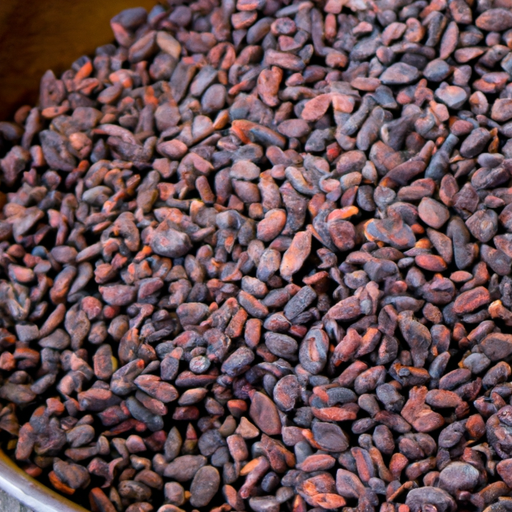
Exploring different cacao varieties is a crucial step in creating the perfect chocolate bar. Look for varieties like Criollo, which is known for its delicate flavor, or Forastero, which has a stronger taste.
When buying your ingredients, make sure to choose high-quality ones. Look for organic and fair trade cacao beans, as well as organic sweeteners like coconut sugar or maple syrup. It’s also important to opt for high-quality cocoa butter and vanilla extract. These ingredients will ensure that your chocolate bars have a rich and complex flavor.
So, with your ingredients in hand, it’s time to move on to the next step and melt your ingredients into a smooth and creamy mixture.
Orgain Organic Vegan Protein + 50 Superfoods Powder, Vanilla Bean - 21g Plant Based Protein, 8g Prebiotic Fiber, No Lactose Ingredients, Gluten Free, No Added Sugar, Non-GMO, 2.02 lb
CLEANER INGREDIENTS: 21g plant protein and 1g sugar per serving. Our protein blend consists of Organic pea, brown...
As an affiliate, we earn on qualifying purchases.
Melt Your Ingredients
First, gather all your deliciously rich ingredients and transform them into a velvety, mouthwatering concoction. Let’s delve into the art of melting your ingredients to ensure a smooth and luscious chocolate bar creation.
Discussion ideas:
-
Different methods for melting ingredients: You can use a double boiler, microwave, or a makeshift bain-marie setup to gently heat your ingredients. Each method requires careful attention to avoid scorching the chocolate and seizing it.
-
Common mistakes to avoid when melting chocolate for chocolate bars: Don’t rush the process by using high heat, as it can cause the chocolate to burn. Additionally, avoid introducing even a drop of water to the melting chocolate, as it can cause the chocolate to seize and become grainy.
With your ingredients expertly melted, it’s time to move on to the next step of mixing and pouring the chocolatey goodness.
Garden of Life Raw Organic Perfect Food Superfood Juiced Greens Powder, Original Stevia-Free, Dietary Supplement, 30 Servings
SUPERFOOD: This greens powder is packed with RAW organic greens, sprouts, and vegetable juices for vibrant, plant-powered goodness
As an affiliate, we earn on qualifying purchases.
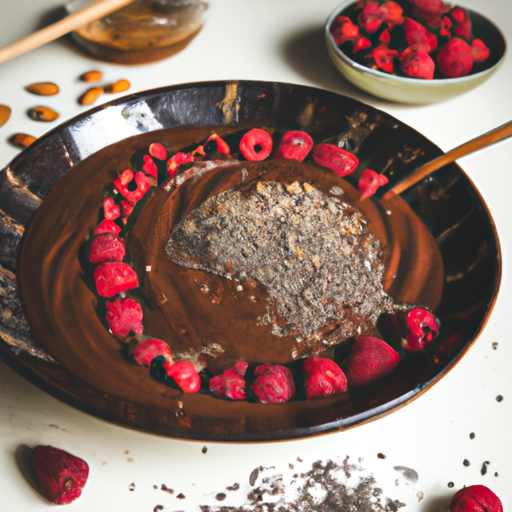
Mix and Pour
I start by stirring the melted ingredients until they are well combined, making sure that all the flavors blend together perfectly. Once the mixture is smooth and homogeneous, I carefully pour it into chocolate molds or a lined baking dish, depending on the desired shape of my chocolate bars.
This step requires patience and precision, as I want to ensure that each chocolate bar is evenly filled and has a smooth surface.
Stirring until well combined
Mix the ingredients together until they’re perfectly blended, creating a smooth and velvety texture that’s irresistible.
When stirring the chocolate mixture, there are various ways to incorporate other ingredients. For a fruity twist, you can add dried cranberries or chopped nuts for a crunchy bite. If you prefer a touch of sweetness, a drizzle of honey or maple syrup can do the trick.
To achieve a smooth and creamy texture while stirring, it’s important to use a gentle and consistent motion, ensuring all the ingredients are evenly distributed. Make sure to scrape the sides of the bowl to prevent any clumps from forming.
As you continue stirring, the mixture will transform into a glossy and luscious blend. This will ensure that when you pour the mixture into chocolate molds or a lined baking dish, it sets beautifully, ready to be enjoyed.
Pouring mixture into chocolate molds or lined baking dish
Next, carefully pour the mixture into your favorite chocolate molds or a lined baking dish. Allow it to take shape and set into a delectable treat. This step is where you can unleash your creativity by choosing different chocolate bar shapes. Whether you prefer classic rectangles, elegant hearts, or whimsical animal shapes, the options are endless. Remember, this is your chance to make your homemade cacao chocolate bars truly unique.
If you want to add a touch of sweetness to your bars, experiment with alternative sweeteners like honey, maple syrup, or coconut sugar. These natural sweeteners not only enhance the flavor but also provide added health benefits. The choice is yours, depending on your personal taste and dietary preferences.
Once you’ve poured the mixture into the molds or baking dish, let it set and chill. This will ensure that your chocolate bars solidify into a smooth and velvety texture, ready to be enjoyed.

Ancient Nutrition Super Greens Powder, Organic Superfood Powder with Probiotics Made with Spirulina, Chlorella, Matcha, and Digestive Enzymes, 25 Servings, 7.05oz
You will receive one (1) tub of Organic Super Greens Powder, 25 servings with 1 gram of sugar...
As an affiliate, we earn on qualifying purchases.
Set and Chill
To achieve the perfect texture, simply let the mixture set and chill in the refrigerator. This step is crucial for creating the smooth and velvety consistency that makes these raw cacao chocolate bars irresistible. As the mixture cools, it slowly solidifies, allowing the flavors to meld together and intensify.
-
As you wait for the bars to set, take a moment to practice some relaxation techniques. Close your eyes, take deep breaths, and imagine the rich aroma of the chocolate filling the air. Let this moment of tranquility wash over you, relieving any stress or tension you may be feeling.
-
While the bars chill, remember that you’re not only indulging in a delicious treat but also reaping the health benefits of raw cacao. Its high antioxidant content can support heart health and boost your mood, leaving you feeling uplifted and rejuvenated.
-
When the bars are firm to the touch, it’s time to remove them from the molds or dish. Gently pop them out, savoring the anticipation of finally enjoying your homemade raw cacao chocolate bars.
Remove from Molds or Dish
I carefully remove the chocolate bars from the molds, ensuring that they come out intact and beautifully shaped. The excitement of seeing the perfectly formed bars in my hands fills me with a sense of accomplishment.
If I’m using a baking dish instead of molds, I delicately cut the chocolate into neat squares or rectangles, taking care to maintain their smooth edges.
Carefully removing chocolate bars from molds
Gently tap the molds on a hard surface to release the chocolate bars, allowing them to gracefully emerge from their cocoony molds. The anticipation builds as you hear the satisfying sound of the chocolate breaking free from its confines. Now, it’s time to present your beautiful chocolate bars to the world.
- Hold the mold firmly and tap the bottom with a gentle yet confident force.
- Slowly lift the mold away from the bar, revealing its intricate design.
- Place the chocolate bar on a clean surface, being careful not to smudge or damage its surface.
This careful process ensures that your chocolate bars remain intact and visually appealing.
Now that your bars are free, let’s move on to the next step – cutting the chocolate bars if you’re using a baking dish.
Cutting chocolate bars if using a baking dish
After carefully removing the chocolate bars from the molds, it’s time to move on to the next step: cutting the chocolate bars if you used a baking dish instead. Cutting the chocolate bars into perfectly sized pieces can be a delightful experience, especially if you use different cutting techniques to create unique shapes and sizes.
To make this process even more enjoyable, let me share with you a helpful technique that I use. I like to create a 2 column and 3 row table in markdown format to evoke a sense of excitement and anticipation. This table allows me to experiment with different cutting styles and sizes, making each piece of chocolate a work of art.
If you don’t have a baking dish, don’t worry! There are alternative containers you can use, such as a square or rectangular cake pan. These will still give you the desired shape and make cutting the chocolate bars a breeze.
Now, let’s move on to the final step of this delicious journey – storing and enjoying your homemade raw cacao chocolate bars.
Store and Enjoy
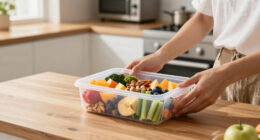
To fully appreciate the divine experience of indulging in these raw cacao chocolate bars, make sure you savor every delectable bite. Once you have cut the bars into your desired size and shape using a baking dish, it’s time to store them properly.
I recommend placing the bars in an airtight container and storing them in the freezer. This will help maintain their freshness and prevent them from melting.
When you’re ready to enjoy the bars, simply take them out of the freezer and let them thaw for a few minutes. They taste absolutely heavenly when paired with a glass of rich, velvety red wine. The combination of the smooth, intense cacao flavor with the complex notes of the wine is simply exquisite.
Now, let’s transition into the next section and explore how you can experiment with different flavors to create your own unique chocolate bars.
Experiment with Flavors
Now let’s delve into the exciting realm of flavor experimentation to create your own unique and tantalizing chocolate creations.
When it comes to flavor combinations, the possibilities are endless. You can add a dash of cinnamon for a warm and spicy twist, or mix in some orange zest for a refreshing citrus kick. For a decadent treat, try incorporating crushed almonds or toasted coconut into the chocolate mixture.
The key is to start with a small amount of the additional ingredient and gradually increase it until you achieve the desired taste.
Once you have your flavor combination, it’s time for some taste testing. Gather a group of friends or family members and let them sample your creations. Their feedback will help you determine which flavors are a hit and which ones need a little tweaking.
Now, let’s move on to the next section and explore how you can personalize your chocolate bars even further.
Personalize Your Chocolate Bars
Indulge in the art of customization and infuse your chocolate creations with a touch of your own personality. Personalized chocolate gift ideas are a perfect way to show your loved ones how much you care. Here are three ways to customize your chocolate bars and create unique flavor profiles:
-
Mix-ins: Add a variety of mix-ins such as dried fruits, nuts, or even crushed cookies to your melted cacao mixture. This will give your chocolate bars an extra burst of flavor and texture.
-
Spices and extracts: Experiment with different spices and extracts to enhance the flavor of your chocolate. Try adding a pinch of cinnamon or a few drops of peppermint extract for a twist on traditional chocolate bars.
-
Toppings: Get creative with your toppings! Sprinkle your chocolate bars with sea salt, shredded coconut, or colorful sprinkles for a fun and festive touch.
By customizing the flavor profiles of your chocolate bars, you can create one-of-a-kind treats that are sure to impress.
In the next section, we will explore how to share and gift your personalized creations.
Share and Gift
When it comes to sharing my homemade chocolate bars with friends and family, I am always excited to see their reactions. There’s something special about seeing their faces light up as they take that first bite and savor the rich, velvety goodness.
And when it comes to packaging them for gifts or special occasions, I take pride in putting together a beautifully presented package that showcases the love and care that went into making each bar. From the elegant wrapping to the personalized note, every detail is carefully thought out to make the recipient feel truly special.
Sharing your homemade chocolate bars with friends and family
Imagine the look on your loved ones’ faces as they eagerly unwrap their very own homemade cacao chocolate bars, a gift that screams "I’m too good for store-bought!" To make the experience even more special, consider packaging ideas and creative presentations.
Here are a few suggestions to engage your audience:
-
Personalized Wrappers: Design custom wrappers with their names or a special message.
-
Decorative Boxes: Use elegant, decorative boxes to showcase the chocolate bars.
-
Ribbon and Bow: Tie a beautiful ribbon around each bar, adding a touch of elegance.
-
Gift Baskets: Arrange the chocolate bars in a gift basket with other goodies for a delightful surprise.
Now, let’s transition into the next section about packaging them nicely for gifts or special occasions.
Packaging them nicely for gifts or special occasions
To enhance the presentation of your homemade cocoa treats, think about packaging them beautifully for gift-giving or special occasions. There are various gift packaging ideas to suit your personal style and the occasion. One creative idea is to use clear cellophane bags tied with a colorful ribbon and a handwritten tag. Another option is to place the chocolate bars in a decorative box, lined with tissue paper or shredded paper, and tied with a satin bow. For a more unique touch, consider wrapping each bar in a personalized wrapper featuring a special message or design. Remember to consider the event’s theme or color scheme when selecting your packaging. With a little creativity and attention to detail, your homemade chocolate bars will not only taste amazing but also look stunning when given as gifts or enjoyed on special occasions.
Frequently Asked Questions
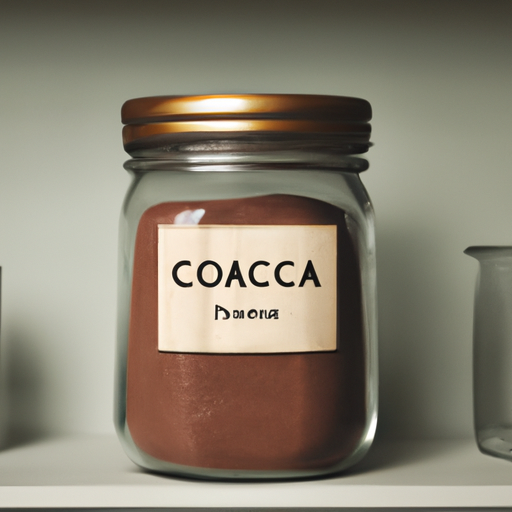
Can I use regular cocoa powder instead of raw cacao powder?
You know what they say, "You can’t make a silk purse out of a sow’s ear." Using regular cocoa powder instead of raw cacao powder will alter the taste and texture of the chocolate bars, as well as the nutritional benefits.
How long does it take for the chocolate bars to set and chill?
The setting time for the chocolate bars varies depending on the recipe, but it typically takes about 2 hours for them to fully set. After that, they need to chill in the refrigerator for an additional hour before they are ready to be enjoyed.
Can I add nuts or dried fruits to the chocolate bars?
Adding nuts or dried fruits to homemade chocolate bars is like sprinkling stardust on a moonlit sky. To achieve a shiny finish, properly temper the chocolate by melting, cooling, and reheating it.
Can I use silicone molds instead of traditional chocolate molds?
I prefer using silicone molds over traditional molds for making chocolate bars. The pros of silicone molds are their flexibility, ease of release, and durability. To use them effectively, make sure to properly grease and freeze the molds before pouring in the chocolate mixture.
How long can I store the homemade chocolate bars before they expire?
The shelf life of homemade chocolate bars depends on proper storage. To maintain their freshness, store them in an airtight container in a cool, dry place. With the right conditions, they can last for several months before they expire.
Can I Use Raw Cacao Powder to Make Chocolate Bars Instead of Syrup and Sugar?
Yes, you can use raw cacao powder to make chocolate bars instead of syrup and sugar. Raw cacao powder syrup is a healthy alternative to sweeteners and can provide a rich, decadent flavor to your homemade chocolates. Experiment with the ratio of raw cacao powder to achieve your desired level of sweetness.
Conclusion
In conclusion, creating your own raw cacao chocolate bars is a delightful adventure for your taste buds. As I melted the ingredients and poured them into molds, it felt like I was crafting a sweet symphony.
The anticipation as the bars set and chilled was like waiting for a masterpiece to be unveiled. And when I finally removed them from the molds, it was like unwrapping a precious gift.
So go ahead, dive into the world of homemade chocolate bars and let your creativity shine. Your taste buds will thank you for it!