Enjoy a guilt-free treat with raw apple pie and a chewy date crust! This no-bake dessert celebrates the natural sweetness and crisp texture of fresh apples, flavored with fragrant spices and nestled in a nutty, coconut-rich base. It's a healthier twist on traditional apple pie, letting the vibrant flavors shine without any processed ingredients. Prepare it in a snap – just blend, layer, and chill. Serve chilled for a refreshing delight, or dress it up with whipped coconut cream. You'll be amazed by how satisfying and nourishing this homemade raw apple pie can be. Let's dive into the easy steps to make this delightful dessert!
Key Takeaways
- A guilt-free dessert that combines crisp apples and fragrant spices in a buttery, nutty raw crust made with soaked cashews, shredded coconut, and natural maple syrup.
- The recipe utilizes a date crust to provide natural sweetness and chewiness, eliminating the need for baking and reducing calorie intake from traditional cooking processes.
- The raw apple pie is packed with nutrients from the fresh ingredients and offers a healthier alternative to traditional versions, making it an ideal treat for health-conscious individuals.
- The simple preparation steps and no-bake assembly make the raw apple pie quick and easy to prepare, eliminating messy cleanup and allowing for spontaneous dessert cravings.
- The raw apple pie can be served chilled, paired with dairy-free whipped cream, and garnished with additional cinnamon for enhanced flavor, making it a versatile dessert option for various occasions and gatherings.

arboleaf Scale for Body Weight, Smart Scale with BMI, Body Fat, Muscle Mass, Upgrade 50+ Metrics Full Body Composition Analyzer, 8-Electrode High Precision Digital Bathroom Scale, Bluetooth Sync
Comprehensive Body Data Analysis – 8-electrode segmental tech measures 50+ metrics: weight, BMI, body fat %, visceral fat,...
As an affiliate, we earn on qualifying purchases.
History
The roots of raw apple pie can be traced back to the colonial era, when resourceful homesteaders embraced the abundance of apples and the simplicity of uncooked desserts.
These early cooks recognized the natural sweetness and crisp texture of fresh apples, and they began to experiment with ways to showcase this wholesome ingredient. They often incorporated seasonal flavors and techniques, much like how music therapy for autism spectrum disorder has been shown to facilitate communication and engagement.
Over time, the raw apple pie evolved, with variations using different types of apples, nuts, and binders like dates or honey to create a delightfully chewy crust.
As the popularity of raw, unprocessed foods grew, the raw apple pie gained a new following. Home bakers and health-conscious cooks rediscovered the appeal of this old-fashioned treat, celebrating its natural flavors and nutrient-rich ingredients.
Today, the raw apple pie remains a beloved dessert, offering a unique twist on a classic that harks back to simpler times and the ingenuity of our ancestors.

GE Smart Scale for Body Weight: 8-Electrode Digital Bathroom Scale for Weight Fat BMI Muscle Mass Full Body Composition Analyzer 50 Measurements Bluetooth Highly Accurate Weighing Machine 400lb Black
COMPREHENSIVE AND HIGHLY ACCURATE: The GE smart scale utilizes 8-electrode dual-frequency and segmental BIA technology, segmenting the body...
As an affiliate, we earn on qualifying purchases.
Recipe
Raw Apple Pie
Recipe
Indulge in the refreshing flavors of raw apple pie, a guilt-free dessert that satisfies your sweet tooth without compromising your health. This delectable treat is a delightful blend of crisp apples, fragrant spices, and a buttery, nutty crust – all without the need for baking.
Incorporating elements like aromatherapy can enhance your overall culinary experience, creating a soothing atmosphere while you prepare this delightful dish. As you enjoy the process, consider how aromatherapy can stimulate the limbic system, impacting emotions and enhancing your mood.
The beauty of this raw apple pie lies in its simplicity and the vibrant, natural flavors that shine through. It's a delightful option for those seeking a healthier alternative to traditional apple pie, as it eschews the typical pastry crust and cooking process in favor of a raw, unprocessed approach.
Ingredients:
- 3 cups peeled and diced apples
- 1 cup raw cashews, soaked for at least 2 hours
- 1/2 cup unsweetened shredded coconut
- 1/4 cup pure maple syrup
- 1 teaspoon ground cinnamon
- 1/4 teaspoon ground nutmeg
- 1/4 teaspoon ground ginger
- 1/4 teaspoon sea salt
Instructions:
Combine the diced apples, soaked and drained cashews, shredded coconut, maple syrup, cinnamon, nutmeg, ginger, and sea salt in a food processor. Pulse until the mixture is well-combined and has a pie-like consistency.
Transfer the filling to a pie dish or tart pan and smooth the top.
Tips:
For best results, let the raw apple pie chill in the refrigerator for at least 2 hours before serving. This allows the flavors to meld and the filling to set.
Top with a sprinkle of additional cinnamon or a dollop of whipped coconut cream for an extra special touch.

RENPHO Smart Scale for Body Weight, FSA&HSA Eligible, Digital Bathroom Scale BMI Weighing Bluetooth Body Fat Scale, Body Composition Monitor Health Analyzer with Smartphone App, 400 lbs - Elis 1
Renpho smart app works in connection with fitness apps. Easy setup app works with Samsung Health, Fitbit and...
As an affiliate, we earn on qualifying purchases.
Cooking Steps
Soak those dates in some hot water to soften them up.
Chia seeds can be a fantastic addition to your crust for an extra boost of nutrition, especially since they're high in fiber and omega-3 fatty acids health advantages of chia seeds.
Then, pop them into a food processor and blend 'em until they're nice and smooth.
Next, press that date mixture right into your pan – you're making the crust!
Now, layer those apple slices on top and get ready to bake.
Pop that pie in the oven at 350°F for 30 minutes and get ready for a delicious treat!
Step 1. Soak Dates in Hot Water
Grab a heatproof bowl and fill it with hot water. Carefully drop the dates into the bowl, making sure they're fully submerged. Let them soak for about 15 minutes. This will soften the dates, making them easier to blend into a smooth, creamy texture.
While the dates are soaking, you can start gathering the other ingredients for your raw apple pie.
Once the 15 minutes are up, drain the dates and add them to your food processor or high-speed blender. Blend them until they form a thick, smooth paste. This date paste will act as the "crust" for your raw apple pie, providing a sweet and chewy base.
Now that your date crust is ready, you can move on to assembling the rest of your delicious raw apple pie. Get ready to layer in the crisp, juicy apple slices and enjoy this healthier twist on a classic dessert!
Step 2. Blend Date Mixture in Food Processor

Once the 15 minutes are up, drain the dates and add them to your food processor or high-speed blender.
You'll want to blend these juicy, caramel-y dates until they form a smooth, creamy paste. Don't be afraid to scrape down the sides a few times to ensure everything gets nicely incorporated.
Now, take a look at that beautiful date mixture! It should have a thick, spreadable consistency – perfect for creating the foundation of your raw apple pie crust.
Go ahead and give it a little taste; the sweet, almost toffee-like flavor is going to be incredible paired with the fresh apples.
With your date paste ready, it's time to move on to the next step: shredding the apples.
Get ready to unleash your inner chef and start slicing and dicing your way to a delightful raw dessert that's sure to impress everyone who tries it.
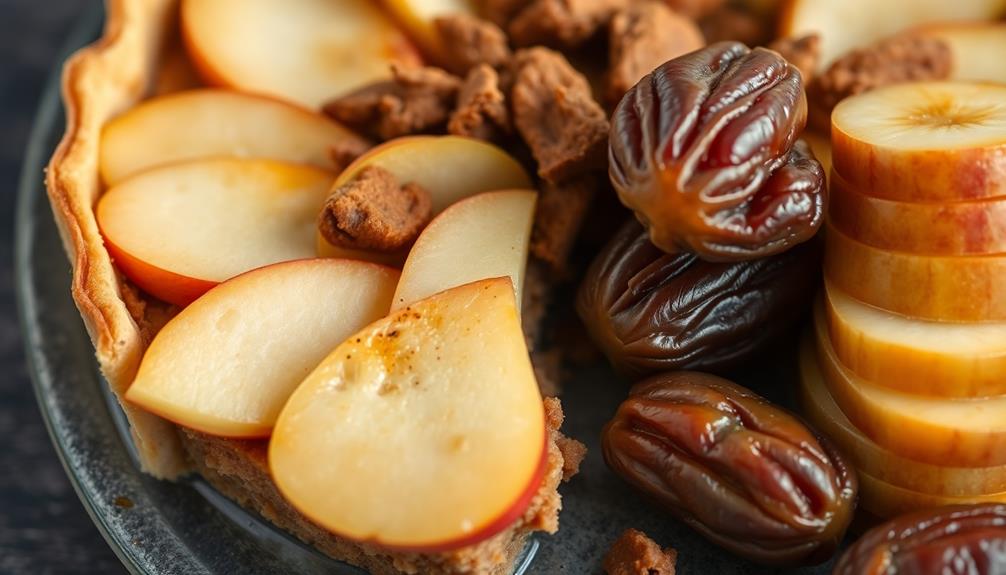
Step 3. Press Date Mixture Into Pan
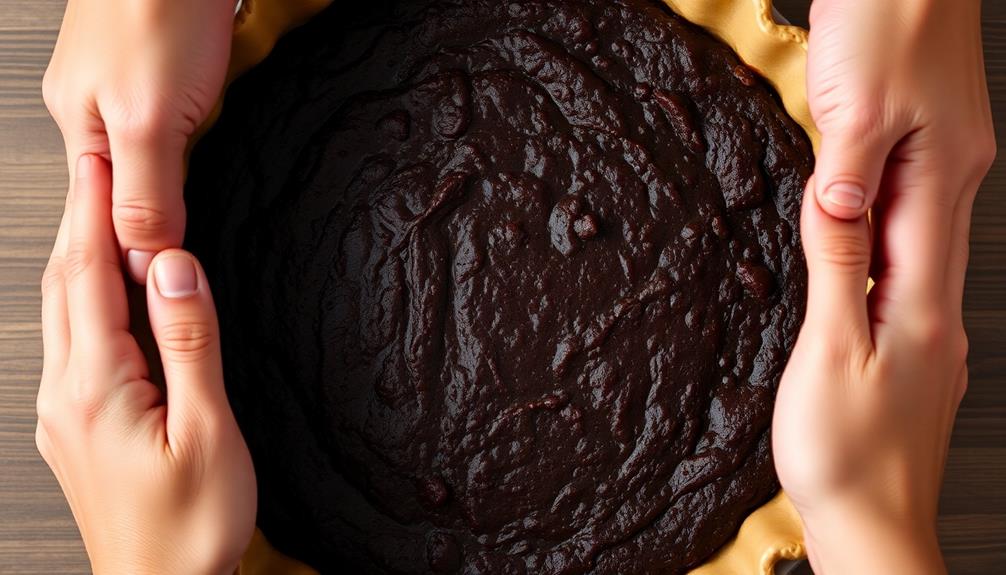
With your luscious date paste ready, it's time to assemble the raw apple pie crust. First, grab a 9-inch pie dish and use your fingers to gently press the date mixture evenly across the bottom and up the sides of the dish.
Don't be afraid to really pack it in there! You want the crust to be nice and sturdy to hold all that delicious apple goodness.
Once you've got the crust shaped, use a fork to prick a few holes in the bottom. This will help prevent any air bubbles from forming as the crust sets.
Now, pop the dish in the fridge while you prepare the apple filling. The cool temperature will help the crust firm up and hold its shape.
When you're ready, simply fill the crust with your tasty apple mixture and enjoy your homemade raw apple pie!
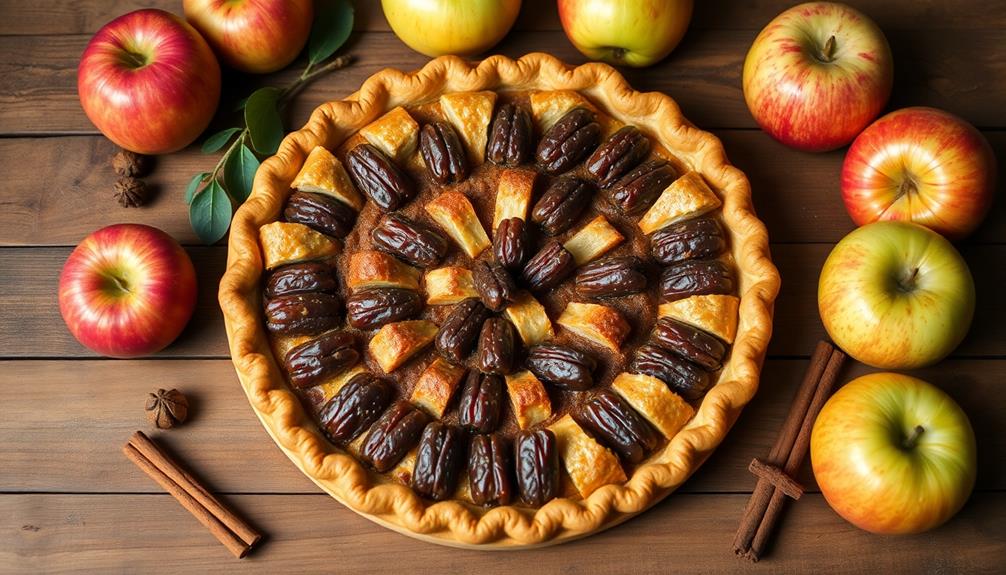
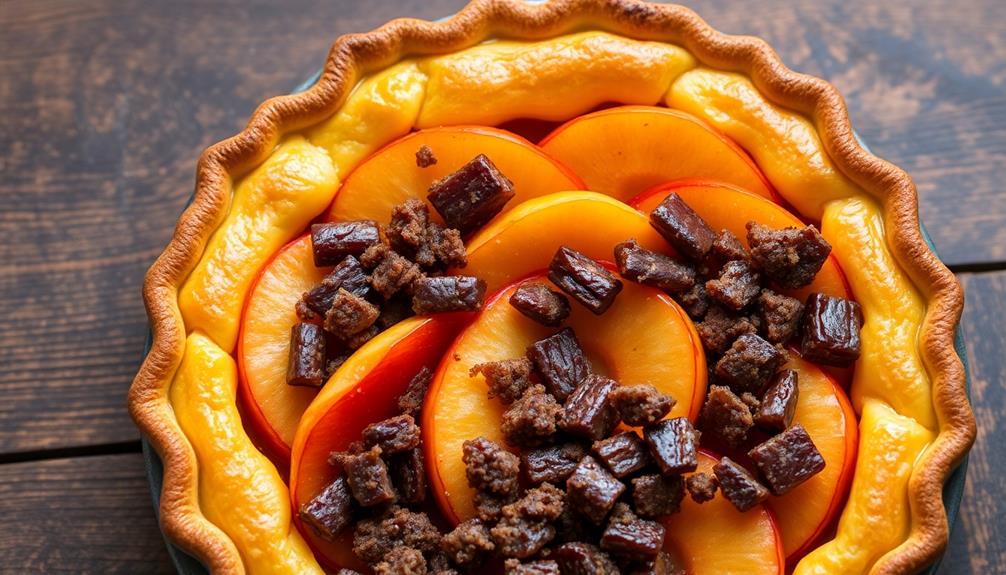
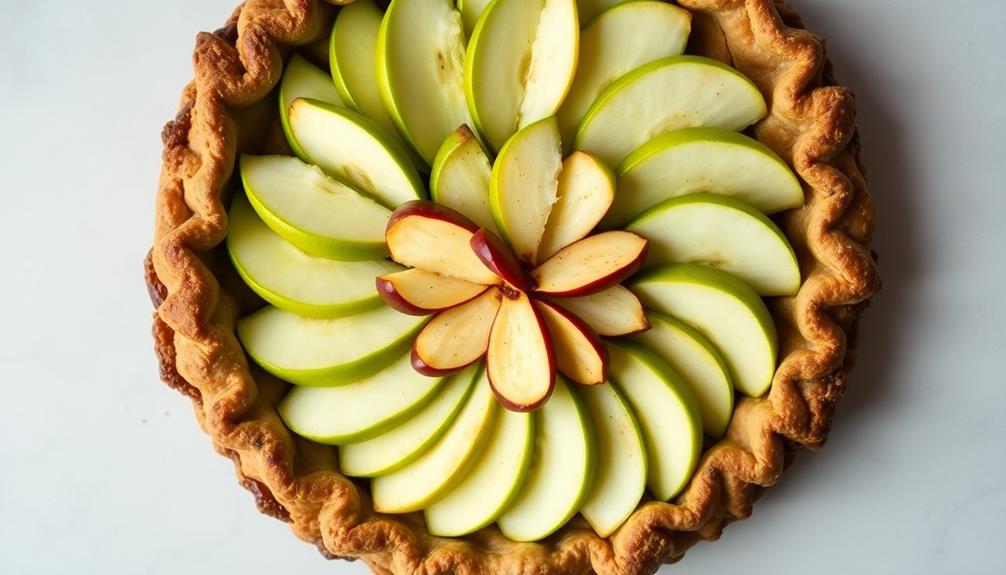
Step 4. Layer Apple Slices in Pan
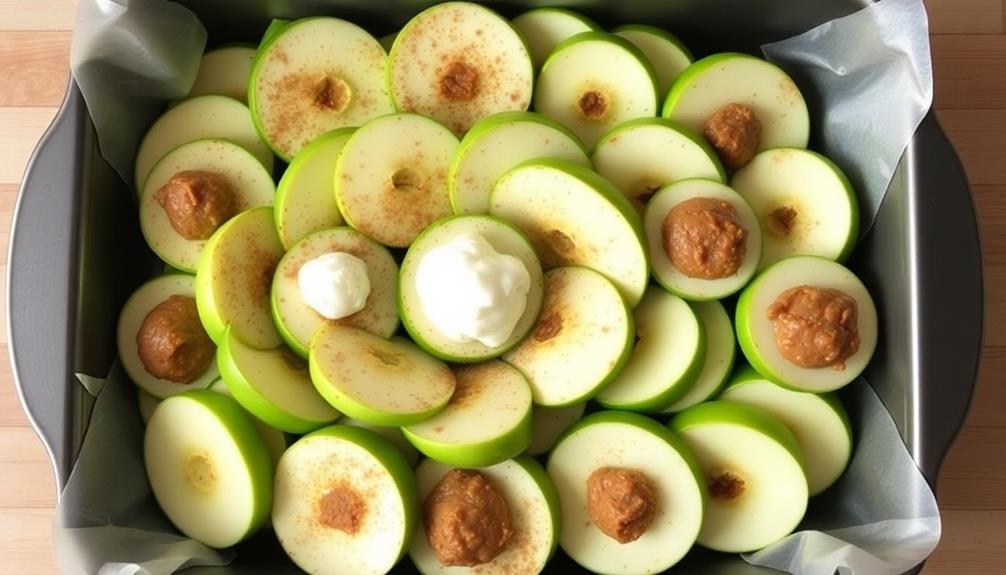
Next, begin layering the apple slices in the prepared pie dish. Neatly arrange the slices, overlapping them slightly to create a beautiful spiral pattern.
Make sure to cover the entire surface of the crust, packing the apples in tightly. As you layer, sprinkle a pinch of cinnamon over the apples for a delightful hint of warmth and spice.
Continue building up the layers, creating a tall, impressive mound of fresh fruit. Don't be afraid to press the slices down gently to compact them and maximize the filling.
Once all the apples are in place, take a moment to admire your handiwork – the vibrant colors and perfect arrangement will have you eager to bake this raw delight.
With the crust and apples ready, you're well on your way to enjoying a truly satisfying raw apple pie. Just wait until you take that first bite!
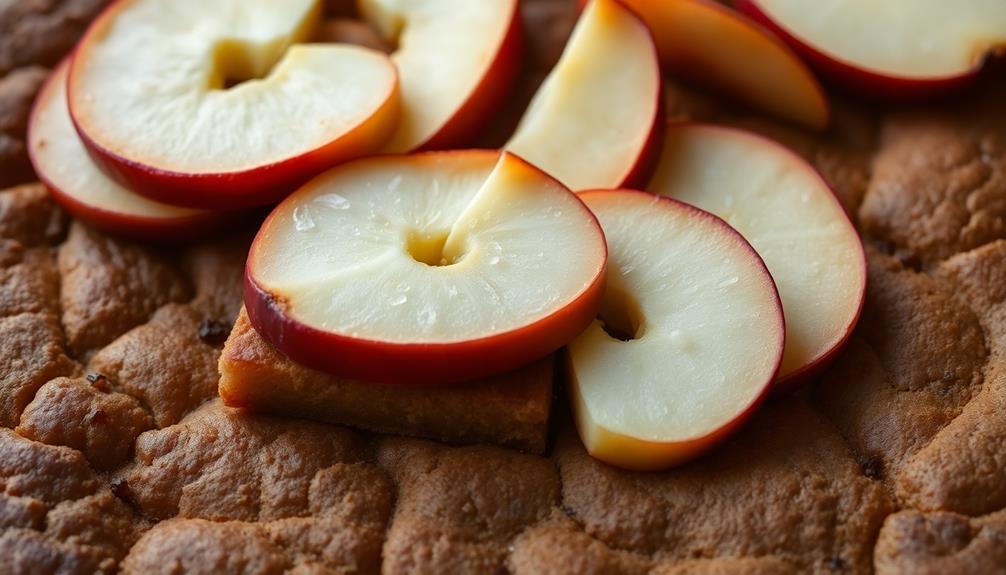
Step 5. Bake at 350°F for 30 Minutes

Preheat your oven to 350°F. This is the perfect temperature to bake your raw apple pie to perfection.
Once your oven is nice and toasty, you'll slide in the pan filled with your delicious apple slices. Be careful not to overcrowd the pan – you want the apples to have room to cook evenly.
Now, set a timer for 30 minutes. This should be just the right amount of time for the apples to soften and the crust to become golden brown.
Keep an eye on it, though, as ovens can vary. You'll know it's done when the apples are tender and the crust looks crispy and inviting.
Once the timer goes off, use oven mitts to carefully remove the pan from the oven. Let it cool for a few minutes before slicing into it.
The longer you let it cool, the easier it'll be to serve. Enjoy your homemade raw apple pie!
![FITINDEX Smart Scale for Body Weight, [2026 Upgraded], Body Composition Analyzer with 8-Electrode Large Platform for Weight, BMI, Fat, Muscle Mass, Segmental Muscle Analysis, High Precision, 400 lbs](https://m.media-amazon.com/images/I/41Zetd9VOIL._SL500_.jpg)
FITINDEX Smart Scale for Body Weight, [2026 Upgraded], Body Composition Analyzer with 8-Electrode Large Platform for Weight, BMI, Fat, Muscle Mass, Segmental Muscle Analysis, High Precision, 400 lbs
50 Body Composition Analysis: Not only weight measurement, this Body pod scale can also measure your BMI, body...
As an affiliate, we earn on qualifying purchases.
Final Thoughts
Raw apple pie can make for a delightful and healthier alternative to traditional cooked apple pie. You'll be amazed at how delicious and satisfying this no-bake version can be.
The date crust provides a naturally sweet and chewy base, while the crisp apples and cinnamon offer a refreshing crunch. Plus, you don't have to worry about the hassle of turning on the oven or dealing with a messy cleanup.
With just a few simple steps, you can whip up this raw apple pie and impress your family and friends. The best part is that it's a guilt-free treat that's packed with nutrients.
Frequently Asked Questions
How Long Can the Raw Apple Pie Be Stored?
You can store the raw apple pie for up to 3-5 days in the refrigerator. Be sure to cover it tightly to prevent it from drying out or absorbing any other flavors in the fridge.
Can the Date Crust Be Made in Advance?
Yes, you can make the date crust in advance. It'll stay fresh for up to a week when stored properly in the refrigerator. Just be sure to cover it tightly to prevent drying out.
What Type of Apples Work Best for This Recipe?
When choosing apples for your recipe, go for firm, crisp varieties like Granny Smith, Honeycrisp, or Fuji. These apples will hold their shape and provide the perfect balance of sweetness and tartness for your dish.
Can I Use a Food Processor to Make the Crust?
Absolutely! You can definitely use a food processor to make the crust for this recipe. The processor will quickly and easily blend the ingredients, creating a smooth and consistent dough for your pie.
Is the Raw Apple Pie Gluten-Free or Vegan?
You can make this raw apple pie vegan, as it doesn't contain any animal products. However, the date crust may contain gluten, so you'll need to use gluten-free dates to make it gluten-free.