
To clean your blender without damaging the seals, start by unplugging it and disassembling the jar carefully. Use gentle cleaning solutions like vinegar, baking soda, or mild dish soap, along with soft sponges or cloths. Avoid abrasive tools and harsh chemicals. Gently clean seals and blades, inspecting them regularly for signs of wear. Reassemble securely and run water to check for leaks. Following these simple steps helps preserve your blender’s seals and keep it running smoothly — discover more tips to guarantee your blender stays in top shape.
Key Takeaways
- Use gentle cleaning agents like vinegar, baking soda, or mild dish soap to protect seals from harsh chemicals.
- Disassemble the blender carefully, handling blades and seals with care to prevent damage.
- Clean seals gently with warm water and mild soap, avoiding abrasive scrubbers or harsh tools.
- Regularly inspect and replace worn seals to prevent leaks and maintain optimal performance.
- Reassemble securely and test with water to ensure no leaks before regular use.

Blender Gasket Replacement Parts, Rubber Ring Seal Rings Blender Accessories for Oster and Osterizer Blender (4 Pieces)
- Compatibility: Fits Oster and Osterizer blenders
- Material Quality: Made of durable high-quality rubber
- Leak-proof Seal: Ensures no leakage during blending
As an affiliate, we earn on qualifying purchases.
As an affiliate, we earn on qualifying purchases.
Why Protect Your Blender Seals During Cleaning?

Protecting your blender seals during cleaning is essential because these seals prevent leaks and keep the motor compartment dry. Proper seal preservation ensures your blender stays functioning smoothly and avoids costly repairs. When you scrub or soak your blender, harsh cleaners or excessive moisture can damage the seals, leading to leaks or mold growth. Prioritize cleaning safety by handling seals gently and avoiding abrasive materials that can cause wear. Additionally, using safe cleaning techniques helps maintain the integrity of the seals and prevents damage. To further extend the lifespan, it’s beneficial to regularly inspect and replace worn seals as needed. Being mindful of cleaning habits can also help prevent seal deterioration over time. Using gentle cleaning tools and avoiding prolonged exposure to water or chemicals can significantly protect the seals. Incorporating proper maintenance routines can further prevent damage and keep your blender in optimal condition. By maintaining the integrity of the seals, you extend your blender’s lifespan and ensure it operates efficiently. Remember, a little extra care during cleaning keeps your appliance in top shape and prevents unnecessary issues. Protecting seals isn’t just about cleanliness—it’s about safeguarding your investment and ensuring reliable performance every time.
Gather Supplies to Clean Your Blender Safely
Start by gathering the right cleaning tools, like a soft sponge or brush, to avoid scratching your blender. Next, pick gentle cleaning agents that won’t harm seals or surfaces. Regularly inspecting your blender’s seal integrity can help prevent leaks or damage over time. Being aware of common maintenance practices ensures your blender stays in optimal condition and extends its lifespan. Additionally, paying attention to natural pool filtration systems can prevent the buildup of residues that may affect your blender’s components. Incorporating knowledge about electric power generation with bike generators can also inspire eco-friendly cleaning methods that reduce electrical waste. Finally, prepare a safe workspace by clearing clutter and ensuring good lighting to make the cleaning process easier and safer. Additionally, consider filter maintenance to ensure your cleaning routine does not damage any internal components.
Gather Appropriate Cleaning Tools
Before you begin cleaning your blender, gather the crucial tools to do the job safely and effectively. Proper tools are essential for effective blender maintenance and ensuring seal preservation. First, grab a soft sponge or microfiber cloth to clean surfaces without scratching. Second, have a small brush or toothbrush ready to reach tight spots and around the seal, preventing buildup that can damage seals. Third, keep a mild dish soap nearby—using gentle cleaners helps avoid seal deterioration. Additionally, understanding how to maintain kitchen tools properly can extend the lifespan of your blender and prevent unnecessary damage. Using the right supplies not only simplifies the process but also prevent seal damage and extends your blender’s lifespan. Incorporating regular cleaning routines can further reduce the risk of mold and bacterial growth. Staying informed about battery reconditioning techniques can help you avoid costly replacements and prolong device life. Being aware of proper cleaning techniques ensures you do not inadvertently harm delicate components, especially the seals, during cleaning. With these essentials, you’ll keep your blender clean, functioning smoothly, and seals intact for longer.
Choose Gentle Cleaning Agents
Choosing gentle cleaning agents is essential to preserve your blender’s components and prolong its lifespan. Eco-friendly solutions and natural cleaning agents are your best options, as they clean effectively without risking damage to seals or plastic parts. Look for ingredients like vinegar, baking soda, or lemon juice, which are safe, non-abrasive, and environmentally friendly. These natural cleaning agents break down residues without harsh chemicals that could degrade your blender’s seals. When gathering supplies, avoid commercial cleaners with strong chemicals or abrasives that may cause wear. Instead, focus on simple, safe solutions that are gentle yet effective. Additionally, using energy-efficient cleaning methods can help reduce your overall environmental impact. Incorporating safe cleaning practices can further ensure that your blender remains in top condition over time. Being mindful of proper maintenance techniques also contributes to the longevity and performance of your kitchen appliances.
Prepare a Safe Workspace
Gathering the right supplies is the first step to cleaning your blender safely. A well-organized workspace ensures you can focus on the task without risking damage to seals or components. To maintain blender safety and protect your appliance, assemble these essentials beforehand:
- Mild dish soap and warm water for gentle cleaning
- Soft cloths or sponges to avoid scratching surfaces
- A small brush or toothbrush for detailed parts
Having everything within reach prevents clutter and accidental spills. Keep your workspace tidy to reduce the risk of damaging seals or misplacing parts. Proper organization makes the cleaning process smoother and safer, ensuring your blender stays in top condition. Additionally, understanding digital safety practices helps prevent accidents or damage when handling electronic appliances. Clear workspace organization is key to a safe, effective cleaning routine.
How to Disassemble Your Blender Safely for Cleaning?

Disassembling your blender safely is essential to prevent damage and guarantee thorough cleaning. Start by unplugging the unit to ensure safety. Remove the blender jar from the base, then carefully detach the blade assembly, being mindful of sharp edges. Avoid forcing parts apart to prevent damaging seals or the motor. While disassembling, check the blade lubrication points—these help maintain smooth operation and prevent rust. If your blender has removable seals, gently detach them and inspect for wear, as damaged seals can affect motor maintenance and overall performance. Keep all parts organized to avoid misplacing small components. Remember, handling each piece carefully preserves your blender’s integrity and ensures it continues working efficiently without risking seal damage. Additionally, understanding proper maintenance techniques can extend the lifespan of your blender and ensure safe operation over time. Regularly inspecting and cleaning seals and gaskets can help prevent leaks and maintain optimal performance. Applying a light lubricant to moving parts during reassembly can also protect seals and help prevent leaks, further prolonging seal life.
Step-by-Step Guide to Cleaning Blender Blades and Jar
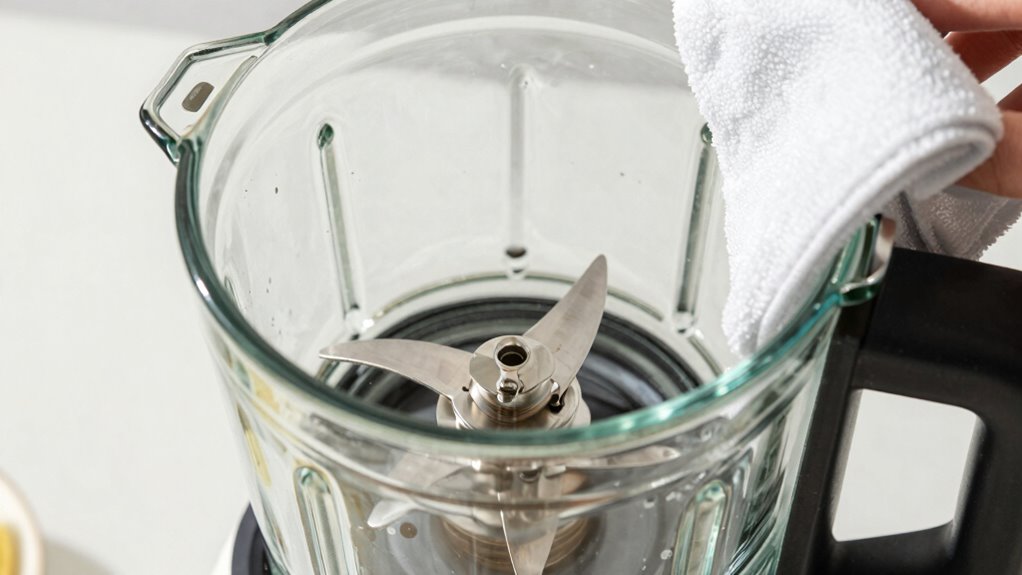
Start by carefully disassembling the blades to avoid injury and damage. Use gentle cleaners to remove residue without harming the jar or seals. Always handle components carefully to prevent seal damage and make certain your blender stays in top condition. Additionally, understanding blender maintenance best practices can extend the lifespan of your appliance. Regularly inspecting seal integrity can help catch potential issues early and keep your blender functioning smoothly. Incorporating proper cleaning techniques can further protect your seals and ensure thorough sanitation.
Disassemble Blades Safely
Before you begin cleaning, make sure the blender is unplugged to prevent any accidents. Disassembling blades safely is essential for effective cleaning and maintaining seal preservation. To do this:
- Remove the blender jar from the base carefully, gripping firmly.
- Unscrew or detach the blade assembly using an appropriate tool if necessary, avoiding excessive force.
- Handle the blades with care to prevent cutting yourself and to avoid damaging the seal or blades.
Be mindful of blade maintenance by inspecting for wear or damage during disassembly. Proper handling ensures you don’t compromise the seal, which helps prevent leaks. Taking your time and following these steps keeps your blender functioning smoothly and extends its lifespan.
Use Gentle Cleaners
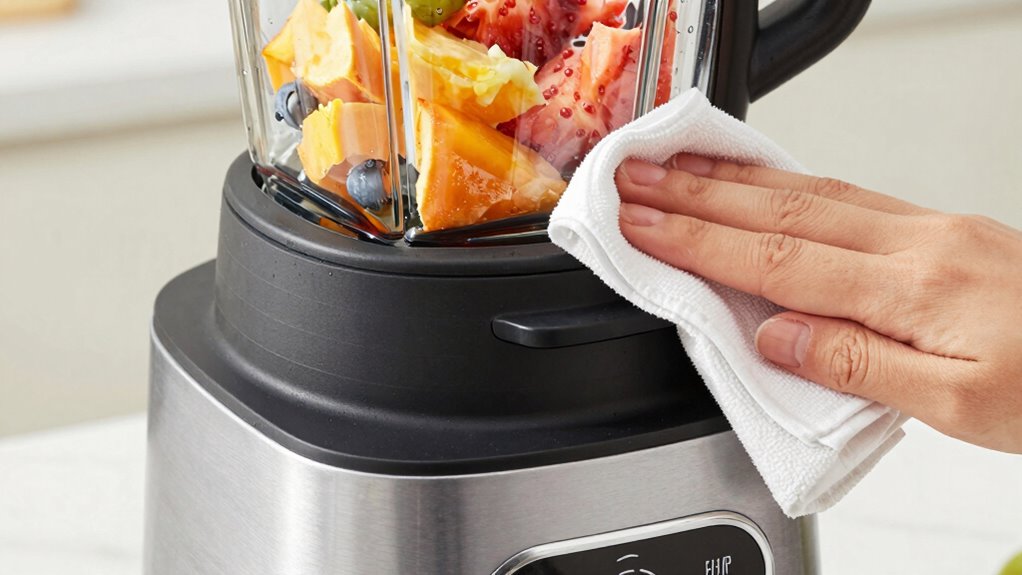
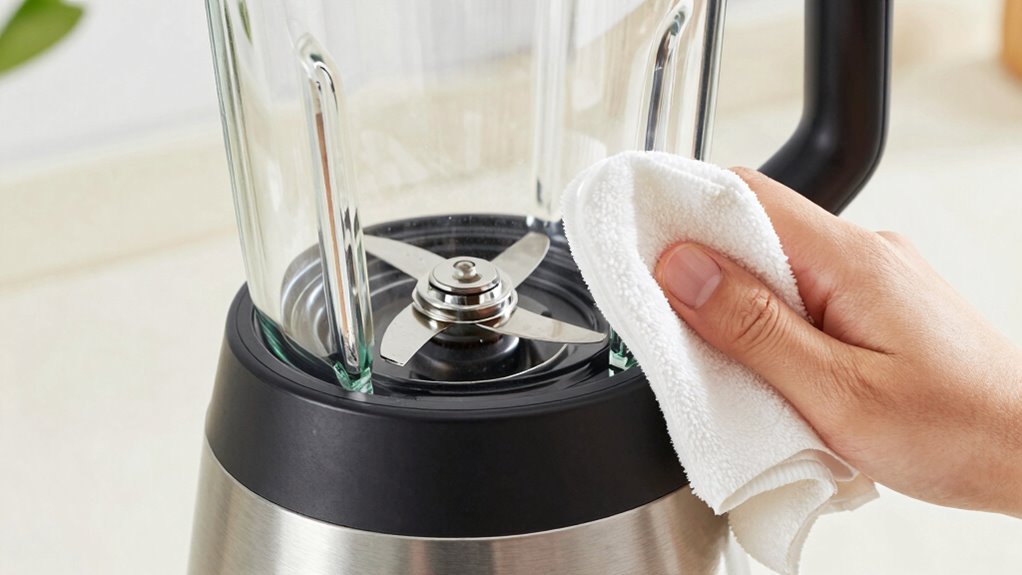
Using gentle cleaners is key to preserving your blender’s blades and jar. Harsh chemicals can weaken seals and cause damage over time, so opt for mild dish soap or natural solutions like vinegar and baking soda. These gentle cleaning agents effectively remove residues without compromising the integrity of your blender’s seals. When cleaning, avoid abrasive scrubbers that can scratch or damage the jar and blades. Instead, use soft sponges or cloths to wipe down surfaces thoroughly. This approach ensures thorough cleaning while maintaining seal preservation and extending your blender’s lifespan. Remember, gentle cleaning not only keeps your blender hygienic but also helps prevent leaks and costly repairs in the long run. Prioritize mild cleaners for a safe, effective cleanup routine.
Prevent Seal Damage
To prevent seal damage during cleaning, focus on carefully removing grime from the blades and jar without applying excessive force or harsh tools. This helps preserve the seal’s integrity and avoids costly replacements. First, avoid scrubbing the seal with abrasive materials that can cause wear. Second, ensure you don’t contaminate the seal with cleaning solutions that can degrade its lubrication over time. Third, regularly check the seal for signs of wear or cracks, and replace it promptly if needed. Proper seal lubrication during reassembly keeps the seal flexible and functional, reducing the risk of damage. If the seal shows persistent issues, consider seal replacement to maintain the blender’s performance and prevent leaks. Gentle handling is key to protecting your blender’s seal and extending its lifespan.
How to Clean and Maintain Blender Seals Without Damage?
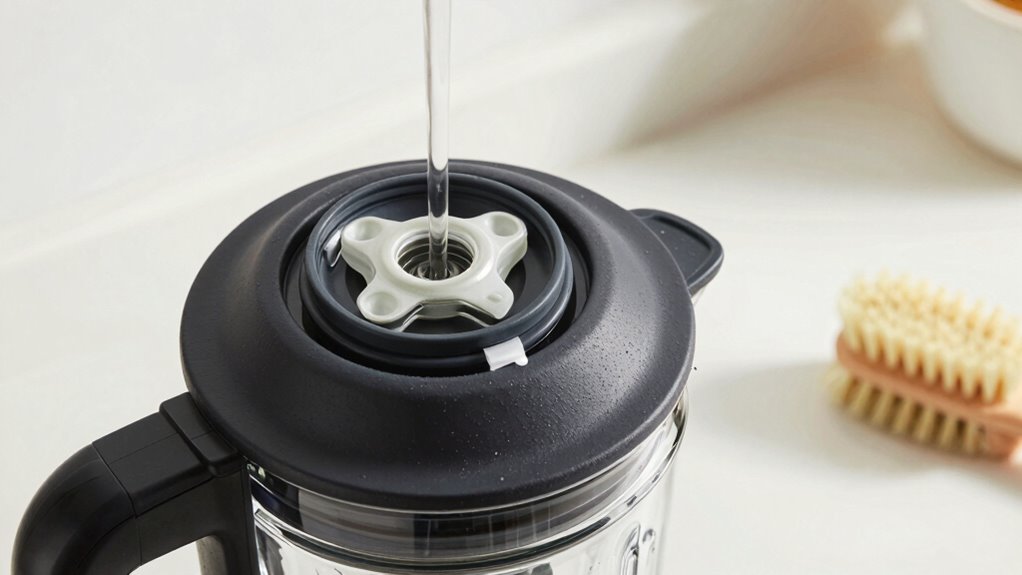
Keeping blender seals clean and intact is essential for preventing leaks and ensuring smooth operation. To do this without damage, regularly inspect the seals for signs of wear. Use a small amount of seal lubrication, like food-grade silicone, to keep the rubber supple and prevent cracking. Avoid harsh chemicals or abrasive tools that could damage the rubber or compromise the seal’s integrity. When seals become too worn or damaged despite proper cleaning, consider seal replacement to maintain peak performance. Gently clean the seals with warm water and mild soap, avoiding excessive force. Proper maintenance ensures your seals stay flexible and effective, preventing leaks and extending your blender’s lifespan. Regular inspection and gentle cleaning are key to maintaining seals without risking damage.
Gentle Ways to Remove Tough Residue Without Harsh Scrubbing
Even with regular seal cleaning, stubborn residue can sometimes cling to blender parts, making it tempting to scrub vigorously. However, harsh cleaning techniques can damage seals and blades. Instead, try these gentle residue removal methods:
- Use warm, soapy water and let it sit for a few minutes to loosen tough residue before rinsing.
- Apply a mixture of baking soda and water to create a gentle abrasive for cleaning tricky spots without scratching surfaces.
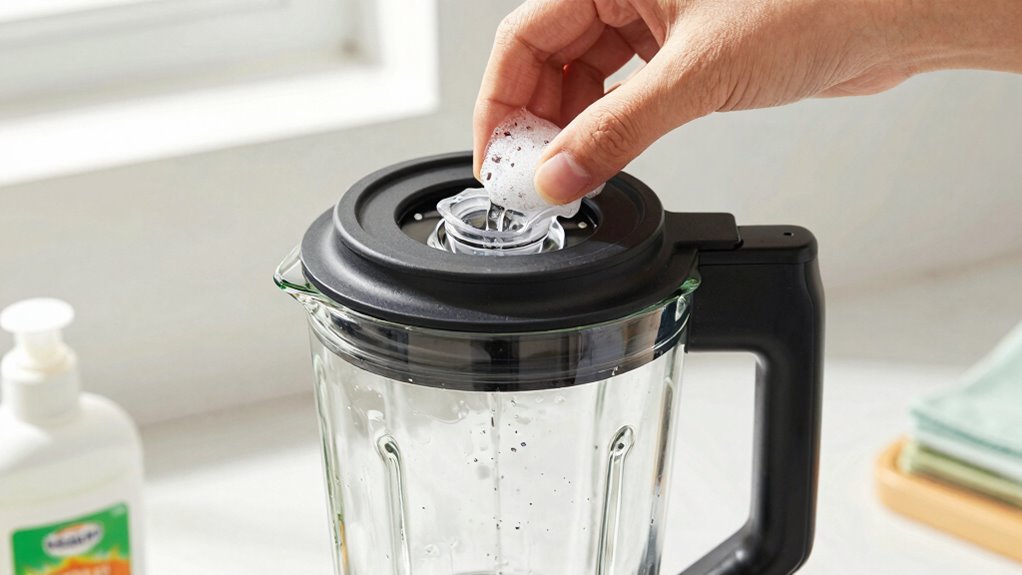
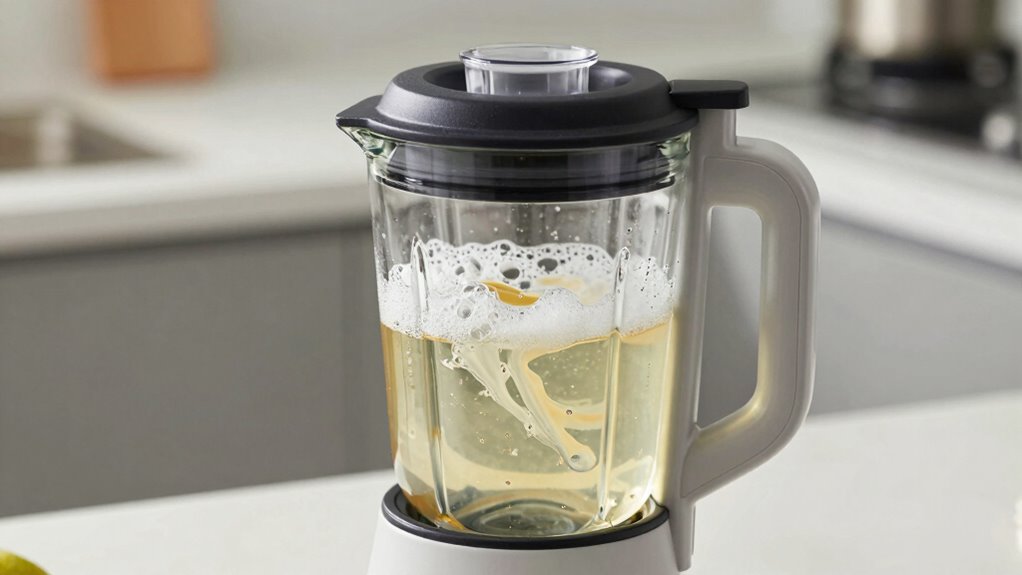
- Fill the blender halfway with water and a splash of vinegar, then run it briefly to break down residue through natural cleaning techniques.
These methods guarantee effective cleaning while protecting seals and preventing damage, making your routine safe and efficient.
Reassemble and Test Your Blender After Cleaning
Once you’ve finished cleaning your blender, carefully reassemble all the parts, guaranteeing each piece fits securely. Check that the seal is properly aligned and lightly lubricated if needed, to maintain a good seal and prevent leaks. Test the blender by running it with some water to confirm smooth operation and check for any leaks around the seal area. If you notice any issues, consider seal replacement or re-lubrication to keep your blender functioning at its best. Use this table to understand key aspects of reassembly:
| Step | Focus | Tip |
|---|---|---|
| Reassemble parts | Fit each securely | Avoid forcing components |
| Seal lubrication | Ensure smooth sealing | Use food-safe lubricant |
| Testing | Confirm no leaks or unusual noise | Run a short cycle with water |
| Seal replacement | Needed if seal is damaged | Consult your model’s manual |
| Final check | Confirm everything is tight | Maintain regular cleaning |
Common Seal Problems and When to Seek Repairs
Seal problems are common in blenders and can lead to leaks, reduced performance, or motor damage if not addressed promptly. Recognizing when to seek repairs helps prevent costly damage. Here are signs to watch for:
- Persistent leaks around the lid or base, indicating the need for leak troubleshooting or seal replacement.
- Reduced blending efficiency, which may result from a worn or damaged seal affecting motor performance.
- Visible cracks or deterioration in the seal, signaling it’s time for seal replacement to prevent further issues.
If you notice any of these problems, don’t delay repairs. Addressing seal issues early can save you from more extensive damage and ensure your blender works smoothly. Proper maintenance keeps your appliance in top shape.
Frequently Asked Questions
Can I Use Dishwasher-Safe Cleaning Methods for My Blender?
You can use dishwasher-safe cleaning methods for your blender, but be cautious. Dishwasher risks include exposing seals to high heat and harsh detergents, which can diminish seal longevity over time. To protect your blender, it’s best to remove the blades and clean them separately or opt for hand washing. This approach helps preserve the seals and keeps your blender functioning smoothly without risking damage from dishwasher cleaning.
How Often Should I Clean the Blender Seals?
You should clean your blender seals at least once a week to prevent buildup and mold. Regular seal maintenance keeps your blender functioning smoothly and extends its lifespan. If you use your blender daily or notice any residue, increase cleaning frequency to every few days. Using gentle cleaning methods guarantees you don’t damage the seals, preserving their effectiveness and preventing leaks. Consistent care makes your blending experience easier and more hygienic.
Are There Natural Cleaning Solutions Safe for Blender Seals?
Yes, natural cleaners are safe for blender seals and help with seal maintenance. You can use a mixture of vinegar and water or baking soda and water to clean your blender effectively. Just blend the solution, rinse thoroughly, and wipe dry. These natural cleaners remove residue without damaging seals, ensuring your blender stays in good condition and functions smoothly. Regular use of natural cleaners keeps your blender hygienic and seal intact.
What Signs Indicate My Blender Seals Need Replacing?
If your blender’s seals start acting up, it’s a clear sign you need seal replacement. Look for cracks, tears, or stiffness during seal inspection—these are your blender’s way of begging for mercy. If leaks persist despite cleaning, it’s time to replace the seals. Don’t ignore these signs; otherwise, you’ll turn your blender into a leaky disaster zone, wasting your smoothies and your patience.
Can Improper Cleaning Damage My Blender’s Motor?
Yes, improper cleaning can damage your blender’s motor. If you use too much water or submerge the motor base, moisture can seep in and cause seal damage, leading to motor failure. Avoid using harsh chemicals or abrasive scrubbers that might harm seals or internal components. Instead, clean the blender carefully, focusing on the blades and jar, and keep the motor base dry to protect it from damage.
Conclusion
By following this simple, safe, and seal-savvy routine, you’ll keep your blender pristine and protected. Prioritize proper preservation by preventing pesky leaks and persistent problems. Patience and gentle techniques promote long-lasting seals and seamless smoothies. Remember, proper preservation isn’t just about cleanliness — it’s about caring for your blender’s core components. Stay consistent, stay cautious, and enjoy countless clean blends with confidence and care!