Connect with us

Benefits of Raw Food

Raw Boy, How Doesn’t The Food Go Bad?

Published

on

An image showcasing a vibrant, fresh fruit basket filled with an assortment of colorful, ripe fruits

In the realm of preserving food, the fight against time is ever-present. It resembles a meticulous ballet, where the quest to maintain the freshness and safety of food is a complex choreography demanding a nuanced grasp of the foundational science.

Enter raw boy, the unsung hero behind the scenes. Have you ever wondered how raw food manages to stay edible without spoiling? It’s a fascinating phenomenon, and the answer lies in the power of enzymes, natural antioxidants, low temperature storage, moisture content, protective skin, oxygen exposure prevention, proper handling, and packaging techniques.

This article will take you on a journey through the intricate web of food preservation, exploring the various methods and techniques that keep raw food from going bad. So, grab a seat and prepare to be amazed by the wonders of raw boy and the magic behind keeping food fresh and delicious.

Key Takeaways

  • Enzymes in raw food prevent bacterial growth and spoilage.
  • Natural antioxidants in raw food inhibit oxidation and maintain freshness.
  • Low temperature storage of raw food preserves nutritional value, slows enzyme activity, inhibits microbial growth, and maintains texture and flavor.
  • Proper handling and packaging techniques, such as vacuum sealing and refrigeration, can prevent spoilage and maximize the shelf life of raw food.

The Role of Enzymes in Raw Food Preservation

Raw food preservation relies heavily on the activity of enzymes, which help to slow down the spoilage process. Enzymes are proteins that act as catalysts in biochemical reactions. They play a crucial role in preserving raw food by facilitating enzymatic reactions that prevent the growth of bacteria and other microorganisms.

Enzymes function by breaking down complex molecules into simpler forms. For example, enzymes called proteases break down proteins into amino acids, while lipases break down fats into fatty acids and glycerol. By breaking down these macromolecules, enzymes prevent the growth of bacteria, which require these nutrients for survival.

Enzymatic reactions also help to slow down the spoilage process by inhibiting the activity of enzymes that promote food spoilage. For instance, enzymes like polyphenol oxidase and peroxidase are responsible for the browning of fruits and vegetables. By inhibiting the activity of these enzymes, raw food can be preserved for longer periods.

Advertisement

In addition to their role in preventing spoilage, enzymes also contribute to the texture and flavor of raw food. For example, enzymes like amylase and pectinase help to soften fruits and vegetables, making them more palatable.

Enzymes play a vital role in raw food preservation by facilitating enzymatic reactions that prevent the growth of bacteria and inhibit the activity of spoilage-promoting enzymes. Understanding these enzyme functions is crucial for preserving the quality and safety of raw food.

Natural Antioxidants and their Preservation Effects

How do natural antioxidants help preserve food and maintain its freshness?

Natural antioxidants play a crucial role in preserving food and preventing spoilage. Unlike synthetic antioxidants, which are artificially created and added to food, natural antioxidants are derived from plants and have been used for centuries to extend the shelf life of various food products.

These antioxidants work by inhibiting the oxidation process, which is the main cause of food deterioration. Processing techniques can significantly impact the antioxidant content in food. High-temperature processing methods, such as boiling or frying, can lead to the loss of natural antioxidants due to their sensitivity to heat. On the other hand, gentle processing techniques like freeze-drying or minimal processing help retain the antioxidant activity in food.

Advertisement

Studies have shown that natural antioxidants not only preserve the freshness of food but also offer additional health benefits. They have been found to neutralize harmful free radicals in the body, which can contribute to various chronic diseases. By incorporating natural antioxidants into our diets through the consumption of fresh fruits, vegetables, and whole grains, we can help protect our bodies from oxidative stress and promote overall well-being.

Natural antioxidants are essential in food preservation as they effectively inhibit oxidation and maintain the freshness of food. The impact of processing techniques on antioxidant content underscores the importance of choosing gentle processing methods to retain the beneficial properties of these antioxidants. Incorporating natural antioxidants into our diet can not only extend the shelf life of food but also contribute to our overall health.

Low Temperature Storage and Its Impact on Raw Food

By utilizing low temperature storage methods, you can prolong the freshness and quality of your perishable produce. Low temperature storage offers numerous benefits for preserving raw food, ensuring that it stays safe to consume for a longer period.

  • Preserving Nutritional Value: Low temperature storage helps retain the nutritional value of raw food. It slows down the rate of nutrient degradation, preserving essential vitamins and minerals that are often lost during food processing or prolonged exposure to higher temperatures.

  • Slowing Down Enzyme Activity: Enzymes play a crucial role in the ripening and deterioration of fruits and vegetables. Cold temperatures inhibit enzyme activity, slowing down the natural decay process and extending the shelf life of raw food.

  • Inhibiting Microbial Growth: Low temperatures create an unfavorable environment for bacteria, yeasts, and molds to grow. Storing raw food at low temperatures can effectively inhibit microbial growth, reducing the risk of foodborne illnesses and increasing the overall safety of the food.

  • Maintaining Texture and Flavor: Cold temperatures help maintain the texture and flavor of raw food. By slowing down chemical reactions responsible for texture degradation and flavor changes, low temperature storage ensures that your produce remains crisp, juicy, and flavorful.

Low temperature storage is a highly effective raw food preservation technique. By utilizing this method, you can extend the shelf life of your perishable produce while preserving its nutritional value, inhibiting microbial growth, and maintaining its texture and flavor.

Moisture Content and Preservation Techniques

Moisture content is the key ingredient that keeps our food fresh and succulent, like a refreshing summer rain that rejuvenates and revitalizes. When it comes to preserving raw food, moisture control plays a crucial role.

Advertisement

Too much moisture can lead to the growth of bacteria and mold, while too little moisture can result in food drying out and losing its taste and texture.

There are various alternative preservation methods that help maintain the perfect moisture balance in raw food. Dehydration is one such technique, where the moisture is removed from the food, preventing bacterial growth and spoilage. This method is commonly used for preserving fruits, vegetables, and meats.

Another effective method is canning, which involves sealing food in airtight containers. This process not only prevents moisture from entering but also creates a vacuum that inhibits the growth of spoilage-causing microorganisms. Canning is commonly used for preserving jams, pickles, and sauces.

Additionally, freezing is a popular preservation technique that relies on low temperatures to control moisture. By freezing raw food, the moisture content is locked in, preserving the flavor and texture of the food. Freezing is commonly used for preserving meats, seafood, and prepared meals.

Moisture control is essential for preserving raw food. Alternative preservation methods such as dehydration, canning, and freezing help maintain the perfect moisture balance, ensuring that our food stays fresh and delicious for longer.

Advertisement

So, next time you savor a juicy piece of raw food, remember the importance of moisture content and the various preservation techniques that keep it from going bad.

Protective Skin and Outer Layers

Preserving the integrity of our produce, the protective skin and outer layers act as a shield, safeguarding the delicate flavors and nutrients within. These natural barriers play a crucial role in preventing spoilage and extending the shelf life of fruits and vegetables. They are composed of protective coatings that serve as a defense mechanism against external threats such as moisture loss, microbial contamination, and physical damage.

The protective coatings found on the surface of produce vary in thickness, texture, and composition depending on the type of fruit or vegetable. For example, apples have a waxy layer called the cuticle, while oranges have a thick, porous skin. These coatings help to regulate the exchange of gases, such as oxygen and carbon dioxide, which are essential for maintaining the freshness and quality of the produce.

To illustrate the importance of protective coatings, consider the following table:

Fruit/Vegetable Protective Coating Function
Apples Cuticle Prevents moisture loss
Grapes Bloom Acts as a natural barrier against pathogens
Tomatoes Epicuticular wax Reduces water loss

The protective skin and outer layers of fruits and vegetables serve as a vital defense mechanism, ensuring that the food remains fresh and nutritious for longer periods. By understanding and appreciating these natural barriers, we can make informed choices in storing and preserving our raw produce.

Advertisement

Microbial Activity and Raw Food Preservation

Now let’s delve into the fascinating world of microbial activity and raw food preservation. You might wonder how raw food manages to stay edible without any artificial preservatives. Well, it all comes down to the intricate balance between microbial growth and enzymatic reactions.

Microbes are tiny microorganisms that exist everywhere, including on the surface of raw food. Some of these microbes are beneficial, while others can cause food spoilage or even make you sick. However, the growth of these microbes can be controlled through various mechanisms.

One way is by manipulating the environmental conditions. For instance, keeping raw food at low temperatures can slow down microbial growth, which is why refrigeration is commonly used for food preservation. Similarly, drying food removes moisture, making it difficult for microbes to survive and multiply.

Another method involves inhibiting microbial growth through natural antimicrobial compounds present in certain foods. For example, some fruits and vegetables contain organic acids and essential oils that have antimicrobial properties, preventing the growth of harmful microorganisms.

Enzymatic reactions also play a crucial role in raw food preservation. These reactions can break down complex molecules, such as proteins and carbohydrates, into simpler forms, making it harder for microbes to utilize them as a food source.

Advertisement

Raw food can stay fresh and safe to eat due to the delicate balance between microbial growth and enzymatic reactions. By controlling environmental conditions and utilizing natural antimicrobial compounds, we can enjoy the benefits of raw food without worrying about spoilage or foodborne illnesses.

  • Refrigeration: Slows down microbial growth.
  • Drying: Removes moisture, inhibiting microbial survival and multiplication.
  • Natural antimicrobial compounds: Found in certain fruits and vegetables, preventing the growth of harmful microorganisms.
  • Enzymatic reactions: Break down complex molecules, making it harder for microbes to utilize them.

Oxygen Exposure and Spoilage Prevention

By carefully sealing raw food in airtight containers, you can shield it from the relentless grasp of oxygen, ensuring its longevity and preventing the onset of spoilage. Oxygen exposure plays a critical role in food spoilage, as it promotes the growth of spoilage-causing microorganisms and accelerates the breakdown of nutrients through enzymatic activity. However, by limiting oxygen availability, you can effectively prevent these detrimental processes.

Spoilage prevention can also be achieved through the presence of natural antioxidants in raw food. These antioxidants help to neutralize harmful free radicals that can lead to spoilage. Low temperature storage is another effective method for extending the shelf life of raw food. By keeping the food at a cool temperature, microbial activity is slowed down, reducing the risk of spoilage. Additionally, maintaining a proper moisture content and storing food in protective skin, such as fruits and vegetables, can further prevent spoilage.

Proper handling and storage techniques, such as avoiding cross-contamination and maintaining cleanliness, are crucial in preventing spoilage. Packaging techniques, such as vacuum sealing and modified atmosphere packaging, can also be employed to limit oxygen exposure and extend the shelf life of raw food. Refrigeration and freezing are common methods used to preserve raw food, as low temperatures inhibit microbial growth and enzymatic activity.

By understanding the role of oxygen exposure in spoilage and implementing proper handling, storage, and packaging techniques, you can effectively prevent the spoilage of raw food and extend its shelf life.

The Importance of Proper Handling and Storage

To ensure your ingredients stay fresh and delicious, it’s crucial to handle and store them properly. Proper handling and storage play a significant role in preventing food spoilage and maintaining food safety.

Advertisement

Here are three key tips to follow:

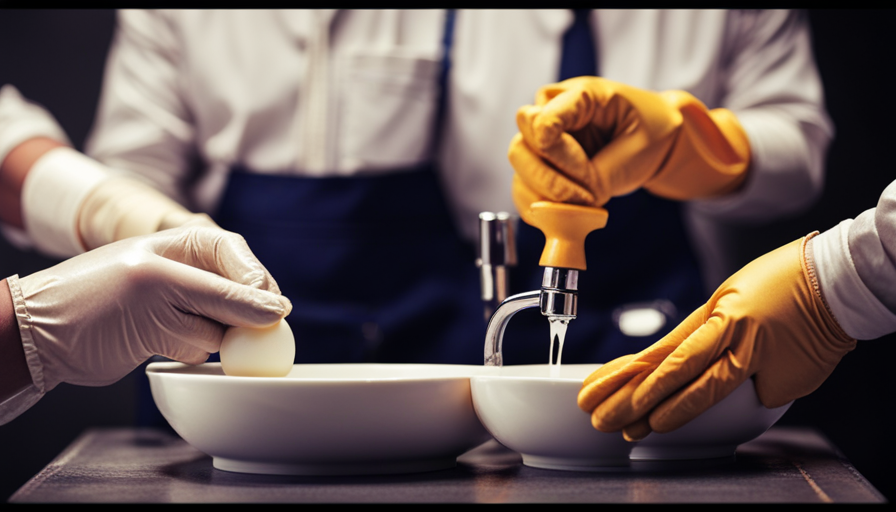
  1. Wash your hands: Before handling any food, make sure to wash your hands thoroughly with soap and warm water. This helps remove any bacteria or germs that can contaminate your ingredients.

  2. Separate raw and cooked foods: To avoid cross-contamination, it’s essential to keep raw and cooked foods separate. Store them in separate containers and use separate utensils to prevent the transfer of harmful bacteria.

  3. Store at the right temperature: Different foods require different storage temperatures. Keep perishable items like meats and dairy products in the refrigerator at or below 40°F (4°C). Dry goods, such as grains and canned goods, can be stored at room temperature in a cool, dry place.

By following these proper handling and storage practices, you can extend the shelf life of your ingredients and reduce the risk of foodborne illnesses. Taking these simple steps will help ensure that your food stays fresh and safe for consumption.

Packaging Techniques for Raw Food Preservation

Ensure your ingredients stay fresh and delicious by learning effective packaging techniques for preserving raw foods. Two popular methods for preserving raw food are vacuum sealing and dehydration techniques.

Vacuum sealing is a fantastic way to extend the shelf life of raw food. By removing the air from the packaging, you create a barrier that prevents the growth of bacteria and other microorganisms. This technique is especially useful for meats and seafood, as it helps to maintain their quality and flavor. When vacuum sealing, make sure to remove any excess moisture from the food, as it can lead to spoilage.

Dehydration is another effective method for preserving raw food. By removing the water content, you inhibit the growth of bacteria and mold. Dehydrating fruits and vegetables not only extends their shelf life but also concentrates their flavors, making them perfect for snacking or adding to recipes. To dehydrate raw food, use a food dehydrator or an oven set to a low temperature.

Advertisement

Remember, proper packaging is crucial for preserving raw food. Both vacuum sealing and dehydration techniques can help you keep your ingredients fresh for longer periods. So, next time you’re storing raw food, give these methods a try and taste the difference in quality and flavor.

Extending Shelf Life through Refrigeration and Freezing

Now that we’ve discussed different packaging techniques for preserving raw food, let’s dive into the next method: extending shelf life through refrigeration and freezing. By using low temperature techniques, you can ensure that your food stays fresh for longer periods of time.

  1. Preservation of Nutrients: Freezing raw food helps to retain its nutritional value. Low temperatures slow down the natural degradation process, preserving essential vitamins and minerals that can be lost during other preservation methods.

  2. Prevention of Bacterial Growth: Refrigeration and freezing inhibit the growth of bacteria, which are the main culprits behind food spoilage. These low temperature techniques create an environment where bacteria cannot thrive, keeping your food safe to consume.

  3. Versatile Preservation: Freezing allows you to preserve a wide variety of raw foods, from fruits and vegetables to meats and seafood. You can freeze these items individually or in combination, providing you with flexibility in meal planning and reducing food waste.

By employing refrigeration and freezing, you can extend the shelf life of your raw food items, minimizing food waste and maximizing their nutritional value. So, next time you’re wondering how to keep your food from going bad, remember the benefits of low temperature techniques.

Frequently Asked Questions

What are the benefits of raw food preservation using enzymes?

Preserving food using enzymes offers numerous benefits. Enzymes act like tiny soldiers, diligently working to break down harmful bacteria and prevent spoilage. They enhance the food’s flavor, texture, and nutritional value, all while extending its shelf life. By harnessing the power of enzymes, you can enjoy the natural goodness of raw food while keeping it safe to eat. So, indulge in the benefits of enzyme preservation and savor fresh, healthy meals for longer.

How do natural antioxidants contribute to the preservation of raw food?

Natural antioxidants play a crucial role in the preservation of raw food. They help to neutralize free radicals, which are responsible for food spoilage. By inhibiting the oxidation process, natural antioxidants prevent the degradation of essential nutrients and maintain the food’s quality and freshness.

Advertisement

Various preservation techniques, such as vacuum packaging or refrigeration, can be used in conjunction with natural antioxidants to further extend the shelf life of raw food.

Can low-temperature storage negatively impact the nutritional value of raw food?

Low-temperature storage can indeed have a negative impact on the nutritional value of raw food. Studies have shown that prolonged storage at low temperatures can lead to nutrient loss, particularly for heat-sensitive vitamins like vitamin C and B vitamins.

Additionally, cooking food can also cause some nutrient loss, but the extent depends on the cooking method. Overall, raw food generally retains more nutrients compared to cooked food, making it a healthier option in terms of nutritional value.

What preservation techniques can be used to maintain the moisture content of raw food?

To maintain the moisture content of raw food, various techniques can be used. Enzymatic preservation involves using enzymes to slow down the degradation process. Methods like vacuum packaging, which removes air and prevents moisture loss, can help preserve the moisture content. Other techniques include canning, freezing, and using moisture-retaining additives. These preservation methods can help prolong the shelf life of raw food and maintain its moisture content.

How does the protective skin and outer layers of raw food contribute to its preservation?

The protective mechanisms of the skin and outer layers of raw food play a crucial role in preventing microbial growth and preserving its freshness. These layers act as a physical barrier, hindering the entry of microorganisms into the food.

Advertisement

Additionally, they contain antimicrobial compounds that further inhibit microbial growth. This helps to extend the shelf life of raw food and maintain its quality.

Can Adding Raw Egg to Food Increase the Risk of Spoilage and Food-Borne Illness?

Adding raw egg protein to food can increase the risk of spoilage and food-borne illness. It’s important to handle and cook raw egg protein properly to minimize the risk of salmonella and other infections. Always use pasteurized eggs in recipes that call for raw eggs to reduce the risk.

Conclusion

Congratulations! You’ve now learned the secrets to keeping your raw food fresh and delicious for longer. By understanding the role of enzymes, utilizing natural antioxidants, and employing low temperature storage, you can prevent spoilage and maintain the nutritional value of your food.

Remember to handle and store your food properly, protect it from oxygen exposure, and use effective packaging techniques.

Finally, refrigeration and freezing are excellent methods for extending the shelf life of your raw food.

Advertisement

So go ahead, enjoy your fresh and wholesome meals with peace of mind!

Continue Reading
Advertisement

Benefits of Raw Food

Mastering The Aeropress Inverted Method: Unlocking The Ultimate Flavor

Published

on

An image showcasing the Aeropress Inverted Method: a hand gripping the device, gently pouring water over inverted coffee grounds, capturing the intense aroma and rich color as it drips into a waiting cup

Over time, the techniques for brewing coffee have developed, giving aficionados numerous methods to discover and enjoy the deep tastes present in coffee beans. Within this array of methods, the AeroPress stands out for its remarkable capability to precisely and effectively extract flavors.

While the standard AeroPress method has its merits, the AeroPress Inverted Method takes brewing to new heights, unlocking the ultimate flavor experience.

In this article, we delve into the world of the AeroPress Inverted Method, exploring its unique brewing process, tips, and techniques to master this art. By juxtaposing the standard method with its inverted counterpart, we aim to highlight the flaws of the former and showcase how the latter addresses those shortcomings, resulting in a cup of coffee that is rich, aromatic, and full-bodied.

Through meticulous measurements, precise water temperature, and the right grind size, the AeroPress Inverted Method accentuates the inherent flavors of the coffee beans used, creating a sensory experience that is unparalleled.

Whether you’re a seasoned coffee connoisseur or a curious beginner, this article will guide you in unlocking the true potential of the AeroPress Inverted Method, elevating your coffee brewing skills to new heights.

Advertisement

Key Takeaways

  • The AeroPress Inverted Method is a solution to the flaws of the standard AeroPress brewing method, which can result in under-extracted coffee and loss of aroma and flavor.
  • The Inverted Method requires measuring and grinding coffee beans, warming up and rinsing the AeroPress, assembling the parts, adding coffee and water, stirring, letting the grounds steep, flipping the AeroPress onto a mug, and pressing down on the plunger.
  • Water temperature and grinding coffee right before brewing are critical for optimal flavor extraction with the AeroPress.
  • Optional steps like rinsing the AeroPress filter and warming up the chamber can remove papery flavors and pre-heat the device for better results.

What is it?

The AeroPress Inverted Method, also known as the upside-down AeroPress, is an alternative brewing technique that addresses the flaws of the standard AeroPress method, resulting in improved extraction of flavor and aroma from ground coffee beans. This method offers several benefits and advantages, making it popular among coffee enthusiasts.

By inverting the AeroPress, the brewing process is altered, allowing for a longer steeping time and enhanced extraction. This leads to a more flavorful and aromatic cup of coffee.

The step by step guide to brewing coffee using the AeroPress Inverted Method involves:

  1. Measuring and grinding coffee beans
  2. Warming up and rinsing the AeroPress
  3. Assembling the parts
  4. Adding coffee and water
  5. Stirring
  6. Letting the grounds steep
  7. Savoring the bloom
  8. Flipping the AeroPress onto a mug
  9. Pressing down on the plunger

The result is a rich and well-extracted coffee that showcases the unique flavor profile of the beans used.

Brewing Process

To achieve optimal results, understanding the brewing process of the AeroPress inverted method is crucial. The AeroPress inverted method involves several steps that contribute to unlocking the ultimate flavor of the coffee. Here is a step-by-step guide to the brewing process:

  1. Measure and grind the coffee beans:

    • Accurately measure the desired amount of coffee beans and grind them to a medium-fine consistency.
  2. Warm up and rinse the AeroPress:

    • Preheat the AeroPress by rinsing it with hot water, removing any papery flavors and ensuring a consistent temperature.
  3. Assemble the AeroPress:

    • Attach the filter cap and filter to the chamber, then place it upside down on a sturdy mug.
  4. Add coffee and water:

    • Add the ground coffee to the chamber, followed by the appropriate amount of hot water (around 200°F).
    • Stir the mixture for about 10 seconds to ensure all grounds are submerged and create a foam layer.
  5. Steep and savor the bloom:

    • Let the coffee steep for about one minute, allowing the flavors to fully develop and bloom.
  6. Flip and press:

    • Carefully flip the AeroPress onto the mug, aligning it with the plunger.
    • Apply moderate pressure and press down steadily on the plunger to extract the coffee into the mug.
  7. Dilute if desired:

    • Depending on personal preference, the concentrated coffee can be diluted with hot water.

The brewing time and water temperature are critical factors that contribute to the flavor and quality of the final cup. The recommended brewing time is around one minute, allowing the coffee to steep and extract its flavors fully. As for the water temperature, it is essential to use water between 195°F and 205°F to achieve optimal extraction and prevent under or over-extraction of the coffee.

By following these steps and paying attention to brewing time and water temperature, coffee enthusiasts can unlock the ultimate flavor using the AeroPress inverted method.

Tips and Techniques

Optimizing the AeroPress brewing process involves implementing effective tips and techniques to enhance the extraction and intensity of the coffee’s characteristics.

Advertisement

One important aspect to consider is the brewing time. While the standard AeroPress brewing method suggests a total brewing time of one minute, the inverted method allows for more control over the extraction process. By extending the steeping time, typically to around one and a half to two minutes, the coffee grounds have more time to release their flavors and aromas, resulting in a more robust and flavorful cup of coffee.

Additionally, water temperature plays a crucial role in the brewing process. The ideal water temperature for AeroPress brewing is between 175 to 205 degrees Fahrenheit. This range ensures optimal extraction without scorching or under-extracting the coffee.

By carefully adjusting these factors, coffee enthusiasts can unlock the ultimate flavor potential of their AeroPress brews.

Frequently Asked Questions

How does the AeroPress Inverted Method compare to other brewing methods in terms of flavor and aroma?

The AeroPress inverted method offers several pros and cons compared to other brewing methods in terms of flavor and aroma.

The inverted method allows for a longer steeping time, resulting in a more flavorful and aromatic cup of coffee. Additionally, it allows for better control over extraction, reducing the risk of under-extraction.

Advertisement

However, the inverted method requires more steps and equipment, making it slightly more complex.

To achieve the best flavor and aroma, it is recommended to use freshly ground coffee, adjust the water temperature, and experiment with different steeping times and ratios.

Can I use pre-ground coffee with the AeroPress Inverted Method, or is it necessary to grind the beans right before brewing?

Using pre-ground coffee in the AeroPress inverted method is possible, but grinding the beans right before brewing is recommended for optimal flavor.

Grind size plays a crucial role in extraction, and pre-ground coffee may not be suitable for the specific brew time and water temperature required.

Grinding beans fresh ensures maximum flavor and aroma, as pre-ground coffee gradually loses its freshness over time.

Advertisement

While using pre-ground coffee may be more convenient, grinding beans right before brewing allows for a more flavorful and aromatic cup of coffee.

Is it possible to use the AeroPress Inverted Method to make more than one cup of coffee at a time?

Using the AeroPress inverted method for making coffee in large quantities is possible with a few modifications. To accommodate more cups, one can adjust the coffee-to-water ratio accordingly, ensuring a balanced flavor.

Additionally, using different types of coffee beans can yield varying results in terms of aroma and taste. Experimenting with different grind sizes and brewing times can help achieve desired flavors.

It is important to note that the AeroPress excels at accentuating the unique flavor profiles of coffee beans, making it a versatile brewing method for coffee enthusiasts.

How does the AeroPress Inverted Method affect the acidity of the coffee?

The AeroPress inverted method, like a gentle tide in the sea of brewing techniques, delicately alters the acidity of the coffee. By inverting the AeroPress, the prolonged steeping time allows for a fuller extraction, resulting in a smoother and less acidic cup of coffee.

Advertisement

The advantages of this method over other brewing techniques include a more complete extraction, enhanced flavor and aroma, and greater control over the brewing variables.

The AeroPress inverted method is a testament to the pursuit of a truly exquisite coffee experience.

Are there any specific types of coffee beans that work best with the AeroPress Inverted Method?

Specific coffee beans that work best with the AeroPress inverted method can vary based on personal preference. However, certain characteristics can enhance the overall flavor.

Light to medium roast beans are commonly recommended for AeroPress brewing. These beans tend to have more acidity and brightness, which can complement the smoothness of the inverted method.

Additionally, using a finer grind size, similar to that of table salt, allows for better extraction and a more robust flavor profile.

Advertisement

Experimenting with different coffee origins and flavors can help find the perfect match for the AeroPress inverted method.

Is the Inverted Method of Aeropress Brewing Comparable to Using a Moka Pot?

The Inverted Method of Aeropress brewing offers a unique complexity and smoothness to your coffee, creating a beautifully rich cup. However, using a Moka pot can produce a different texture and flavor profile, still achieving the goal of brewing perfect coffee Moka pot. Each method has its own merits.

Conclusion

In conclusion, the AeroPress Inverted Method is a game-changer for coffee enthusiasts looking to unlock the ultimate flavor in their brew. By addressing the flaws of the standard AeroPress brewing method, this technique allows for a more controlled and precise extraction process.

With careful measurements, grinding, and attention to water temperature, the AeroPress accentuates the unique flavor profile of the coffee beans, resulting in a truly exceptional cup of coffee. It’s like experiencing a symphony of flavors, where each note is perfectly balanced, creating a harmonious and satisfying sensory experience.

So, embrace the AeroPress Inverted Method and elevate your coffee brewing to new heights.

Advertisement
Continue Reading

Benefits of Raw Food

From Seed To Cup: The Journey Of Coffee

Published

on

An image showcasing the journey of coffee, starting with a lush coffee plantation under a golden sunrise, followed by hand-picked ripe cherries, precise roasting, and ending with a steaming cup of aromatic coffee

Coffee, the fragrant brew that has enchanted millions globally, undertakes an incredible voyage from seed to cup. This process is akin to a detailed choreography, involving the detailed cultivation, careful processing, and skillful roasting methods that metamorphose a basic seed into a rich and inviting drink.

The coffee belt, a region blessed with abundant sunshine, rainfall, and fertile soil, serves as the nurturing cradle for the coffee plants. Here, the two main varieties of coffee, Arabica and Robusta, flourish, each offering its unique flavor profile.

Through the careful selection of processing methods, the coffee cherries undergo a transformation, shedding their fruity flesh and revealing the precious beans within. Roasting, the alchemical process that imparts a rich brown hue and distinctive flavors, completes the metamorphosis.

Finally, brewing extracts the essence of these roasted beans, yielding a liquid that is both invigorating and comforting.

Join us as we embark on a fascinating voyage through the journey of coffee, exploring the intricate steps that culminate in the perfect cup of this beloved beverage.

Advertisement

Key Takeaways

  • Coffee cultivation requires specific climate conditions and well-draining soil in the coffee belt region.
  • Different processing methods such as natural, washed, and honey result in unique flavor profiles.
  • Roasting coffee beans at different levels (light, medium, and dark) brings out distinct flavors and colors.
  • Brewing methods like espresso, pour-over, French press, cold brew, and Aeropress extract different flavors from roasted coffee beans.

Growing Conditions

Growing coffee requires specific climate conditions and well-draining soil, as it is a flowering bush that thrives in regions known as the coffee belt, where ample sunshine, frost-free conditions, plenty of rain, and well-draining soil are present.

Coffee cultivation techniques vary depending on the region and include methods such as organic farming, shade-grown cultivation, and integrated pest management.

Harvesting practices also play a crucial role in coffee production. The coffee cherries are hand-picked when they reach their optimum ripeness, ensuring the best flavor and quality. Some farms employ selective picking, where only the ripe cherries are harvested, while others use strip picking, which involves harvesting all the cherries at once.

The harvested coffee cherries are then processed through various methods, such as natural, washed, or honey processing, to remove the fruit and prepare the beans for roasting.

Coffee Processing Methods

Coffee processing methods involve different techniques to transform the harvested fruit into the final product, with the natural method being the most time-consuming but also the most environmentally friendly, requiring 30% less water compared to other methods.

  1. Natural vs. Washed: Impact on Flavor Profiles:
    • Natural processing involves fermenting the cherries in the sun before removing the fruit. This method allows the fruit’s sugars to infuse the beans, resulting in a sweeter and fruitier flavor profile.
  • Washed processing, on the other hand, removes the fruit before fermentation. This method produces a cleaner and brighter cup, with flavors that showcase the coffee’s inherent characteristics.
  1. Honey Processing: A Balance of Natural and Washed Methods:
    • Honey processing is a hybrid method that combines elements of both natural and washed methods. The cherries are partially removed, allowing some fermentation to occur, resulting in a unique flavor profile that balances sweetness and acidity.

These various processing methods play a crucial role in shaping the flavor profiles of coffee, offering a diverse range of tastes to cater to different preferences.

Brewing and Roasting

Brewing and roasting are essential steps in the coffee production process, as they greatly influence the final flavor and aroma of the beverage. Different coffee brewing methods can extract unique flavors from the coffee beans, allowing for a diverse range of taste experiences. The importance of freshness in roasting cannot be overstated, as it determines the quality of the coffee. The process of roasting coffee beans involves applying heat to the green beans, causing them to go through various chemical reactions that develop their flavor profile. The time and temperature of roasting are carefully controlled to achieve the desired flavor characteristics. A light roast brings out bright fruit and floral flavors, while a medium roast reveals caramelization notes. A dark roast results in a toasted flavor and a full-bodied cup of coffee. To present the information in a visually appealing manner, the following table summarizes the different brewing methods and their characteristics:

Advertisement
Brewing Method Description
Espresso A concentrated, full-bodied coffee brewed under pressure.
Pour-over Hot water is poured over coffee grounds in a filter.
French press Coffee grounds steep in hot water, then are pressed down.
Cold brew Coffee grounds are steeped in cold water for an extended period.
Aeropress A device that uses air pressure to extract coffee flavors.

By understanding the brewing and roasting processes, coffee enthusiasts can better appreciate the complexities and nuances that contribute to the perfect cup of coffee.

Frequently Asked Questions

How long does it take for a coffee plant to start producing cherries?

The time it takes for a coffee plant to start producing cherries depends on various factors affecting coffee plant growth. These factors include the coffee plant’s age, variety, environmental conditions, and cultivation practices.

Generally, it takes around 3 to 4 years for a coffee plant to reach maturity and start producing cherries. However, this time frame can vary, with some plants taking up to 5 years or more.

Patience and proper care are crucial during the coffee plant development stage to ensure optimal fruit production.

Are there any specific pests or diseases that coffee plants are susceptible to?

Coffee plants are not immune to the perils of nature, as they face various pests and diseases that can wreak havoc on their growth and productivity.

Advertisement

Some common pests include coffee berry borers, leaf miners, and aphids, while diseases like coffee leaf rust and coffee wilt disease pose significant threats.

To prevent and control these issues, farmers employ integrated pest management strategies, such as crop rotation, pruning infected plants, and using organic pesticides.

The impact of these pests and diseases can be devastating, leading to reduced yields and quality, and ultimately affecting coffee production worldwide.

Can coffee plants be grown in greenhouses or indoor settings?

Coffee plants can be grown in greenhouses or indoor settings, providing certain advantages and disadvantages. The controlled environment of a greenhouse allows for optimal conditions such as temperature and humidity control, protection from pests, and extended growing seasons. However, it requires significant initial investment and ongoing maintenance costs.

The impact of light and temperature on coffee plant growth is crucial, as they affect photosynthesis, flowering, and overall plant health. Adequate light intensity and duration, along with proper temperature management, are essential for successful indoor coffee plant cultivation.

Advertisement

What are the environmental impacts of coffee production?

Coffee production has significant environmental impacts, particularly in terms of environmental sustainability, deforestation, and habitat loss.

The expansion of coffee plantations often leads to the clearing of forests, resulting in the loss of crucial habitats for various species.

Additionally, the intensive use of pesticides and fertilizers in coffee farming can contribute to soil degradation and water pollution.

It is crucial for the coffee industry to adopt sustainable practices that prioritize environmental conservation and minimize these negative impacts.

Are there any specific certifications or labels to look for when purchasing coffee to ensure ethical and sustainable practices?

When purchasing coffee, consumers can look for specific certifications or labels to ensure ethical and sustainable practices.

Advertisement

Two such certifications are the Fair Trade Certification and the Rainforest Alliance Certification.

The Fair Trade Certification ensures that coffee farmers receive fair prices for their products and work under safe and environmentally friendly conditions.

The Rainforest Alliance Certification focuses on promoting sustainable farming practices that protect ecosystems, biodiversity, and the well-being of farmers and workers.

These certifications provide reassurance to consumers that the coffee they are purchasing is produced in an ethical and sustainable manner.

What is the Journey of Coffee from Seed to Cup and How Does it Impact the Taste of a Flat White Coffee?

The journey of coffee from seed to cup is a fascinating process. The delightful flat white coffee flavor is influenced by various factors such as the region where the coffee is grown, the altitude, the harvesting method, and the roasting process. These elements all contribute to the unique taste of a flat white coffee.

Advertisement

Conclusion

In conclusion, the journey of coffee from seed to cup is a captivating tale of nature’s intricate processes and human craftsmanship.

Symbolizing the interconnectedness of the world, coffee cultivation relies on specific growing conditions in the coffee belt, where the plants thrive under the sun’s warmth and rain’s nourishment.

The delicate cherries undergo various processing methods to unlock their unique flavors, while roasting transforms them into rich brown gems.

Brewing coffee is an art of extracting its essence, resulting in a beverage that awakens the senses and brings people together.

This journey is a testament to the passion and expertise required to deliver a truly remarkable cup of coffee.

Advertisement
Continue Reading

Benefits of Raw Food

The Irresistible Caramel Brulee Latte: A French Classic Copycat

Published

on

An image that showcases a steaming cup of velvety caramel brulee latte, adorned with a luscious caramel drizzle, delicately frothed milk, and a sprinkling of caramel shards on a rustic wooden table

Boasting luxurious and indulgent tastes, the caramel brulee latte is cherished as a French favorite and can now be effortlessly made in the comfort of your own home. This lavish coffee concoction blends the robustness of dark roast coffee beans with a smooth caramel brulee sauce, crafting a drink that’s bound to fulfill the desires of anyone with a penchant for coffee.

The addition of whipped cream and a caramel brulee crumble adds an extra layer of sweetness and texture to this already irresistible latte.

What makes this drink truly special is its versatility. Non-dairy milk options can be used for those with dietary restrictions, and variations can be made by adding extracts or creating a salted caramel version. The use of sugar substitutes in the caramel brulee base allows for a healthier alternative, while steaming oat milk provides a unique twist.

Whether enjoyed during cold winters or as a dessert for breakfast, the caramel brulee latte is a French classic that brings a touch of luxury to any occasion. By following a few simple steps, anyone can create this delightful coffee drink in the comfort of their own home.

Key Takeaways

  • Caramel Brulee Latte is a popular coffee drink and a French classic.
  • The Starbucks copycat recipe for Caramel Brulee Latte includes espresso, sugar, milk, cream, caramel sauce, and vanilla syrup.
  • Non-dairy milk options can be used in the recipe.
  • Toppings for the latte include whipped cream and caramel brulee crumble.

How to make it?

To make a caramel brulee latte, follow these steps:

  1. Combine espresso, sugar, milk, cream, caramel sauce, and vanilla syrup.nn2. Use a 1:1 ratio of milk to heavy cream for a creamy texture.nn3. Steam the mixture with an espresso machine or a French press.nn4. Add different extracts like almond, hazelnut, or vanilla for variations.nn5. Ensure that the milk and cream are cold before steaming for the perfect froth.nn6. Use a steam wand to steam the milk and cream until a velvety texture is achieved.nn7. Pour the frothed caramel brulee latte base over the espresso or hot coffee.nn8. Enjoy your delicious and indulgent caramel brulee latte.

Ingredients and Equipment

Bold, dark roast coffee beans are recommended for achieving a robust and rich flavor in this renowned beverage replication. The caramel brulee latte can be customized and tailored to individual preferences. Variations can be made by adding extracts like almond, hazelnut, or vanilla, giving the latte a unique twist. Additionally, a salted caramel version can be created by increasing the salt content in the caramel brulee sauce and sprinkling flaky sea salt on top.

In terms of health benefits, the caramel brulee latte provides a source of energy from the espresso and milk components. The latte also offers a comforting and indulgent experience, which can positively affect one’s mood. However, it is important to note that the drink contains added sugar and fats from the cream and caramel sauce. As such, moderation is key when enjoying this sweet treat.

Advertisement

Below is a table outlining the main ingredients and equipment required to make the caramel brulee latte:

Ingredients Equipment
Espresso Espresso machine or French press
Sugar Measuring spoons
Milk Saucepan
Cream Whisk
Caramel sauce Mug or glass
Vanilla syrup Steaming pitcher
Whipped cream Coffee grinder
Caramel brulee topping Broiler or blow torch
Brulee crumble topping Mixing bowls
Salt Sieve or strainer

Step-by-step instructions

One important step in making the caramel brulee latte is brewing a strong and bold cup of espresso or hot coffee separately. This step ensures that the latte has a robust and flavorful base.

To achieve the perfect frothed caramel brulee latte base, it is essential to combine heavy cream, milk, caramel syrup, vanilla syrup, and a pinch of salt. Steaming this mixture using an espresso machine or a French press creates a creamy and velvety texture.

Additionally, it is worth experimenting with different flavors to create unique variations of the caramel brulee latte. For instance, adding almond, hazelnut, or vanilla extracts can enhance the aroma and taste.

Another option is making a salted caramel version by incorporating extra salt into the caramel brulee sauce and sprinkling flaky sea salt on top. These variations allow for a delightful and personalized caramel brulee latte experience.

Advertisement

Frequently Asked Questions

Can I make a caramel brulee latte without an espresso machine or French press?

While an espresso machine or French press is typically used to make a traditional caramel brulee latte, there are alternative brewing methods available.

For those without access to these machines, alternative options like a Moka pot, AeroPress, or pour-over method can be used to make a strong coffee base.

Additionally, vegan caramel alternatives, such as homemade caramel made with coconut milk or store-bought vegan caramel sauces, can be used to achieve the rich and sweet caramel flavor in the latte.

How can I make a vegan version of the caramel brulee latte?

To make a vegan version of the caramel brulee latte, there are several options for substituting the non-vegan ingredients. Instead of using dairy milk and cream, plant-based alternatives like oat milk, almond milk, coconut milk, or soy milk can be used. These alternatives can be frothed by following specific steps, such as using a steam wand or a handheld frother.

Additionally, vegan caramel alternatives can be used, such as homemade caramel made with coconut milk and coconut sugar or store-bought vegan caramel sauces.

Advertisement

Can I use caramel syrup instead of caramel sauce?

When considering a caramel syrup alternative for the caramel brulee latte, it is important to acknowledge the flavor difference between caramel syrup and caramel sauce.

While both offer a sweet and rich caramel taste, caramel syrup tends to be thinner and more liquid in consistency compared to the thicker and creamier texture of caramel sauce.

This difference may affect the overall mouthfeel and flavor profile of the latte.

It is recommended to experiment and adjust the quantities of caramel syrup to achieve the desired taste and consistency.

Can I make a decaf version of the caramel brulee latte?

Decaf options are available for those who prefer a caffeine-free version of the Caramel Brulee Latte. Instead of using espresso, alternatives such as decaf coffee or decaf espresso can be used as the base. These options can be brewed separately and added to the frothed caramel brulee latte base.

Advertisement

Additionally, for those who do not have an espresso machine, a French press can be used to froth the latte base. This allows for the creation of a decaf version of this delightful French classic.

How long does it take to make a caramel brulee latte from start to finish?

The time it takes to make a caramel brulee latte from start to finish can vary depending on individual preferences and equipment used. On average, it can take approximately 10-15 minutes to prepare the caramel brulee sauce and toppings.

The latte base can be made in a few minutes by combining the necessary ingredients and steaming them using an espresso machine or a French press. Brewing the espresso shots or hot coffee separately can take an additional few minutes.

Assembling the latte with the frothed latte base, toppings, and optional extracts takes just a minute or two.

Overall, the entire process can be completed in around 15-20 minutes.

Advertisement

– Can the Caramel Brulee Latte be a Refreshing Summer Drink like the Freddo Espresso?

The Caramel Brulee Latte can be a delightful summer treat, but it may not have the same refreshing quality as the authentic Greek Freddo Espresso. The rich, smooth taste of the Freddo Espresso is perfect for hot summer days, making it a top choice for those craving a cool caffeine boost.

Conclusion

In conclusion, the caramel brulee latte is a delightful French classic coffee drink that can now be easily recreated at home with a Starbucks copycat recipe.

This decadent latte features bold, dark roast coffee beans and a creamy caramel brulee sauce that perfectly complements the espresso.

With non-dairy milk options available and the ability to customize with different extracts or sugar substitutes, this indulgent drink can be enjoyed by a wide range of individuals.

While some may argue that it is too rich or sweet, the caramel brulee latte offers a comforting and indulgent experience, especially during cold winters or as a dessert for breakfast.

Advertisement

So why not treat yourself to this irresistible drink and bring a touch of French elegance to your morning routine?

Continue Reading
Advertisement

Affiliate disclaimer

As an affiliate, we may earn a commission from qualifying purchases. We get commissions for purchases made through links on this website from Amazon and other third parties.

Advertisement

Trending