Connect with us

What is Raw Food?

How To Slice Raw Top Sirloin Steak In A Cuisinart Food Processor

Published

on

An image capturing the process of effortlessly slicing a raw top sirloin steak using a Cuisinart food processor

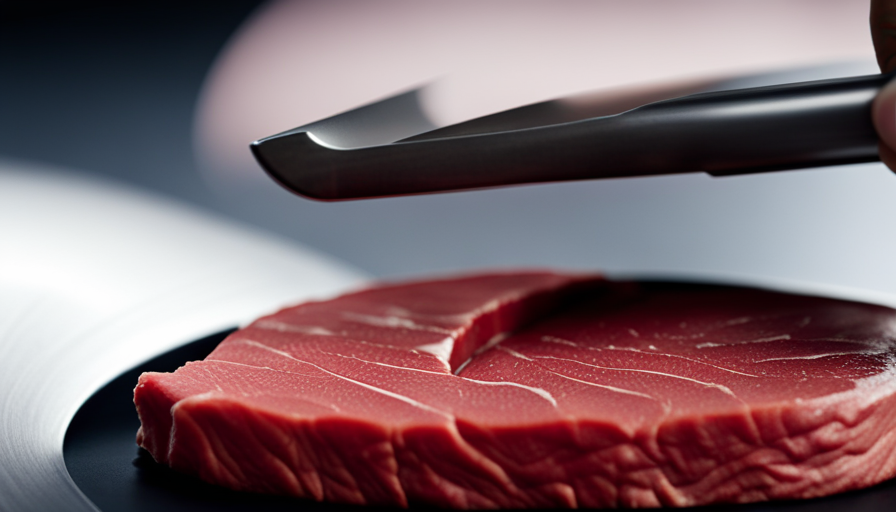
Are you prepared to effortlessly cut your top sirloin steak as smoothly as a hot knife through butter? Look no further than your reliable Cuisinart food processor! Boasting sharp blades and a strong motor, this kitchen device is your secret ally for slicing raw top sirloin steak into fine strips with ease.

In this article, we will guide you through the step-by-step process of preparing your steak, setting up your food processor, and mastering the art of slicing. We’ll also share tips on safety, storage, troubleshooting, and cleaning. Whether you’re planning a delicious stir-fry, a mouthwatering sandwich, or a flavorful salad, learning how to slice your top sirloin steak with a Cuisinart food processor will take your culinary skills to the next level.

Let’s get slicing!

Key Takeaways

  • Choosing a high-quality cut of top sirloin steak with minimal fat marbling is important for optimal slicing results.
  • Proper setup and safety precautions, including attaching the bowl securely, inserting the slicing blade, and not overloading the food processor, are essential for slicing raw top sirloin steak in a Cuisinart food processor.
  • Chilling the meat in the freezer before slicing can make it easier to cut thin slices.
  • Regular cleaning, maintenance, and proper storage techniques are important to ensure the quality and flavor of the sliced steak and to maintain the sharpness of the blades.

Choosing the Right Cut of Top Sirloin Steak

You’re going to love learning how to choose the perfect cut of top sirloin steak for your next culinary adventure in the Cuisinart food processor! When it comes to cooking techniques, the top sirloin steak is a great choice because of its tenderness and flavor. It comes from the hip area of the cow and is known for its lean meat and fine texture.

Look for a top sirloin steak that’s bright red in color with minimal fat marbling. This indicates a high-quality cut that’ll result in a delicious meal.

When it comes to marinade options, the top sirloin steak is very versatile. You can choose to marinate it in a variety of flavors such as garlic, soy sauce, or even a tangy barbecue sauce. Marinating the steak not only adds flavor but also helps to tenderize the meat, making it even more enjoyable to eat.

Advertisement

To ensure that your top sirloin steak slices perfectly in the Cuisinart food processor, it’s important to choose a cut that’s uniform in thickness. This will allow for even cooking and slicing. Look for a steak that’s about 1 inch thick, as this’ll provide the best results.

By choosing the right cut of top sirloin steak and using the proper cooking techniques and marinade options, you can create a delicious meal that’ll impress your friends and family. So go ahead and give it a try in your Cuisinart food processor!

Preparing Your Steak for Slicing

To get your steak ready for slicing, it’s important to first prepare it properly. Here are some steps you can follow to ensure your top sirloin steak is ready for the slicing process:

  • Start by marinating your steak: Marinating adds flavor and helps to tenderize the meat. Choose a marinade that complements the flavors of the steak, such as a mixture of olive oil, garlic, and herbs.

  • Use a meat tenderizer: Tenderizing the steak will help break down the muscle fibers, resulting in a more tender and juicy slice. You can use a meat mallet or a tenderizing tool to gently pound the steak.

  • Let it rest: After tenderizing, allow the steak to rest for about 30 minutes. This will help the meat retain its juices and ensure a more even cook.

  • Season the steak: Before slicing, season the steak with salt and pepper to enhance its natural flavors.

  • Slice against the grain: To achieve the most tender slices, it’s important to cut against the grain of the meat. This will help break up the muscle fibers and result in a more tender bite.

By following these steps and incorporating preparing marinades and tenderizing techniques, you’ll have a perfectly prepared top sirloin steak ready for slicing in your Cuisinart food processor.

Setting Up Your Cuisinart Food Processor

Once everything is prepared, it’s time to set up your trusty Cuisinart processor and let its powerful blades work their magic. To start, make sure you have a clean and dry work surface, as well as all the necessary components of your food processor: the base, the bowl, the lid, and the slicing blade attachment. Place the base on your work surface and attach the bowl securely onto it. Next, insert the slicing blade into the designated slot on the center hub of the bowl. Make sure it is locked into place before proceeding. Finally, place the lid on top of the bowl, making sure it fits snugly and securely.

Advertisement

To operate your Cuisinart food processor, refer to the basic operating instructions provided in the user manual. Familiarize yourself with the different speed settings and pulse function. Remember to always use the pulse function when slicing your top sirloin steak to have better control over the thickness of the slices.

If you encounter any issues while setting up or using your Cuisinart food processor, consult the troubleshooting section of the user manual. It provides helpful tips and solutions for common problems such as difficulty locking the bowl or lid in place, improper blade installation, or motor overheating. By following these instructions and troubleshooting any issues that arise, you’ll be well on your way to effortlessly slicing your top sirloin steak with your Cuisinart food processor.

Table:

Step Description Image
1 Place the base on your work surface Base
2 Attach the bowl securely onto the base Bowl
3 Insert the slicing blade into the designated slot on the center hub of the bowl Blade

Ensuring Safety and Proper Handling

Ensuring your safety and proper handling is of utmost importance when using this powerful kitchen appliance. When handling raw meat, it’s crucial to maintain proper hygiene to prevent the spread of bacteria and ensure your health.

Before starting, make sure your hands and all utensils are clean and dry. Additionally, make sure that your work area is clean and sanitized.

When it comes to slicing raw top sirloin steak in a Cuisinart food processor, there are a few key steps to follow for safety and proper handling. First, make sure the steak is properly thawed and not frozen. This will ensure even slicing and prevent damage to the food processor.

Advertisement

Once thawed, carefully trim any excess fat or connective tissue from the steak. This will help prevent it from getting stuck in the food processor and affecting the texture of the sliced meat.

Next, make sure the food processor is securely assembled and the blades are sharp. Place the sliced steak into the food processor, making sure not to overload it. Start the food processor on a low setting and gradually increase the speed until you achieve the desired thickness of slices. Remember to use the pulse function if you prefer a more controlled slicing technique.

After slicing, carefully remove the sliced steak from the food processor and transfer it to a clean plate or container. Clean the food processor immediately after use, following the manufacturer’s instructions. This will help prevent cross-contamination and maintain the appliance’s longevity.

By following these safety and handling tips, you can effectively slice raw top sirloin steak in your Cuisinart food processor while ensuring proper hygiene and preventing any mishaps.

Slicing Techniques for Thin Strips

When slicing thin strips of meat, you’ll want to make sure that your knife is sharp and your technique is precise, as studies have shown that using a dull knife can increase the risk of accidents by 79%. Here are some techniques to help you achieve those perfect thin slices:

Advertisement
  1. Choose the right knife: Opt for a long, thin, and sharp knife, such as a carving or slicing knife. This’ll allow you to make clean, precise cuts through the meat.

  2. Chill the meat: Place the raw top sirloin steak in the freezer for about 20-30 minutes before slicing. This’ll firm up the meat, making it easier to cut thin slices.

  3. Use a meat slicer: If you have access to a meat slicer, it can make the process even easier and more consistent. Adjust the thickness setting to the desired level and feed the chilled steak through the slicer.

Remember to always use caution when handling sharp objects and follow proper safety guidelines. With these thin slice techniques and the use of a meat slicer, you’ll be able to effortlessly create thin and uniform slices of top sirloin steak for your culinary creations.

Maintaining Sharp Blades for Optimal Results

To achieve the best results, it’s crucial for you to maintain sharp blades when slicing thin strips of meat. Blade maintenance is key to ensuring that your Cuisinart food processor can effortlessly slice through your top sirloin steak.

Over time, the blades can become dull from regular use, which can affect the quality of your cuts. To maintain sharp blades, it’s important to regularly sharpen them.

There are several sharpening techniques you can use to keep your blades in optimal condition. One common method is to use a sharpening stone or a honing rod. Simply run the blade along the sharpening stone or honing rod at a 20-degree angle, applying light pressure. Repeat this process a few times on each side of the blade until you feel the blade is sharp again.

Another option is to use a commercial knife sharpener. These sharpeners are specifically designed to sharpen kitchen knives and food processor blades. Follow the instructions provided by the manufacturer to achieve the best results.

Advertisement

Remember to always handle sharp blades with caution and use protective gloves when sharpening them. By regularly maintaining and sharpening your blades, you can ensure that your Cuisinart food processor will consistently deliver thin, precise slices of top sirloin steak for your culinary creations.

Storing and Freezing Sliced Steak

Now that you know how to maintain sharp blades for optimal results when slicing your top sirloin steak in a Cuisinart food processor, let’s discuss the next step: storing and freezing your sliced steak.

Proper storage techniques are crucial to ensure that your steak stays fresh and delicious for as long as possible. When storing your sliced steak, it’s important to wrap it tightly in plastic wrap or place it in an airtight container to prevent freezer burn. This’ll help maintain the quality and flavor of the meat. Additionally, labeling the package with the date of freezing is a good practice, as it’ll allow you to keep track of its freshness.

When you’re ready to enjoy your sliced steak, there are a few defrosting methods you can use. The safest way to defrost is to transfer the steak from the freezer to the refrigerator and let it thaw slowly overnight. If you’re short on time, you can also use the defrost function on your microwave or submerge the sealed package in cold water.

Remember, proper storage and defrosting techniques are essential for maintaining the taste and texture of your sliced steak. Follow these guidelines, and you’ll be able to enjoy your perfectly sliced top sirloin steak whenever you desire.

Advertisement

Creative Recipes and Serving Ideas

If you’re looking to elevate your culinary game and impress your guests, try out these mouthwatering recipes and unique serving ideas using your perfectly prepared, tender meat.

Experimenting with recipe variations is a fantastic way to showcase the flavors and versatility of your sliced top sirloin steak. For a classic twist, try marinating the steak in a mixture of soy sauce, garlic, and ginger, then stir-fry it with colorful vegetables for a delicious Asian-inspired dish.

If you’re feeling adventurous, why not try making steak tacos? Simply season your sliced steak with chili powder, cumin, and lime juice, then serve on warm tortillas with your favorite toppings.

Not only can you experiment with different recipes, but you can also get creative with your plating and presentation techniques. For an elegant touch, arrange your sliced steak on a bed of creamy mashed potatoes and drizzle with a red wine reduction. Garnish with fresh herbs for a pop of color.

If you’re looking for a more casual presentation, serve your sliced steak on a crusty baguette with melted cheese and caramelized onions for a mouthwatering steak sandwich. Don’t forget to add some homemade aioli or horseradish sauce for an extra kick of flavor.

Advertisement

With these recipe variations and plating ideas, you can take your sliced top sirloin steak to the next level and create memorable meals that will leave your guests wanting more.

Troubleshooting Tips and Common Mistakes to Avoid

Avoid the disappointment of overcooking your tender meat by keeping a close eye on the cooking time and using a meat thermometer to ensure it reaches your desired level of doneness. When it comes to slicing raw top sirloin steak in a Cuisinart food processor, there are a few troubleshooting tips and common mistakes to avoid.

Firstly, make sure the steak is properly chilled before slicing. This will help maintain its shape and make it easier to cut. Additionally, ensure that the food processor blade is sharp and in good condition. Dull blades can cause uneven and messy cuts.

Another common mistake to avoid is overcrowding the food processor. It’s best to slice the steak in batches, allowing enough space for the meat to move around and be evenly sliced. Overcrowding can lead to uneven cuts and can put strain on the food processor.

Lastly, be cautious of overprocessing the steak. It’s important to pulse the food processor rather than continuously running it. Overprocessing can result in a mushy texture and can affect the overall taste and appearance of the steak.

Advertisement

By following these troubleshooting tips and avoiding common mistakes, you can ensure that your sliced top sirloin steak turns out perfectly every time.

Cleaning and Maintenance of Your Cuisinart Food Processor

To keep your Cuisinart food processor in top-notch condition and ensure it lasts for years to come, all you need to do is give it a little TLC and regular cleaning.

Cleaning your food processor is a simple process that can be done in a few easy steps. First, make sure to unplug the device and disassemble it by removing the work bowl, lid, and blades. Rinse the removable parts with warm, soapy water and use a brush to remove any stubborn food particles. Avoid submerging the base of the food processor in water and instead wipe it clean with a damp cloth.

For tougher stains or odors, you can create a paste using baking soda and water. Apply the paste to the affected areas and let it sit for a few minutes before rinsing it off. Remember to dry all parts thoroughly before reassembling the food processor.

In terms of troubleshooting common issues, it’s important to always check for any loose or damaged parts before using the food processor. Make sure the blades are properly attached and the lid is securely in place. If the motor doesn’t start, double-check that the unit is securely plugged in and the power source is functioning properly.

Advertisement

By following these cleaning techniques and troubleshooting common issues, you can ensure that your Cuisinart food processor remains in excellent working condition for years to come.

Frequently Asked Questions

Can I use a different type of steak for this recipe?

Yes, you can definitely use a different type of steak for this recipe. However, using top sirloin steak has its benefits. It’s a lean and flavorful cut that works well in a food processor.

The alternative steak options you can consider include ribeye, strip loin, or tenderloin. These cuts will also deliver great taste and texture to your dish.

So, feel free to experiment and find the steak that suits your preferences.

How long should I let the steak rest before slicing it?

Let the steak rest for at least 5 minutes before slicing it. Resting allows the juices to redistribute and the fibers to relax, resulting in a more tender and flavorful steak. Resting also prevents the juices from spilling out when you slice into it, helping to retain the moisture and tenderness.

Advertisement

So, be patient and give your steak a little time to rest before enjoying the delicious results.

Can I slice the steak into thicker strips instead of thin strips?

Looking to switch up your steak slicing technique? You can definitely slice the steak into thicker strips instead of thin ones. Thicker slices can give your steak a more robust and hearty texture.

Additionally, you can also explore alternative cuts of steak that are naturally thicker, such as ribeye or New York strip.

So go ahead and experiment with thicker slices for a different dining experience!

Can I use a blender instead of a food processor to slice the steak?

Using a blender to slice steak has its pros and cons. While a blender can technically slice the steak, it may not give you the desired results. The blades in a blender are designed for blending, not slicing. This means that the slices may not be even or consistent in thickness. Additionally, the blender may struggle with cutting through the tough texture of the steak. It’s generally recommended to use a food processor for slicing steak for better results.

Advertisement

Can I slice the steak without a machine, using a knife instead?

To slice your steak without a machine, you can use a knife. There are different slicing techniques you can try, such as the cross-grain or against-the-grain method. The pros of using a knife include more control over the thickness of the slices and the ability to adjust as needed. However, it can be more time-consuming compared to using a machine. Consider your skill level and time constraints when deciding which method to use.

Is It Safe to Slice Raw Meat in a Food Processor Used for Storing Raw Food in a Restaurant?

It is not safe to slice raw meat in a food processor used for storing raw food in restaurants. Cross-contamination can occur, leading to foodborne illness. It is essential to use separate equipment for preparing raw meat and to follow proper sanitation protocols to ensure food safety for patrons.

Can A Cuisinart Food Processor Be Used for Raw Food Diet Meal Preparation?

Yes, a Cuisinart food processor is extremely useful when starting a raw food diet. It can easily chop, shred, and purée fruits and veggies, making meal preparation a breeze. With its powerful motor and various blades, you can effortlessly create delicious and nutritious raw meals packed with flavor and nutrients.

Conclusion

In conclusion, slicing raw top sirloin steak in a Cuisinart food processor can be a convenient and efficient way to prepare thin strips for various recipes. By following the steps outlined in this article, you can ensure the safety and proper handling of your steak while achieving the desired results.

For example, one user, Sarah, found that using the food processor helped her save time and effort when making beef stir-fry. With proper cleaning and maintenance, your Cuisinart food processor will continue to be a valuable tool in your kitchen arsenal.

Advertisement
Continue Reading
Advertisement

What is Raw Food?

How To Find Raw Ingredients For Pet Food

Published

on

An image showcasing a colorful farmers market, bustling with vendors selling fresh meats, fish, vegetables, and fruits

Tired of being in the dark about the contents of your pet’s meals? Interested in preparing homemade dishes for your animal companion to better manage their diet? Fortunately, you’ve come to the right place! This article will provide instructions on sourcing raw materials for pet food, allowing you to guarantee that your cherished pet receives optimal nutrition.

By making your own pet food, you have the power to choose high-quality ingredients that meet your pet’s specific nutritional needs. Whether you have a dog or a cat, it is essential to provide them with a balanced diet that includes all the necessary proteins, vitamins, and minerals.

To start, we will walk you through the process of identifying your pet’s nutritional needs and help you locate local farms, farmers markets, butchers, and meat suppliers who can provide you with fresh, raw ingredients.

Additionally, we will explore online suppliers that offer a wide variety of raw ingredients for your convenience.

Stay tuned as we delve into the world of homemade pet food and discover the many benefits it can bring to your furry friend’s health and happiness.

Advertisement

Key Takeaways

  • Consult a veterinarian and research reputable sources to identify your pet’s nutritional needs.
  • Source quality ingredients by reading labels on commercial pet food products and considering homemade options with a balance of protein, carbohydrates, and healthy fats.
  • Locate local farms and farmers markets to support your pet’s health, the environment, and the local economy.
  • Connect with butchers and meat suppliers to ensure the quality of ingredients in your pet’s food.

Benefits of Making Homemade Pet Food

Making homemade pet food has numerous benefits, such as improving your furry friend’s overall health and well-being. When you prepare your pet’s meals at home, you have full control over the ingredients you use. This means you can ensure that your pet receives a balanced and nutritious diet. Many commercial pet foods contain fillers, artificial additives, and low-quality ingredients that can be harmful to your pet’s health. By making homemade pet food, you can avoid these potentially harmful ingredients.

Another benefit of homemade pet food is that it can be tailored to your pet’s specific dietary needs. Some pets may have food allergies or sensitivities, and commercial pet foods may not cater to these individual needs. By preparing their meals at home, you can carefully select ingredients that are suitable for your pet’s unique needs.

Furthermore, homemade pet food can also be more flavorful and appetizing for your furry friend. You can incorporate a variety of fresh ingredients, such as lean meats, vegetables, and whole grains, which provide essential nutrients and vitamins. This can lead to improved digestion, increased energy levels, and a healthier coat.

The benefits of making homemade pet food are clear. By taking the time to prepare meals at home, you can ensure that your pet receives a nutritious and balanced diet, tailored to their specific needs. This can lead to improved overall health and well-being for your beloved furry friend.

Identifying Nutritional Needs for Your Pet

Contrary to popular belief, it’s quite surprising how often we overlook the importance of understanding our furry friends’ nutritional requirements. Just like humans, pets have specific nutritional needs that must be met in order to maintain optimal health.

To ensure that you are providing the best diet for your pet, it is crucial to identify their nutritional needs and source quality ingredients.

Advertisement

Identifying nutritional needs:

  • Consult your veterinarian: They can provide valuable insight into your pet’s specific dietary requirements based on their age, breed, size, and any existing health conditions.
  • Research reputable sources: Look for reliable information from trusted sources such as veterinary publications or pet nutritionists to gain a better understanding of the essential nutrients your pet needs.

Sourcing quality ingredients:

  • Read labels: Carefully examine the ingredient list on commercial pet food products to ensure they contain high-quality, recognizable ingredients.
  • Consider homemade options: Making your own pet food gives you complete control over the ingredients. Be sure to include a balance of protein, carbohydrates, and healthy fats.

Remember, providing a nutritious diet is essential for your pet’s overall well-being. By identifying their nutritional needs and sourcing quality ingredients, you can ensure that they’re getting the best possible diet to support their health and happiness.

Locating Local Farms and Farmers Markets

When it comes to ensuring the highest quality for your furry friend’s diet, you can easily locate local farms and farmers markets where you can discover a wide array of fresh, locally-sourced options.

Locating organic options and supporting local agriculture not only benefits your pet’s health, but also the environment and local economy.

By choosing to buy from local farms and farmers markets, you can have peace of mind knowing that the ingredients in your pet’s food are sourced from nearby. This means they’re likely to be fresher and more nutrient-rich compared to mass-produced options that may have traveled long distances before reaching store shelves.

When you support local agriculture, you contribute to the preservation of farmland in your community. This helps maintain a sustainable and diverse food system for both humans and animals. Additionally, buying from local farms allows you to establish a direct connection with the farmers who grow the ingredients for your pet’s food. You can ask questions about their farming practices and ensure that they align with your pet’s dietary needs and preferences.

Advertisement

To locate local farms and farmers markets, you can start by checking online directories or using mobile apps that specialize in connecting consumers with local producers. You can also ask for recommendations from other pet owners or visit your nearest agricultural extension office for information on nearby farms and markets.

Choosing to locate local farms and farmers markets for your pet’s food not only provides you with organic options but also supports local agriculture. It’s a win-win situation for both your furry friend’s health and the community.

Connecting with Butchers and Meat Suppliers

Supporting local butchers and meat suppliers enables you to establish a personal connection with the people who provide the nourishing proteins for your furry companion, fostering a sense of trust and community. By connecting with local suppliers, you not only ensure the quality of the ingredients in your pet’s food but also contribute to the local economy.

Here are some tips for finding ethical sources:

  • Take the time to research and identify local butchers and meat suppliers in your area. Look for those who prioritize animal welfare and sustainable farming practices.

  • Visit the butcher shop or meat supplier in person. This allows you to see firsthand how they handle and store their products. Look for cleanliness and organization, as these are indicators of a reputable supplier.

  • Ask questions about the origin of the meat and the farming practices used. Ethical suppliers will be transparent and proud to share information about their sources.

By connecting with local suppliers and finding ethical sources, you can have peace of mind knowing that the raw ingredients in your pet’s food are of the highest quality. Plus, you’ll be supporting local businesses and fostering a stronger sense of community.

Advertisement

Exploring Online Suppliers for Raw Ingredients

If you’re looking to up your furry friend’s nutrition game, checking out online suppliers for top-notch, high-quality ingredients is a paw-some option! When exploring online suppliers for raw ingredients, it’s essential to do your research and read online reviews to ensure you’re getting the best products for your pet.

Online reviews can provide valuable insights into the quality and reliability of the supplier, giving you peace of mind when making your purchase. Additionally, comparing prices is crucial when shopping for raw ingredients online. Different suppliers may offer varying prices for the same product, so it’s essential to compare and find the best deal.

Take the time to browse through different websites, noting the prices offered for the ingredients you’re looking for. Don’t forget to consider factors like shipping costs and discounts offered by the supplier. By comparing prices, you can find the most cost-effective option without compromising on the quality of the ingredients.

Online suppliers can be a convenient and reliable source for raw ingredients for your pet’s food. By utilizing online reviews and comparing prices, you can ensure that you’re providing your furry friend with the highest quality ingredients while staying within your budget. So go ahead, do your research, and find the perfect online supplier to take your pet’s nutrition to the next level!

Understanding Food Safety and Handling

Now that you’ve explored online suppliers for raw ingredients, it’s important to understand the significance of food safety and proper handling techniques when it comes to preparing pet food.

Advertisement

Just like human food, pet food must adhere to certain food safety standards to ensure the health and well-being of our furry friends.

Food safety standards for pet food involve guidelines and regulations that aim to prevent contamination and maintain the nutritional value of the ingredients. This includes proper storage, handling, and preparation of raw ingredients. It’s crucial to handle raw ingredients with care to minimize the risk of bacterial growth or cross-contamination.

When handling raw ingredients for pet food, it’s essential to wash your hands thoroughly before and after handling. Additionally, separate cutting boards and utensils should be used specifically for pet food preparation to avoid the transfer of harmful bacteria to human food. Raw ingredients should be stored at the appropriate temperature to prevent spoilage and maintain freshness.

By following these food safety standards and proper handling techniques, you can ensure that your pet’s food is safe and nutritious. Remember, the health and well-being of our furry friends depend on us, and providing them with safe and healthy food is a crucial part of responsible pet ownership.

Choosing the Right Proteins for Your Pet

When it comes to selecting the perfect proteins for your furry friend, it’s important to consider their dietary needs and preferences. Choosing alternative proteins can provide a variety of benefits for your pet, including reducing the risk of food allergies and sensitivities.

Advertisement

Here are some key factors to keep in mind when considering protein options for your pet:

  • Fish: Fish is an excellent source of protein for pets, especially those with allergies to common protein sources like chicken or beef. It’s also rich in omega-3 fatty acids, which can support your pet’s skin and coat health.

  • Lamb: Lamb is a great option for pets with sensitive stomachs or allergies. It’s easily digestible and provides essential amino acids that are necessary for their overall health.

  • Turkey: Turkey is a lean protein source that can help maintain your pet’s muscle mass. It’s also a good option for pets with food allergies or sensitivities.

  • Duck: Duck is a novel protein source, making it a suitable option for pets with food allergies. It’s also rich in iron and provides essential nutrients for your pet’s well-being.

  • Venison: Venison is a lean and highly digestible protein source. It’s a good option for pets with food allergies or sensitivities, as it’s not commonly found in commercial pet foods.

Understanding protein requirements is crucial in providing a balanced diet for your pet. Consult with your veterinarian to ensure you’re meeting their specific dietary needs.

Incorporating Fruits and Vegetables into Their Diet

Incorporating fruits and vegetables into your furry friend’s diet can provide them with essential vitamins and minerals they need for optimal health. When it comes to choosing the right fruits and vegetables for your pet, it’s important to consider incorporating frozen options.

Frozen fruits and vegetables are a convenient choice, as they’re often picked at the peak of freshness and then quickly frozen, preserving their nutritional value. Plus, frozen options can be a cost-effective way to provide your pet with a variety of fruits and vegetables throughout the year.

When it comes to finding organic options, it’s important to look for pet food brands that prioritize using organic ingredients. Organic fruits and vegetables are grown without the use of synthetic pesticides, fertilizers, or GMOs. By choosing organic options, you can ensure that your pet is getting the best quality produce without any potentially harmful chemicals.

Advertisement

To incorporate fruits and vegetables into your pet’s diet, you can start by adding small amounts to their regular meals and gradually increasing the portion size. Some popular options include blueberries, carrots, spinach, and sweet potatoes. Just be sure to avoid feeding your pet any fruits or vegetables that are toxic to them, such as grapes, onions, or avocados.

Overall, incorporating fruits and vegetables into your pet’s diet can provide them with a wide range of health benefits. By choosing frozen and organic options, you can ensure that your furry friend is getting the best nutrition possible.

Adding Essential Supplements for Balanced Nutrition

To ensure your furry friend gets a balanced diet, don’t forget to add essential supplements that’ll give them a nutritional boost beyond their wildest dreams.

While incorporating fruits and vegetables into your pet’s diet is important, it’s equally crucial to address any nutrient deficiencies that may arise. Just like humans, pets can also suffer from imbalances in their diet, which can lead to various health issues.

One essential supplement that’s often recommended for pets is omega-3 fatty acids. These fatty acids help promote healthy skin and coat, reduce inflammation, and support brain and joint health. Fish oil is a common source of omega-3 fatty acids for pets.

Advertisement

Another important supplement is probiotics, which can aid in digestion and support a healthy gut. Probiotics can help improve nutrient absorption and strengthen the immune system.

Additionally, certain vitamins and minerals are essential for your pet’s overall well-being. These include vitamin D, vitamin E, calcium, and iron. Ensuring that your pet receives these nutrients in adequate amounts can help prevent nutrient deficiencies and promote optimal health.

Adding essential supplements to your pet’s diet is crucial for maintaining a balanced diet and preventing nutrient deficiencies. Consult with your veterinarian to determine the specific supplements that’re appropriate for your pet’s individual needs.

Providing your furry friend with the necessary nutrients will contribute to their overall health and happiness.

Meal Prepping and Storage Tips

Make meal prepping and storing your pet’s nutritionally balanced meals a breeze with these helpful tips. When it comes to meal prepping for your pet, there are a few key tips to keep in mind.

Advertisement

First, make sure to plan out your pet’s meals in advance. This will not only save you time but also ensure that your pet is getting all the necessary nutrients. Consider using a meal prep calendar or app to help you stay organized.

Next, invest in high-quality storage containers that are airtight and freezer-safe. This will help keep your pet’s meals fresh and prevent any freezer burn. Additionally, label each container with the date and contents to easily keep track of what you have on hand.

When it comes to portioning out your pet’s meals, consider using silicone ice cube trays or muffin tins. These can be a convenient way to control portion sizes and make it easier to thaw individual servings.

Lastly, be sure to thaw your pet’s meals in the refrigerator rather than on the counter. This will help prevent the growth of harmful bacteria. And remember, always wash your hands and any utensils or surfaces that come into contact with your pet’s food to maintain proper hygiene. With these meal prepping tips and storage hacks, you can ensure that your pet’s meals are always fresh and nutritious.

Frequently Asked Questions

What are the potential risks and drawbacks of making homemade pet food?

When making homemade pet food, there are potential health risks and drawbacks to consider. One major concern is the potential for nutritional deficiencies. Without proper knowledge and guidance, it can be challenging to ensure that your pet’s diet is balanced and meets all their nutritional needs.

Advertisement

Additionally, there is a risk of contamination or improper handling of raw ingredients, which can lead to foodborne illnesses. It’s crucial to consult with a veterinarian or animal nutritionist to create a well-rounded and safe homemade pet food plan.

How can I ensure that the raw ingredients I find are of high quality and safe for my pet?

To ensure pet food safety and evaluate ingredient sources, there are a few key steps you can take. Firstly, research reputable suppliers who prioritize quality and transparency. Look for certifications like AAFCO, which ensures that the food meets specific nutritional standards.

Additionally, examine the ingredient list carefully, avoiding any artificial additives or fillers. Lastly, consider consulting with a veterinarian or pet nutritionist to ensure that the ingredients you choose will meet your pet’s specific dietary needs.

Are there any specific guidelines or recommendations for portion sizes when feeding homemade pet food?

When it comes to portion control and nutritional balance in homemade pet food, there are some guidelines you can follow. It’s important to consult with a veterinarian to determine the appropriate portion sizes for your pet based on their breed, age, weight, and activity level.

Additionally, ensure that the homemade pet food contains a proper balance of proteins, carbohydrates, and fats to meet your pet’s nutritional needs. Following these guidelines will help keep your pet healthy and satisfied.

Advertisement

Can I use frozen fruits and vegetables in my pet’s homemade diet?

Frozen fruits and vegetables can be a convenient and nutritious addition to your pet’s homemade diet. While some may argue that fresh is always best, frozen produce often retains more nutrients due to being picked at peak ripeness and quickly frozen. Canned fruits and vegetables, however, may have added sugars or preservatives that are not ideal for pets. To ensure the best quality, opt for frozen options and always check labels for any additives.

Are there any common mistakes or pitfalls to avoid when meal prepping and storing homemade pet food?

When it comes to meal prepping and storing homemade pet food, there are a few common mistakes and pitfalls to avoid. First, make sure to properly balance the nutrients in your pet’s diet to avoid deficiencies or excesses.

Additionally, be cautious with the storage of homemade pet food, as improper storage can lead to bacterial growth and contamination.

Lastly, always follow safe food handling practices to ensure your pet’s health and well-being.

Can I Use the Raw Ingredients I Find for Pet Food to Prepare Meals Ahead of Time?

When it comes to feeding raw food pets ahead, it’s essential to use quality ingredients. Look for fresh, unprocessed items such as raw meat, bones, and organs. Be sure to research the nutritional requirements and potential risks associated with raw pet diets before preparing meals in advance.

Advertisement

Conclusion

In conclusion, by taking the time to find raw ingredients for your pet’s food, you’re ensuring they receive the best nutrition possible.

By exploring local farms, farmers markets, butchers, and online suppliers, you’ve access to a wide range of fresh, high-quality ingredients.

By incorporating a variety of proteins, fruits, and vegetables, you can create a well-balanced diet for your furry friend.

Don’t forget to add essential supplements for optimal health.

With proper meal prepping and storage, you can provide your pet with delicious and nutritious meals every day.

Advertisement

Start today and witness the vibrant health and happiness of your beloved pet.

Continue Reading

What is Raw Food?

How To Feed Raw Food Ahead Of Time To Pets

Published

on

An image of a neatly organized refrigerator, filled with labeled containers of fresh, raw pet food

Have you ever found yourself perpetually in a hurry trying to provide meals for your beloved pets? Given the fast-paced nature of our day-to-day existence, it’s often difficult to carve out moments to concoct healthy, fresh food for our animals regularly. But, imagine if there was an option to afford your pet the advantages of a raw food diet minus the everyday inconvenience?

Enter the technique of feeding raw food ahead of time. By preparing raw meals in bulk and utilizing proper storage techniques, you can conveniently provide your pet with the nourishment they need, while also maintaining their health and well-being.

In this article, we will explore the benefits of feeding raw food ahead of time, discuss the importance of choosing the right ingredients, and provide expert guidance on how to properly store and introduce raw meals to your pet. Get ready to revolutionize your pet’s diet and simplify your feeding routine!

Key Takeaways

  • Feeding raw food ahead of time provides the benefits of a raw food diet without the daily hassle of preparation.
  • Lean meats, supplements, fruits, and vegetables should be included in a pet’s raw diet to ensure essential nutrients.
  • Proper storage of raw food is crucial for freshness and safety, with vacuum-sealed containers being effective.
  • Portioning, labeling, and bulk meal preparation can save time, minimize waste, and provide consistent nutrition for pets.

Understanding the Benefits of Preparing Raw Meals

Imagine your furry friend eagerly devouring a freshly prepared, nutrient-rich raw meal, their tail wagging with delight as they savor the benefits of a homemade diet. Feeding raw food to your pet has numerous advantages that can greatly enhance their overall health and well-being.

One of the key benefits of raw feeding is the provision of essential nutrients in their natural form. Raw meals contain high-quality proteins, healthy fats, and a wide range of vitamins and minerals that are easily absorbed by your pet’s body, promoting optimal growth and development.

Additionally, raw feeding can help address certain health issues such as allergies and digestive problems. By eliminating processed ingredients and additives commonly found in commercial pet foods, you can reduce the risk of allergic reactions and improve digestion.

Advertisement

Moreover, transitioning to a raw diet can provide mental stimulation for your pet, as they engage in the natural chewing and tearing motions required to consume raw food. This can help prevent boredom and behavioral issues caused by the monotony of processed diets.

Overall, feeding your pet a raw diet offers a multitude of benefits that can contribute to their longevity and vitality.

Choosing the Right Ingredients for Your Pet’s Diet

Ensure your furry friend’s diet is packed with powerful and palatable ingredients that promote their optimal health and happiness. When choosing appropriate protein sources for your pet’s raw diet, it’s important to consider their specific dietary needs. Dogs, for example, thrive on a diet that includes lean meats such as chicken, turkey, beef, and fish. These protein sources provide essential amino acids, which are the building blocks of muscle and tissue repair.

Understanding the role of supplements in a raw diet is also crucial. While raw food provides many of the necessary nutrients, some supplements can help bridge any nutritional gaps. Omega-3 fatty acids, for instance, are beneficial for maintaining healthy skin and a shiny coat. You can find these fatty acids in fish oil or flaxseed oil.

Additionally, incorporating calcium-rich ingredients like crushed eggshells or bone meal is essential for your pet’s bone health. Calcium helps support strong teeth and bones, preventing issues like osteoporosis or tooth decay.

Advertisement

Remember, a balanced raw diet for your pet should also include a variety of fruits and vegetables. These provide vital vitamins, minerals, and antioxidants that boost their immune system and overall well-being.

By carefully selecting the right ingredients for your pet’s raw diet and incorporating necessary supplements, you can ensure they receive the nutrition they need for optimal health and happiness.

Properly Storing Raw Food for Future Use

To keep your furry friend’s future meals fresh and safe, make sure you store the raw ingredients properly. Storing raw food without freezing can be a challenge, but there are ways to maintain its freshness.

One effective method is using vacuum-sealed containers for raw food storage. Vacuum-sealed containers are a great option for storing raw food because they remove the oxygen from the container, preventing the growth of bacteria and other harmful microorganisms. This helps to preserve the quality and nutrients of the raw ingredients. Additionally, vacuum-sealed containers are airtight, which means they also prevent any odor from escaping, keeping your kitchen smelling fresh.

When using vacuum-sealed containers, it’s important to properly portion out the raw food before sealing. This ensures that you only defrost the amount you need for each meal, minimizing waste. It’s also crucial to label the containers with the date and the type of raw food inside, as this will help you keep track of what needs to be used first.

Advertisement

Remember, properly storing raw food is essential for maintaining its freshness and safety. By using vacuum-sealed containers, you can ensure that your pet’s meals are always of the highest quality.

Preparing Raw Meals in Bulk

When you’re ready to dive into the world of meal prep, get your apron on and start batching those fresh, nutrient-packed meals for your furry pals. Bulk meal preparation is an excellent way to save time and ensure your pets are getting a well-balanced diet.

By planning ahead and preparing raw meals in bulk, you can streamline the feeding process and provide your pets with consistent nutrition. To begin, gather all the necessary ingredients and tools for your recipes. Make sure to have a variety of proteins, such as chicken, beef, and fish, along with fruits, vegetables, and supplements.

Next, determine the appropriate portion sizes for your pets based on their weight, age, and activity level. Once you have everything ready, start by portioning out the ingredients for each meal. Use a scale or measuring cups to ensure accuracy. Then, combine the ingredients in large batches, making sure to mix them thoroughly.

Divide the bulk meals into individual containers or freezer bags, labeling them with the date and contents. Properly storing the prepared meals is crucial to maintain freshness and prevent contamination. Keep the containers in the refrigerator for up to three days or freeze them for longer-term storage.

Advertisement

When it’s time to feed your pets, simply thaw the meals in the refrigerator overnight or warm them slightly before serving. By utilizing bulk meal preparation and meal planning techniques, you can take the stress out of feeding raw food to your pets. It allows you to provide them with nutritious meals while saving time and effort in the long run.

So, roll up your sleeves and get ready to embark on this exciting and beneficial journey for your furry friends.

Using Freezing Techniques to Preserve Freshness

Don’t worry about your furry friends going hungry or their meals spoiling because freezing techniques will preserve the freshness of their nutrient-packed meals for an extended period of time. Freezing is an effective method for extending the shelf life of raw pet food while maintaining its nutritional value.

By freezing the meals, you can ensure that your pets are getting the same level of nutrients as they would from fresh food.

When using freezing techniques to preserve the freshness of raw pet food, it’s important to follow a few guidelines. First, make sure to portion the meals appropriately before freezing them. This’ll make it easier to thaw and serve the meals when needed.

Advertisement

Secondly, use high-quality freezer-safe containers or freezer bags to prevent freezer burn and maintain the taste and texture of the food.

Lastly, label each container with the date of freezing to keep track of the freshness of each meal.

To thaw the frozen meals, simply transfer them from the freezer to the refrigerator and allow them to thaw slowly overnight. Avoid thawing the food at room temperature, as this can promote bacterial growth. Once thawed, the meals can be served to your pets, providing them with a delicious and nutritious meal.

Freezing techniques are a reliable way to preserve the freshness of raw pet food. By following the proper freezing and thawing methods, you can ensure that your pets are receiving the same high-quality meals even when served ahead of time.

Thawing and Serving Raw Meals Safely

Properly thawing and serving frozen meals is crucial to ensure the safety and quality of the nutrient-rich meals for your beloved companions. When it comes to thawing techniques, there are a few important things to keep in mind.

Advertisement

Firstly, it’s best to thaw raw pet food in the refrigerator. This slow thawing process allows the food to defrost evenly while minimizing the risk of bacterial growth. Simply place the frozen meal in a covered container and let it thaw for 24-48 hours.

Alternatively, if you need to thaw the food quickly, you can use the cold water method. Place the frozen meal in a sealed plastic bag and submerge it in cold tap water. Change the water every 30 minutes until the food is thawed. However, be cautious not to use warm water, as it can encourage the growth of bacteria.

Now that you’ve properly thawed the raw food, portion control is key. It’s recommended to divide the thawed meal into individual serving sizes to avoid waste and ensure proper nutrition. Use a scale or measuring cup to accurately portion the food according to your pet’s dietary needs.

By following these thawing techniques and practicing portion control, you can ensure that your pets receive safe and wholesome meals.

Monitoring Your Pet’s Health and Nutritional Needs

Monitoring your pet’s health and nutritional needs is crucial for their overall well-being, and did you know that approximately 56% of pets in the United States are overweight or obese? As a responsible pet owner, it’s important to keep a close eye on your furry friend’s weight and make necessary adjustments to their portion sizes.

Advertisement

Regularly monitoring your pet’s weight is essential in ensuring they maintain a healthy body condition. Keep a record of their weight on a weekly basis and consult with your veterinarian if you notice any significant changes. By tracking their weight, you can identify any potential issues early on and take appropriate action.

Adjusting portion sizes is another important aspect of monitoring your pet’s health. As they age or their activity level changes, their nutritional needs may vary. It’s crucial to adapt their meal sizes accordingly. Overfeeding can lead to weight gain and obesity, while underfeeding can result in malnutrition and other health problems. Consult with your veterinarian to determine the appropriate portion sizes for your pet based on their age, breed, activity level, and overall health.

Remember, maintaining a healthy weight is key to your pet’s longevity and well-being. By monitoring their weight and adjusting portion sizes as needed, you can ensure they lead a healthy and happy life.

Introducing Raw Food to Picky Eaters

If your finicky furball turns up their nose at traditional meals, introducing a raw food diet might be the solution. Transitioning your picky eater to raw food can be a challenge, but with patience and the right approach, you can successfully introduce this nutritious diet.

Here are three tips to help you overcome resistance and make the switch:

Advertisement
  1. Gradual Transition: Start by mixing a small amount of raw food with your pet’s current diet. Over time, gradually increase the proportion of raw food while decreasing the old food. This slow transition allows your pet to acclimate to the new taste and texture without causing digestive upset.

  2. Variety is Key: Pets, like humans, can get bored with the same food every day. Offer a variety of raw meats, including chicken, beef, and fish, to entice your pet’s taste buds. You can also add fruits and vegetables for added nutrients and flavor.

  3. Patience and Persistence: Introducing raw food to a fussy eater may take time and perseverance. Don’t give up if your pet initially rejects the raw diet. Offer the food consistently, and try different preparation methods to find what your pet prefers. Eventually, they’ll likely come around and enjoy the benefits of a raw food diet.

By following these tips and being patient with your pet, you can successfully introduce raw food to even the pickiest eaters. Remember to consult with your veterinarian for guidance and to ensure your pet’s nutritional needs are being met.

Addressing Common Concerns and Myths about Raw Feeding

Now that you’ve successfully introduced raw food to your picky eater, it’s important to address common concerns and debunk any misconceptions about raw feeding.

Many pet owners worry that feeding raw food can be unsafe due to bacteria or parasites. However, it’s important to note that raw meat for pets is handled and stored differently than human-grade meat. Proper hygiene practices, such as washing hands and disinfecting surfaces, can greatly reduce the risk of contamination.

Another myth surrounding raw feeding is the belief that it’s difficult to transition from kibble to raw food. While it may take some time for your pet to adjust to the new diet, there are several strategies you can employ to ease the transition. Gradually mixing small amounts of raw food with their kibble can help them get accustomed to the new texture and taste. Additionally, adding some warm water or bone broth to the mixture can make it more appealing.

It’s important to note that every pet is different, and their transition may vary. Patience and consistency are key during this process.

Advertisement

By addressing these common concerns and debunking misconceptions, you can feel confident in your decision to feed raw food to your pet and provide them with a nutritious and balanced diet.

Consulting with a Veterinarian for Expert Guidance

When it comes to ensuring the best health for your furry companion, it’s crucial to consult with a veterinarian for their expert guidance and advice. Veterinarians play a key role in providing recommendations on feeding raw food to pets and can help address any concerns or myths surrounding this practice. They have the knowledge and experience to guide you in making the right choices for your pet’s nutrition.

Consulting with a veterinarian allows you to receive personalized recommendations tailored to your pet’s specific needs. They can assess your pet’s overall health, consider any underlying conditions, and determine if a raw food diet is appropriate. Additionally, they can provide guidance on the proper preparation, handling, and storage of raw food to minimize the risk of foodborne illnesses.

It’s important to note that while raw feeding can have potential benefits, there are also potential risks involved. A veterinarian can help you understand these risks and provide strategies to mitigate them. They can educate you on proper food handling practices, the importance of balanced nutrition, and the potential for nutritional deficiencies or imbalances.

By consulting with a veterinarian, you can make informed decisions about feeding raw food to your pet and ensure their overall health and well-being. Their expert guidance and recommendations are invaluable in navigating the complex world of raw feeding.

Advertisement

Frequently Asked Questions

How often should I feed my pet raw food?

You should feed your pet raw food on a regular basis to ensure their nutritional needs are met. The feeding frequency depends on factors such as the age, weight, and activity level of your pet.

As part of the transitioning process, start by introducing small amounts of raw food and gradually increase the portion size over time. This allows your pet’s digestive system to adjust to the new diet.

It’s important to consult with a veterinarian to determine the appropriate feeding frequency for your specific pet.

Can I mix raw food with commercial pet food?

Yes, you can mix raw food with commercial pet food, such as dry kibble. Mixing the two can provide a balanced diet for your pet, combining the benefits of both.

Raw food offers essential nutrients and enzymes that may be lacking in commercial pet food. It can also promote healthier skin, coat, and digestion. However, it’s important to consult with your veterinarian to ensure your pet receives proper nutrition and to avoid any potential health risks.

Advertisement

Are there any risks to feeding my pet raw food?

Feeding your pet raw food can have numerous benefits. It provides essential nutrients, promotes healthier skin and coat, and improves digestion. However, it’s crucial to handle and store raw pet food properly to minimize the risk of bacterial contamination.

Raw food should be kept frozen until ready to serve, and any leftovers should be refrigerated or discarded. Additionally, make sure to clean all utensils and surfaces thoroughly after handling raw pet food to prevent cross-contamination.

What are some common signs that my pet is not tolerating raw food well?

Recognizing signs of raw food intolerance in pets is crucial for their well-being. Look out for symptoms such as diarrhea, vomiting, excessive gas, or a lack of appetite. If your pet exhibits these signs, it may be struggling to tolerate the raw food diet.

To transition your pet to a raw food diet, start by introducing small amounts of raw food mixed with their regular diet. Gradually increase the portion of raw food over a few weeks until they’re fully transitioned.

Can I feed my pet raw food if they have health conditions or allergies?

Raw food can worsen health conditions in pets and trigger allergies. It’s important to consult with your veterinarian before feeding raw food to a pet with health conditions or allergies. Some health conditions, such as pancreatitis or compromised immune systems, may make it unsafe for pets to consume raw food. Similarly, pets with allergies may have adverse reactions to specific ingredients found in raw food. Your veterinarian can provide guidance on appropriate dietary options for your pet’s specific needs.

Advertisement

Is It Safe to Feed Raw Food to Pets in Advance?

Feeding a labrador raw food has both supporters and opponents. Some argue it’s a natural, healthier option, while others worry about the risk of bacterial contamination. Consult with a veterinarian to make an informed decision. Always handle and store raw food properly to minimize potential health hazards for your pet.

Conclusion

Congratulations on taking the initiative to explore the world of raw feeding for your furry companion! By understanding the benefits, choosing the right ingredients, and properly storing and preparing raw meals, you’re ensuring a nourishing diet for your pet.

Remember to monitor their health and nutritional needs, and don’t be discouraged if they’re initially hesitant. With patience and the guidance of a veterinarian, you can address any concerns or myths surrounding raw feeding.

Keep up the great work in providing the best nutrition for your beloved pet!

Advertisement
Continue Reading

What is Raw Food?

How To Get Colonists To Cook Raw Food

Published

on

An image showcasing a bustling kitchen scene within a colonial settlement

Is your colony squandering valuable unprocessed food supplies? Are you fed up with watching them deal with hunger as a wealth of foodstuffs remains unused? If this resonates with you, then it’s the right moment to intervene and encourage your settlers to start cooking!

In this article, we will explore practical strategies to motivate and empower your colonists to whip up delicious meals from raw ingredients. From building a well-equipped kitchen to setting priorities and implementing a cooking schedule, we will provide you with the tools and knowledge you need to transform your colonists into master chefs.

We will also discuss the importance of incentives, cooking workbenches, and monitoring food stockpiles to ensure a steady supply of cooked meals. Additionally, we will address challenges and troubleshoot common issues that may arise along the way.

So, let’s dive in and unlock the culinary potential of your colony!

Key Takeaways

  • Invest in quality tools and equipment for efficient cooking.
  • Organize ingredients and label containers for easy access.
  • Assign dedicated cooks with clear instructions.
  • Provide ongoing training and support to improve skills.

Building a Well-Equipped Kitchen

Alright, folks, let’s whip up a well-equipped kitchen that’ll have your colonists cooking raw food in no time! When it comes to maximizing efficiency in your kitchen, organization is key. Start by designating specific areas for different tasks. Have a dedicated space for prepping ingredients, another for cooking, and a separate area for cleaning up. This will help your colonists move smoothly through the cooking process and minimize any unnecessary steps.

To further maximize efficiency, make sure your kitchen is well-stocked with all the necessary tools and equipment. Invest in quality knives, cutting boards, and measuring utensils. Having a variety of pots, pans, and baking sheets will also come in handy when preparing different dishes. Don’t forget about the smaller items like spatulas, tongs, and whisks, as they can make a big difference in the cooking experience.

Advertisement

When organizing ingredients, consider arranging them in a way that makes sense. Group similar items together, such as spices, herbs, and oils. Keep frequently used ingredients within easy reach, while storing less commonly used items in cabinets or pantry spaces. Labeling containers and using clear storage bins can also help with quick identification and access to ingredients.

By creating a well-equipped kitchen that maximizes efficiency and organizes ingredients, your colonists will be inspired to cook raw food with ease. So get ready to enjoy delicious meals prepared with love and care!

Setting Priorities for Cooking Tasks

To effectively manage your time in the kitchen, you should prioritize cooking tasks based on the urgency of the ingredients needing to be transformed into delicious meals. For example, imagine a situation where your colony’s food supplies are dwindling, and the only way to prevent starvation is by cooking the perishable items first. Meal planning becomes crucial in such situations.

Start by assessing the available ingredients and determining which ones are at risk of spoiling soon. These should take priority in your cooking tasks.

Additionally, it’s essential to familiarize yourself with food preservation techniques to extend the shelf life of ingredients. For example, vegetables can be blanched and frozen, while fruits can be canned or made into jams. By preserving some of the ingredients, you can ensure a steady supply of food even when fresh produce is scarce.

Advertisement

When setting priorities, consider the nutritional value of different ingredients as well. It’s advisable to cook meals that provide a balanced diet and fulfill the nutritional needs of the colonists. This way, you can ensure their overall well-being even in challenging circumstances.

To efficiently utilize your time in the kitchen, prioritize cooking tasks based on the urgency of ingredients, practice meal planning, and employ food preservation techniques to maximize the availability of resources.

Assigning Dedicated Cooks

Hiring specialized chefs can greatly enhance the efficiency and quality of meals prepared in the kitchen. When it comes to assigning dedicated cooks, recruiting talent is key. Look for individuals who have a passion for cooking and a strong background in the culinary arts. They should have experience in preparing a variety of dishes and be able to handle the pressure of a busy kitchen.

Once you’ve found your dedicated cooks, it’s important to ensure consistency in their work. This can be achieved by providing them with clear instructions and guidelines. Create a recipe book that outlines the step-by-step process for each dish, including measurements and cooking times. This will help to standardize the cooking process and ensure that each meal is prepared to the same high standard.

In addition to providing clear instructions, it’s also important to provide ongoing training and support to your dedicated cooks. This will help them to improve their skills and stay updated on the latest cooking techniques and trends. Encourage them to attend culinary workshops and conferences, and consider bringing in guest chefs to provide additional training and inspiration.

Advertisement

By recruiting talented individuals and ensuring consistency in their work, you can create a team of dedicated cooks who’ll produce high-quality meals for your colonists.

Implementing a Cooking Schedule

When it comes to creating a delicious and well-organized dining experience, one of the key steps is implementing a cooking schedule that allows your talented cooks to showcase their skills and create mouthwatering meals for everyone to enjoy.

Meal planning is a crucial aspect of this process. By carefully considering the dietary needs and preferences of your colonists, you can create a well-rounded menu that incorporates a variety of flavors and nutrients. This will not only keep your colonists satisfied but also ensure that they’re getting the necessary nourishment.

In addition to meal planning, food preservation is another important factor to consider when implementing a cooking schedule. It’s essential to properly store and preserve raw food to prevent spoilage and waste. You can do this by investing in refrigeration units or implementing a system for stock rotation to ensure that older ingredients are used first.

To create a cooking schedule, start by designating specific days or shifts for your dedicated cooks. This’ll allow them to focus solely on meal preparation and ensure that they have enough time to create high-quality dishes. Consider assigning different cooks to different meals or types of cuisine to diversify the menu and showcase their individual talents.

Advertisement

By implementing a cooking schedule that incorporates meal planning and food preservation, you can ensure that your colonists are well-fed with delicious and nutritious meals. This’ll not only boost morale but also contribute to a healthy and thriving community.

Providing Incentives for Cooking

Boost your culinary team’s motivation by offering enticing rewards and incentives for their exceptional cooking skills, fueling their passion for creating delectable dishes. Providing incentives for cooking not only increases productivity but also fosters a sense of camaraderie and healthy competition among your colonists. Rewards and recognition play a pivotal role in encouraging your team to consistently deliver their best.

One effective way to incentivize cooking is by implementing a rewards program. Consider offering gift cards, bonuses, or even paid time off as incentives for achieving cooking milestones or receiving positive feedback from customers. This not only acknowledges their hard work but also provides tangible benefits that can further motivate them to excel in their culinary endeavors.

Another method to boost motivation is through gamification and competitions. Create friendly cooking challenges where colonists can showcase their skills and compete for prizes. This not only adds an element of excitement but also encourages creativity and innovation in the kitchen. You can organize weekly or monthly cook-offs, where the winner receives special recognition and rewards.

Incorporating a leaderboard can also ignite a healthy sense of competition among your culinary team. Displaying the top performers and their achievements can inspire others to step up their game and strive for excellence. Additionally, consider giving out certificates or badges for specific achievements, such as ‘Master Chef’ or ‘Most Innovative Dish,’ to further recognize their talents and dedication.

Advertisement

By providing rewards and recognition, as well as incorporating gamification and competitions, you can create an environment that motivates your colonists to unleash their culinary prowess and take pride in their cooking skills.

Educating Colonists on the Benefits of Cooking

One way to truly appreciate the art of cooking is by educating your team on the numerous benefits and advantages that come with honing their culinary skills. By educating colonists about the importance of cooking, you can promote healthy eating habits and ensure that raw food is transformed into delicious and nutritious meals.

Here are three key reasons why educating colonists on the benefits of cooking is essential:

  1. Health benefits: Cooking allows colonists to have control over the ingredients they use, enabling them to create meals that are rich in nutrients and low in unhealthy additives. By educating your team on the health benefits of cooking, you can encourage them to prioritize fresh ingredients, balanced meals, and portion control.

  2. Cost-effectiveness: Cooking raw food not only promotes healthier eating but also helps save money. By teaching colonists how to cook, you empower them to prepare meals from scratch, reducing the need for expensive pre-packaged or processed foods.

  3. Creativity and satisfaction: Cooking is an art that allows colonists to express their creativity and experiment with flavors. By educating your team on cooking techniques and recipes, you give them the opportunity to explore new ingredients and dishes, leading to a sense of satisfaction and accomplishment.

By educating your colonists on the benefits of cooking, you can inspire them to embrace this skill, resulting in healthier, more enjoyable meals for the entire community.

Utilizing Cooking Workbenches and Tools

Utilizing cooking workbenches and tools can greatly enhance the efficiency and quality of meals. Studies show that chefs who use specialized equipment are able to prepare dishes 20% faster compared to those without access to such tools.

Advertisement

When it comes to cooking raw food, these workbenches and tools can make a significant difference in ensuring that your colonists are able to cook meals safely and effectively.

Cooking workbenches provide a dedicated space for preparing and cooking food. They typically come equipped with various features such as built-in stovetops, ovens, and cutting boards. These workbenches allow colonists to have all the necessary tools within arm’s reach, making the cooking process more streamlined and efficient.

In addition to workbenches, using specialized cooking tools can further enhance the cooking experience. Tools such as knives, measuring cups, and mixing bowls are essential for precise cooking techniques. Having a well-stocked kitchen with these tools readily available can make a world of difference in the quality of meals prepared.

When cooking raw food, it is crucial to prioritize food safety. Make sure to wash your hands thoroughly before handling any ingredients and clean all cooking surfaces regularly. Keep raw foods separate from cooked foods to avoid cross-contamination. Utilize food thermometers to ensure that meat and poultry are cooked to the proper temperature, reducing the risk of foodborne illnesses.

By utilizing cooking workbenches and tools, and following proper cooking techniques and food safety practices, you can ensure that your colonists are able to cook raw food efficiently and safely, resulting in delicious and nutritious meals for all.

Advertisement

Monitoring and Managing Food Stockpiles

To effectively manage and ensure a steady supply of meals, you need to keep a close eye on your food stockpiles. Carefully organizing and tracking them to avoid shortages or spoilage is crucial. Optimizing food storage is crucial for maintaining a well-functioning kitchen and minimizing food waste.

Start by designating specific areas for different types of food. Create separate stockpiles for raw meat, vegetables, and fruits. This will make it easier for your colonists to locate and access the ingredients they need when cooking meals. Additionally, consider using refrigerated storage areas for perishable items to prolong their shelf life.

Regularly check your food stockpiles to ensure they are well-stocked. Set up a system to track the inventory, such as using a whiteboard or spreadsheet. This will help you keep track of the quantity of each ingredient, allowing you to plan meals accordingly and avoid running out of essential items.

Implement a first-in, first-out (FIFO) system to prevent food spoilage. When new supplies arrive, place them behind the older ones to ensure that the older food is used first. This will help minimize waste and ensure that your colonists are consuming fresh ingredients.

By optimizing food storage and minimizing food waste, you can maintain a steady supply of meals and keep your colonists well-fed and happy.

Advertisement

Improving Colonists’ Cooking Skills

Improving the skills of your culinary team can spice up the quality of meals in your colony, adding a pinch of expertise to satisfy even the most discerning palates. To enhance their cooking skills, you can focus on teaching them new cooking techniques and recipe variations.

Here’s a visual representation of ideas to help you improve your colonists’ cooking skills:

Cooking Techniques Recipe Variations
Grilling Stir-frying
Baking Roasting
Sauteing Braising

By introducing these cooking techniques, your colonists will have a wider range of skills to create delicious dishes. Grilling is great for bringing out the flavors of meat and vegetables, while baking can result in mouthwatering pastries and bread. Sauteing and stir-frying are perfect for quick and flavorful meals, while roasting and braising can make tougher cuts of meat tender and flavorful.

Additionally, encourage your colonists to experiment with recipe variations. They can try adding different herbs and spices, or even substitute ingredients to create unique flavors. This will keep meals exciting and prevent monotony in their cooking.

By investing time and effort into improving your colonists’ cooking skills, you can ensure that raw food is transformed into delectable and satisfying meals for everyone in your colony.

Advertisement

Addressing Challenges and Troubleshooting

Tackling challenges and finding solutions can be a fun and rewarding part of becoming a skilled chef in your colony. When it comes to addressing challenges and troubleshooting in the kitchen, there are a few key areas to focus on: kitchen appliances and dealing with spoiled ingredients.

Firstly, troubleshooting kitchen appliances is essential for ensuring a smooth cooking process. If your colonists are struggling to cook raw food, it could be due to a malfunctioning stove or oven. Check for any signs of damage or malfunction and repair or replace the appliance as necessary. Additionally, make sure the appliances are clean and free of any debris that may be interfering with their performance.

Secondly, dealing with spoiled ingredients is crucial for maintaining the quality of your cooked food. If your colonists are using spoiled ingredients, it can affect the taste and safety of the meals. Regularly check the food storage areas for any signs of spoilage and dispose of any expired or spoiled ingredients. Encourage your colonists to practice proper food storage techniques, such as refrigerating perishable items and using them before they spoil.

By troubleshooting kitchen appliances and addressing issues with spoiled ingredients, you can overcome challenges and ensure that your colonists are able to cook raw food effectively. Remember to stay vigilant and proactive in maintaining a functional and safe cooking environment in your colony.

Frequently Asked Questions

What are the essential tools and equipment needed for a well-equipped kitchen?

To have a well-equipped kitchen, essential tools and equipment are necessary. Firstly, you’ll need a set of high-quality knives for chopping and slicing.

Advertisement

Other crucial items include a cutting board, measuring cups and spoons, mixing bowls, a blender or food processor, a stovetop or oven, and a variety of pots and pans.

Additionally, don’t forget about smaller essentials like a can opener, peeler, and whisk. These tools will ensure you can efficiently prepare any meal in your kitchen.

How can I encourage colonists to prioritize cooking tasks over other responsibilities?

To encourage colonists to prioritize cooking tasks, you can provide them with incentives for cooking. You can assign cooking tasks to specific individuals and reward them with bonuses or recognition. Make sure to communicate the importance of cooking and the benefits it brings to the colony.

Additionally, create a schedule or system that clearly outlines the cooking responsibilities and expectations. This will help motivate colonists to focus on cooking and ensure that raw food is transformed into delicious meals.

Is it necessary to assign dedicated cooks, or can colonists take turns cooking?

When it comes to cooking in your colony, you have the option of either assigning dedicated cooks or having colonists take turns. Rotating cooks can have its benefits, such as allowing everyone to gain experience in cooking and preventing burnout. However, it also has its drawbacks, such as inconsistency in the quality of meals and potential delays in meal production.

Advertisement

Sharing cooking responsibilities can lead to increased teamwork and flexibility, but it requires effective communication and coordination among colonists.

How often should I implement a cooking schedule, and what factors should I consider when creating one?

To create an effective cooking schedule, consider factors like the size of your colony, the number of available cooks, and the importance of nutrition in meal planning. The frequency of cooking schedules will depend on these factors.

Aim for a schedule that ensures meals are prepared regularly and that colonists receive balanced nutrition. Assign dedicated cooks or have colonists take turns cooking to ensure everyone contributes and meals are prepared consistently.

What types of incentives can I provide to motivate colonists to cook more often?

To motivate colonists to cook more often, you can provide incentives that encourage their participation. One interesting statistic shows that incorporating creative cooking can increase engagement and interest in the cooking process. Encourage colonists to explore unique and innovative recipes, allowing them to experiment and showcase their culinary skills.

Another effective approach is team cooking, where multiple colonists work together to prepare meals. This promotes collaboration and creates a sense of camaraderie among the colonists.

Advertisement

Can Cooking Raw Food Make It Glow?

Cooking raw food glow benefits can actually enhance the nutritional value of certain foods. While some raw fruits and vegetables are best eaten in their natural state, cooking others can release beneficial nutrients and make them easier for the body to absorb. It’s all about finding the right balance.

Conclusion

Congratulations! By following these practical steps and implementing the right strategies, you’ve unlocked the secret to getting your colonists to cook raw food.

Like a master chef orchestrating a symphony of flavors, you’ve created a well-equipped kitchen. You’ve assigned dedicated cooks and implemented a cooking schedule. You’ve provided incentives and utilized workbenches and tools.

With your watchful eye on food stockpiles and the continuous improvement of your colonists’ cooking skills, you’ve overcome challenges and conquered the culinary world of your colony.

Bon appétit!

Advertisement
Continue Reading
Advertisement

Affiliate disclaimer

As an affiliate, we may earn a commission from qualifying purchases. We get commissions for purchases made through links on this website from Amazon and other third parties.

Advertisement

Trending