Connect with us

Benefits of Raw Food

In Cold Storage, Which Raw Food Item Is Commonly Stored On The Bottom Shelf?

Published

on

An image for a blog post about cold storage, featuring a freezer with shelves

Are you intrigued by what’s hidden beneath in your freezer’s deep recesses? Let’s go ahead and explore the mystery of the lowest shelf.

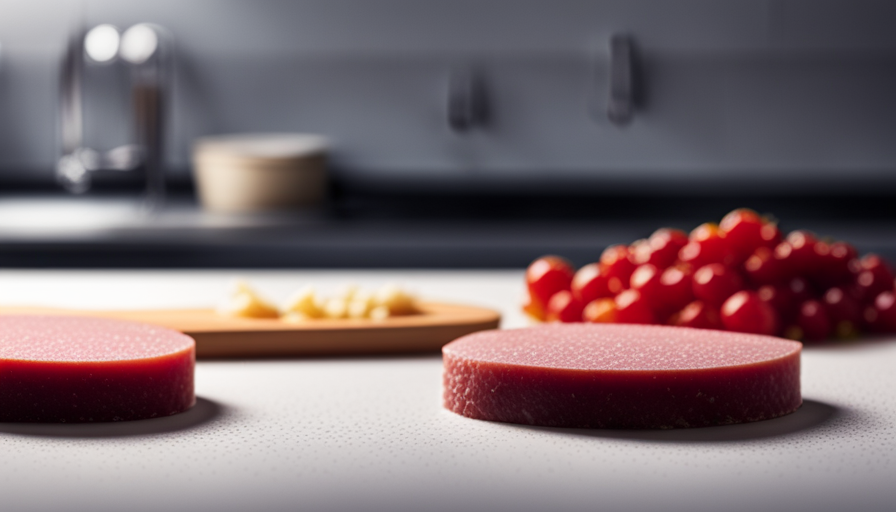
When it comes to storing raw food items in your refrigerator, there is one common sight that you will often find on the lowest level. It’s none other than raw meat! Yes, that’s right. From succulent steaks to tender chicken breasts, raw meat takes its place on the bottom shelf for good reason.

This strategic placement ensures that any potential leaks or drips from the meat won’t contaminate other foods stored above. By keeping raw meat separate and at a lower temperature, you are taking a crucial step in maintaining food safety and preventing cross-contamination.

So, next time you open your cold storage, remember to keep an eye out for the raw meat residing on the bottom shelf, safeguarding your health and taste buds alike.

Key Takeaways

  • Raw meat is commonly stored on the bottom shelf of the refrigerator to prevent cross-contamination.
  • Storing raw meat separately and at a lower temperature helps maintain food safety.
  • Proper food storage is crucial for keeping raw food fresh and safe to eat.
  • Storing raw food on the bottom shelf prevents potential leaks or drips from contaminating other foods.

Importance of Proper Food Storage

You need to make sure you store your raw food properly because it’s crucial to keep it fresh and safe to eat. Proper food handling is essential to prevent spoilage and maintain food quality. When it comes to storing raw food in cold storage, it’s common to place it on the bottom shelf.

Storing raw food on the bottom shelf of the refrigerator or cold storage unit is important for food safety reasons. It helps prevent any potential cross-contamination between raw food and ready-to-eat items. By keeping raw food separate from other foods, you can avoid the risk of bacteria or pathogens transferring and causing foodborne illnesses.

Advertisement

Additionally, storing raw food on the bottom shelf helps maintain a consistent temperature throughout the refrigerator. Cold air tends to settle at the bottom, so placing raw food there ensures that it stays at the appropriate temperature and reduces the risk of bacterial growth.

Remember to always store raw food in sealed containers or wrapped tightly to prevent any leakage or odors from spreading. It’s also important to regularly clean and sanitize the storage area to avoid any buildup of bacteria or mold.

By following proper food storage practices and storing raw food on the bottom shelf, you can ensure the freshness and safety of your food, preventing spoilage and minimizing the risk of foodborne illnesses.

Understanding Raw Meat Storage Guidelines

One interesting statistic about raw meat storage guidelines is that the majority of foodborne illnesses are caused by improper storage and handling of raw meat. Following proper raw meat storage guidelines is crucial in preventing cross contamination and ensuring food safety.

When storing raw meat in the refrigerator, it’s important to keep it on the bottom shelf. This is because raw meat can sometimes leak juices that may contain harmful bacteria, and storing it on the bottom shelf prevents these juices from dripping onto other foods and causing cross contamination.

Advertisement

Additionally, it’s recommended to store raw meat in a sealed container or a leak-proof bag to further prevent any potential contamination. It’s also important to keep raw meat separate from other foods, especially ready-to-eat foods, to avoid cross contamination.

By following these guidelines, you can help reduce the risk of foodborne illnesses and ensure the safety of your meals.

The Role of Temperature in Food Safety

To ensure food safety, it’s crucial to maintain the proper temperature when storing and handling various types of food items. Temperature control plays a vital role in preventing the growth of harmful foodborne pathogens. Here are four important things to know about the role of temperature in food safety:

  1. Optimal Temperature Range: Different types of food require specific temperature ranges for safe storage. For example, perishable items like raw meat should be stored at temperatures below 40°F (4°C) to slow down bacterial growth and reduce the risk of contamination.

  2. Danger Zone: The danger zone refers to the temperature range between 40°F (4°C) and 140°F (60°C), in which bacteria can multiply rapidly. It’s important to avoid leaving food within this range for an extended period, as it increases the risk of foodborne illnesses.

  3. Refrigeration: Refrigeration is essential for maintaining the freshness and safety of many perishable foods. It slows down the growth of bacteria and helps preserve the quality of raw meat and other raw food items.

  4. Freezing: Freezing raw food items, including raw meat, can help extend their shelf life by preserving their quality and preventing bacterial growth. When using the freezer, ensure the temperature is set to 0°F (-18°C) or below to maintain food safety.

By properly controlling the temperature during storage and handling, you can significantly reduce the risk of foodborne illnesses and ensure the safety of your raw food items.

Preventing Cross-Contamination in Cold Storage

When storing different types of food, it’s crucial to prevent cross-contamination, as it can lead to foodborne illnesses and pose a risk to your health.

Advertisement

Did you know that a study found that 1 in 6 cutting boards used in homes were contaminated with potentially harmful bacteria?

To prevent cross-contamination in cold storage, there are a few key steps you can take.

Firstly, it’s important to separate raw foods from ready-to-eat foods. Raw meats, poultry, and seafood should be stored on the bottom shelf of your refrigerator or cold storage unit. This helps to prevent any potential drips or leaks from contaminating other foods that may be consumed without further cooking.

Additionally, it’s crucial to properly wrap or store raw foods to avoid any contact with other items. Placing them in sealed containers or using leak-proof bags can help minimize the risk of cross-contamination.

It’s also important to clean and sanitize your storage area regularly to eliminate any lingering bacteria.

Advertisement

By following these practices and being mindful of proper food storage, you can greatly reduce the risk of cross-contamination and ensure the safety of your food. Remember, taking these precautions is essential for protecting your health and preventing foodborne illnesses.

Organizing Your Refrigerator for Food Safety

Organizing your refrigerator is crucial for ensuring the safety of your perishable items and preventing cross-contamination. Here are some tips to help you organize your refrigerator for food safety:

  1. Keep raw meat on the bottom shelf: Raw meat can contain harmful bacteria that can contaminate other foods if not stored properly. Placing it on the bottom shelf prevents any potential drips or leaks from contaminating other items.

  2. Separate cooked and raw foods: To prevent spoilage and cross-contamination, it’s essential to keep cooked and raw foods separate. Store cooked leftovers and ready-to-eat foods on the upper shelves, away from raw meats and other raw ingredients.

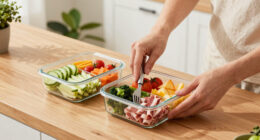
  3. Utilize clear containers: Clear containers make it easier to see what’s inside and help prevent forgotten leftovers from spoiling. Label the containers with the date to keep track of when the food was prepared.

  4. Practice the ‘first in, first out’ rule: When organizing your refrigerator, place newer items in the back and older items in the front. This way, you’ll use up older food first, preventing spoilage and reducing waste.

By following these organizing tips, you can prevent spoilage, avoid cross-contamination, and ensure the safety of your food.

Freezing Raw Meat: Best Practices

Freezing your raw meat properly is essential for maintaining its quality and preventing waste, so remember the saying: "When in doubt, freeze it out!" To ensure the best ways of freezing raw meat and avoiding contamination, follow these guidelines:

  1. Proper packaging: Package your raw meat in airtight containers or freezer bags to prevent freezer burn and maintain freshness. Label each package with the date of freezing to keep track of its shelf life.

  2. Temperature control: Set your freezer to 0°F (-18°C) or below to maintain the quality of the meat. Make sure to place the meat on the bottom shelf to prevent any accidental drips onto other foods.

  3. Table for imagery:

Best Ways to Freeze Raw Meat Avoiding Contamination
Use airtight containers Separate from other foods
Label with freezing date Clean and sanitize surfaces
Set freezer to 0°F (-18°C) Thaw in the refrigerator

By following these best practices, you can ensure that your frozen raw meat stays safe and maintains its quality. Remember to thaw frozen meat in the refrigerator to avoid bacterial growth. When it comes to freezing raw meat, taking the proper steps will not only help you avoid food waste but also ensure that your meals are delicious and safe to consume.

Advertisement

Foodborne Illnesses and Raw Meat Handling

Now that you know the best practices for freezing raw meat, let’s dive into the importance of food safety guidelines and proper handling when it comes to raw meat. Ensuring the safety of raw meat is crucial in preventing foodborne illnesses.

Raw meat, such as poultry, beef, and pork, can harbor harmful bacteria like Salmonella, E. coli, and Campylobacter. These bacteria can cause severe illnesses when consumed. Therefore, it’s essential to handle raw meat with care to minimize the risk of contamination.

To maintain proper food safety, always store raw meat on the bottom shelf of your cold storage. This prevents any potential drips or leaks from contaminating other foods. Raw meat should be stored in leak-proof containers or securely wrapped in plastic to further minimize the risk of cross-contamination.

When handling raw meat, be sure to wash your hands thoroughly with soap and warm water before and after handling. Additionally, use separate cutting boards and utensils for raw meat to avoid cross-contamination with other foods.

Following these food safety guidelines and practicing proper handling of raw meat will help ensure that you and your loved ones stay safe from foodborne illnesses. Remember, taking these simple precautions can greatly reduce the risk of contamination and keep your meals healthy and delicious.

Advertisement

Maximizing Shelf Life for Raw Meat

To extend the lifespan of your raw meat, make sure to keep it securely wrapped in leak-proof containers or plastic when storing in your refrigerator. This helps to prevent cross-contamination and maintain the quality of the meat.

Here are some tips for maximizing freshness and extending the shelf life of your raw meat:

  • Keep the temperature of your refrigerator at or below 40°F (4°C) to slow down bacterial growth.
  • Store raw meat on the bottom shelf of your refrigerator to prevent any potential drips from contaminating other foods.
  • Use a separate cutting board and utensils for raw meat to avoid cross-contamination with other foods.
  • Freeze raw meat if you’re not planning to use it within a couple of days. Freezing can significantly extend its shelf life.
  • Regularly clean and sanitize your refrigerator to prevent the buildup of bacteria.

By following these guidelines, you can ensure that your raw meat stays fresh and safe to consume for a longer period. Remember to always check for any signs of spoilage, such as an off odor or unusual color, before using raw meat.

Tips for Safe Thawing of Frozen Meat

Make sure your frozen meat thaws safely by following these tips that’ll have you dancing with delight as your meat defrosts. Safe thawing techniques are essential to prevent bacterial growth and ensure the quality of the meat.

Firstly, never thaw meat at room temperature as it can promote bacterial growth. Instead, thaw it in the refrigerator. This method is the safest and allows for a slow, controlled thawing process. Plan ahead and place the frozen meat on a plate or in a leak-proof bag to catch any juices that may drip during thawing.

If you’re in a hurry, you can also use the cold water thawing method. Place the meat in a sealed plastic bag and submerge it in cold water. Change the water every 30 minutes to maintain its cold temperature. However, make sure to cook the meat immediately after thawing using this method.

Advertisement

Avoid using the microwave for thawing meat unless you plan to cook it right away. Microwaving can cause uneven thawing and may even start cooking the meat in some areas, leading to a loss of quality.

By following these safe thawing techniques, you can minimize the risk of bacterial growth and ensure that your meat is safe to consume. So, take care when thawing your frozen meat and enjoy a delicious and safe meal.

Maintaining Quality and Flavor in Stored Meat

Ensure that your meat stays fresh and flavorful by properly storing it in the refrigerator. By following a few simple guidelines, you can maintain the quality and flavor of your stored meat, while also preventing spoilage.

Firstly, it is important to keep your meat on the bottom shelf of the refrigerator. This helps to prevent any drips or leaks from contaminating other foods. Additionally, placing the meat on the bottom shelf ensures that it remains at a consistently low temperature, reducing the risk of bacterial growth.

To further maintain flavor, store your meat in airtight containers or resealable bags. This helps to prevent moisture loss and freezer burn, which can negatively impact the taste and texture of the meat. Labeling the containers with the date of storage can also help you keep track of how long the meat has been stored.

Advertisement

Furthermore, it is crucial to regularly check and adjust the temperature of your refrigerator. The ideal temperature for storing meat is between 32-40°F (0-4°C). Keeping the refrigerator at this temperature range helps to slow down the growth of bacteria and maintain the quality of the meat.

Incorporating these practices into your meat storage routine will help you maintain the flavor and prevent spoilage, ensuring that you can enjoy delicious and safe meals every time.

Flavorful Meat Storage Tips Benefits Emotional Response
Store meat on bottom shelf Prevents contamination Peace of mind
Use airtight containers or bags Prevents moisture loss and freezer burn Confidence in taste
Check and adjust refrigerator temperature Slows down bacterial growth Assurance of safety

Frequently Asked Questions

How long can raw meat be stored in cold storage?

You’re the captain of your culinary ship, navigating the waters of food safety. Raw meat, like fish, can be stored in cold storage for around 1-2 days.

But how can you tell if it’s gone bad? Trust your senses. Look for any changes in color, texture, or a pungent odor. If anything seems off, it’s better to be safe than sorry.

Remember, freshness is key when it comes to raw meat.

Advertisement

Can raw meat be stored on the top shelf of the refrigerator?

Yes, raw meat can be stored on the top shelf of the refrigerator, but there are risks involved. The main risk is cross-contamination. If the raw meat drips or leaks onto other food items below, it can spread harmful bacteria and cause foodborne illnesses.

To minimize this risk, it’s recommended to store raw meat in leak-proof containers or sealed bags, and place them on a tray or in a separate section of the fridge to prevent contact with other foods.

Is it safe to freeze raw meat multiple times?

Yes, it’s safe to refreeze thawed raw meat as long as it was thawed in the refrigerator and kept at a safe temperature (below 40°F). However, it’s best to avoid refreezing meat multiple times to maintain quality.

To store raw meat in the freezer, follow these best practices: wrap it tightly in freezer-safe packaging, label it with the date, and store it on the bottom shelf to prevent cross-contamination.

Can raw meat be stored together with fresh produce in the refrigerator?

Yes, raw meat can be stored in the same section as fresh produce in the refrigerator, but it’s not recommended. There are potential risks involved. Raw meat can contain harmful bacteria, and if it comes into contact with fresh produce, it can contaminate it. To minimize the risk, it’s best to store raw meat in a separate container or on the bottom shelf to prevent any cross-contamination.

Advertisement

What are the recommended methods for thawing frozen raw meat safely?

To safely thaw frozen raw meat, there are a few recommended methods. First, you can thaw it in the refrigerator by placing it on the bottom shelf. This method allows for a slow and even thawing process.

Alternatively, you can use the defrost setting on your microwave, making sure to follow the manufacturer’s instructions.

Another option is to submerge the meat in cold water, making sure to change the water every 30 minutes.

Finally, you can use the ‘quick thaw’ function on some modern appliances, but be cautious as this method may partially cook the meat.

What is the best way to store raw food in cold storage?

When it comes to raw feeding food storage, the best way is to use airtight containers or vacuum-sealed bags to prevent freezer burn and preserve the food’s quality. Label and date the containers for easy tracking. Store them at the back of the freezer to maintain a consistent temperature.

Advertisement

Conclusion

In conclusion, when it comes to storing raw food in the cold storage, the bottom shelf is commonly reserved for raw meat. By following proper food storage guidelines and understanding the importance of temperature, you can prevent foodborne illnesses and ensure the safety of your meals.

Organizing your refrigerator and practicing safe thawing techniques will maximize the shelf life and maintain the quality and flavor of your stored meat. So remember, keep your raw meat on the bottom shelf and enjoy delicious, safe meals every time.

Continue Reading
Advertisement

Benefits of Raw Food

Mastering Milk Frothers: A Guide To Perfectly Frothed Drinks

Published

on

An image showcasing a barista's hand skillfully pouring steamed milk into a porcelain cup, forming a velvety texture with delicate microfoam, while a faint wisp of steam rises in the background

On the journey to make ideally frothed beverages in the comfort of your own home, learning how to skillfully use milk frothers is crucial. These adaptable gadgets are available in several forms, such as electric, handheld, and manual varieties. Every model has distinct characteristics and necessitates particular methods to produce the perfect froth.

The electric frothers, with their built-in heaters, make the process effortless, while handheld and manual frothers demand precision and skill. Selecting the right milk and understanding the ideal temperature range are crucial factors in achieving optimal frothing results. Moreover, proper cleaning and maintenance of the frother play a vital role in ensuring its longevity.

By following the techniques, tips, and guidelines provided in this comprehensive guide, anyone can become adept at using milk frothers and enjoy delicious frothed drinks in the comfort of their own home.

Key Takeaways

  • There are different types of milk frothers including electric, handheld, and manual.
  • Frothing and steaming are different processes.
  • The quantity of milk needed depends on the drink.
  • It is important to clean up immediately after frothing milk.

Types of Milk Frothers

Different types of milk frothers, such as electric, handheld, and manual, offer various options for frothing milk and creating delicious drinks at home.

Electric frothers, like the popular brands Nespresso and Breville, are highly efficient and come with built-in heaters, making the process easier and quicker.

Handheld frothers, such as the Aerolatte or PowerLix, are portable and require the correct depth when frothing the milk.

Advertisement

Manual frothers, like the Bodum or HIC, require a rapid up and down movement to create froth.

However, regardless of the type of frother, there are common issues that may arise.

Troubleshooting common issues like clogging, inadequate froth, or uneven heating can be addressed by following the manufacturer’s instructions, ensuring proper maintenance, and using the correct milk type and temperature.

Techniques for Frothing Milk

Various approaches can be employed when frothing milk, each yielding distinct results. One technique for frothing milk without a frother is to use a mason jar with a lid. Simply pour the desired amount of milk into the jar, ensuring that it is no more than halfway full to allow room for expansion. Secure the lid tightly and shake vigorously for about 30 seconds. This method creates a frothy texture similar to that produced by a frother.

When troubleshooting frothing problems, it is important to consider the temperature of the milk. If the milk is too cold, it may not froth properly. Heating the milk slightly before frothing can help improve the results. Additionally, using the correct milk consistency is crucial. Whole dairy milk or 1% milk works best for frothing, as they contain enough fat and protein to create a creamy foam. Finally, make sure to clean the frothing wand or frother immediately after use to prevent any residue buildup that could affect future frothing results.

Advertisement

Tips for Using Milk Frothers

One effective way to enhance the frothing results when using a milk frother is to ensure that the milk is at the correct temperature before frothing. Frothing milk troubleshooting can be minimized by starting with cold milk and avoiding overheating.

It is important to note that different types of milk frothers may have different temperature requirements, so it is essential to refer to the specific instructions provided by the manufacturer.

Additionally, frothing milk for latte art requires a slightly different technique. It is recommended to froth the milk until it reaches a smooth and velvety texture, with small and fine bubbles. This will create a perfect canvas for creating latte art designs.

Practicing and experimenting with different milk frothing techniques will help to achieve the desired results.

Frequently Asked Questions

Can I froth non-dairy milk with a milk frother?

Yes, it is possible to froth non-dairy milk with a milk frother. However, it is important to note that frothing techniques for non-dairy milks may differ from those used with dairy milk. The process of frothing non-dairy milk requires attention to factors such as the type of milk being used (e.g., almond, soy, oat), its consistency, and the frothing technique employed.

Advertisement

Some non-dairy milks may require additional steps, such as heating or adding stabilizers, to achieve optimal frothiness. Experimentation and practice are key to mastering the art of frothing non-dairy milk.

How can I achieve latte art with a milk frother?

Achieving latte art with a milk frother requires mastering specific techniques.

To begin, ensure the milk is properly frothed by using the correct frothing pitcher and frother type. Pay attention to the milk’s texture and temperature, as these factors greatly influence the outcome.

Skillful pouring techniques are essential to create intricate designs. Practice and experimentation are key in perfecting latte art, as it demands precision and a steady hand.

With patience and dedication, one can achieve beautiful latte art using a milk frother.

Advertisement

Can I froth flavored milk or syrup with a milk frother?

Flavored milk alternatives and frothing syrups can be frothed with a milk frother, adding a unique twist to specialty drinks. The process remains the same regardless of the type of milk or syrup used. However, it is important to note that the consistency and frothiness may vary depending on the specific product.

It is recommended to follow the instructions provided by the manufacturer for optimal results. Experimentation may be required to achieve the desired froth and flavor intensity when using flavored milk alternatives or syrups.

Is it possible to froth milk without a frother or espresso machine?

Yes, it is possible to froth milk without a frother or espresso machine. There are alternative methods available, such as hand frothing.

To froth milk by hand, you can pour the desired amount of milk into a jar or container with a tight-fitting lid, and then vigorously shake the milk for about 30-60 seconds until it becomes frothy.

This method requires some effort and may not yield the same results as using a dedicated milk frother or espresso machine.

Advertisement

Can I froth milk directly in the mug I plan to use for my drink?

Frothing milk directly in the mug you plan to use for your drink is possible, but it may not yield the best results. Using a milk frother for hot chocolate is a popular method, but it is important to note that frothing milk in a microwave safe mug may not produce the same level of frothiness as using a dedicated milk frother.

The shape and size of the mug may affect the frothing process, and the microwave may not provide enough power to create the desired consistency.

Which type of frothed milk is best for a flat white versus a latte?

When it comes to flat white versus latte differences, the type of frothed milk used can make a significant impact. For a flat white, microfoam is preferred to create a smooth, velvety texture that complements the espresso. In a latte, a thicker layer of frothed milk helps balance the coffee flavor.

Conclusion

In conclusion, mastering the art of milk frothing is a skill worth pursuing for those seeking the perfect frothed drink.

The different types of milk frothers offer various options for achieving the desired results.

Advertisement

With the right techniques and proper milk temperature, anyone can create a delectable frothy beverage at home.

Remember to clean up promptly to avoid any mess.

So go ahead, embrace the challenge of becoming a milk frothing expert, and delight in the irony of finding joy in the frothy goodness that awaits.

Continue Reading

Benefits of Raw Food

The Ultimate Guide To Espresso Knock Boxes

Published

on

An image showcasing a sleek, stainless steel espresso knock box with a removable rubber bar

In the realm of making espresso at home, maintaining cleanliness and efficient operation is crucial. There’s a popular adage that goes, ‘A clean machine is a happy machine.’ This is precisely the role that espresso knock boxes play.

These accessories are essential for any espresso enthusiast looking to streamline their brewing process and maintain a tidy workspace.

In this ultimate guide to espresso knock boxes, we will explore the benefits and features of these innovative tools, as well as provide valuable insights into choosing the right knock box for your needs.

Whether you’re a seasoned barista or a novice coffee lover, this comprehensive guide will equip you with the knowledge and expertise to make an informed decision.

From the best overall pick to budget-friendly options, we will cover it all.

Advertisement

So, let’s dive in and discover the world of espresso knock boxes together.

Key Takeaways

  • Espresso knock boxes are essential for maintaining cleanliness and efficiency in home espresso making.
  • They provide a convenient and hygienic way to dispose of used coffee grounds, preventing clogging of the espresso machine and saving time.
  • Knock boxes can be made of stainless steel, plastic, or wood, offering different benefits such as durability, affordability, and eco-friendliness.
  • When choosing a knock box, consider factors such as material, size, and design to find the best fit for your needs and preferences.

What is it?

A knock box is an essential accessory for home espresso makers as it provides a convenient and hygienic way to dispose of used coffee grounds, ensuring easy clean-up and maintaining the efficiency of the espresso making process.

By simply knocking the portafilter against the bar or surface of the knock box, the used coffee grounds are easily and quickly discarded, preventing clogging of the espresso machine and eliminating the need to manually remove the grounds. This not only saves time but also ensures that the espresso maker operates at its optimal level.

Additionally, knock boxes have other advantages beyond their primary function. For example, some people repurpose knock boxes for fertilizing gardens, using the coffee grounds as a natural fertilizer. This allows for the eco-friendly disposal of coffee waste while providing nutrients for plants and reducing waste.

Benefits and Features

One of the key advantages of these containers designed for the disposal of used coffee grounds is their ability to prevent mess and streamline the brewing process. But what specific features make them essential tools for espresso enthusiasts?

Pros of Stainless Steel Knock Boxes:

Advertisement
  • Durable and long-lasting material
  • Resistant to stains and odors
  • Easy to clean and maintain

Cons of Stainless Steel Knock Boxes:

  • Can be more expensive compared to other materials
  • May be heavier and less portable

How to Properly Use a Knock Box:nn1. Place the knock box near your espresso machine.nn2. After brewing a shot of espresso, firmly tap the portafilter against the knock bar to release the coffee grounds.nn3. Empty the knock box regularly to prevent overflow and maintain hygiene.

Stainless steel knock boxes offer numerous benefits, such as durability, stain resistance, and easy cleaning. However, they may come with a higher price tag and be less portable due to their weight. Proper usage involves placing the knock box near the espresso machine, tapping the portafilter against the knock bar to release the grounds, and regularly emptying the box for optimal performance and cleanliness.

Choosing the Right Knock Box

When selecting a knock box for espresso grounds disposal, it is important to consider factors such as material, size, and design to ensure an optimal fit for one’s specific espresso setup and preferences. Knock boxes are available in various materials, including stainless steel, plastic, and wood. Stainless steel knock boxes are durable and easy to clean, while plastic knock boxes are lightweight and affordable. Wood knock boxes offer a stylish and eco-friendly option. Additionally, knock boxes come in different size options to accommodate the volume of espresso grounds produced. Smaller knock boxes are suitable for home use or limited countertop space, while larger knock boxes are ideal for commercial settings or high-volume espresso production. By carefully considering the materials and size options available, one can choose a knock box that best suits their needs and enhances their espresso-making experience.

Material Pros Cons
Stainless Steel Durable, easy to clean More expensive
Plastic Lightweight, affordable Less durable
Wood Stylish, eco-friendly Requires more maintenance

Frequently Asked Questions

How do I properly dispose of the coffee grounds collected in the knock box?

To properly dispose of the coffee grounds collected in the knock box, there are several eco-friendly alternatives.

One option is to use the coffee grounds as compost for your garden or plants. Coffee grounds are rich in nitrogen and can provide valuable nutrients to the soil.

Another option is to repurpose the coffee grounds as a natural exfoliant for your skin or as an odor neutralizer in your refrigerator. These alternatives not only reduce waste but also offer additional benefits outside of just disposal.

Advertisement

Can I use a knock box with a non-pressurized portafilter?

Yes, you can use a knock box with a non-pressurized portafilter. Knock boxes offer several benefits such as easy clean-up and faster espresso making. They provide a convenient and hygienic way to dispose of coffee grounds.

However, if you prefer alternatives to knock boxes, you can use a designated container or a compost bin to dispose of the coffee grounds. These alternatives can also be effective in managing coffee waste and promoting sustainability.

Are there any knock boxes specifically designed for commercial espresso machines?

There are several commercial knock box options available that are specifically designed for use with commercial espresso machines. These knock boxes offer numerous benefits when used with commercial espresso machines.

They provide a convenient and hygienic solution for disposing of used coffee grounds, allowing baristas to easily clean and maintain their espresso machines during busy service periods.

Additionally, using a knock box helps to prevent clogging and damage to the plumbing system of the commercial espresso machine, ensuring its longevity and optimal performance.

Advertisement

Can I use a knock box made of plastic or silicone?

A knock box made of plastic or silicone can be considered for use in espresso machines.

Plastic knock boxes offer benefits such as lightweight and affordable options, making them suitable for beginners or those on a budget. However, they may lack durability and can absorb odors over time.

Silicone knock boxes, on the other hand, are flexible, easy to clean, and resistant to stains and odors. However, they may not provide the same stability as their plastic or metal counterparts.

Ultimately, the choice between plastic and silicone knock boxes depends on individual preferences and needs.

How often should I clean my knock box to maintain hygiene?

To maintain hygiene, it is recommended to clean your knock box regularly. Best practices for cleaning a knock box include emptying it after each use to prevent the buildup of coffee grounds and moisture.

Advertisement

To sanitize the knock box, you can use a mild detergent or a mixture of water and vinegar to remove any residue or odors. It is important to thoroughly rinse and dry the knock box after cleaning to prevent the growth of bacteria.

Regular cleaning will ensure a clean and hygienic knock box for your espresso making needs.

Is an Espresso Knock Box Necessary for Using the ECM Casa V Espresso Machine?

An Espresso Knock Box isn’t just a fancy accessory; it’s a practical tool for any barista who values cleanliness and efficiency, especially when using a topquality espresso machine like the ECM Casa V. It streamlines the process of discarding used coffee pucks, ensuring a tidy workspace and pure, unadulterated shots every time.

Conclusion

The ultimate guide to espresso knock boxes is an extensive resource that provides a thorough analysis of the best knock boxes available in 2023. It emphasizes the importance of these accessories for home espresso makers, offering easy clean-up and faster espresso making.

The guide reviews seven top knock boxes, highlighting their unique features and benefits. It also covers dimensions, materials, and styles of knock boxes, along with cleaning and maintenance tips. With recommendations for different user preferences and expert opinions, this guide is a must-read for espresso enthusiasts.

Advertisement

Additionally, it even provides tips on using knock boxes for fertilizing gardens, making it a versatile and practical resource.

Continue Reading

Benefits of Raw Food

The Ultimate Guide To Choosing The Perfect Coffee Scale For Pour Over Brewing

Published

on

An image showcasing a sleek and modern coffee scale, positioned next to a meticulously arranged pour-over brewing setup

Crafting the perfect cup of coffee is an art form that demands exactness and meticulousness. A vital component in nailing the ideal pour-over coffee is the selection of an appropriate coffee scale.

This ultimate guide aims to provide an in-depth analysis of the top coffee scale options available, along with the factors to consider when making a decision. By utilizing a scale, coffee enthusiasts can ensure consistent and exceptional results every time they brew.

The recommended scales, such as the HARIO Drip Scale, Acaia Pearl S Brewing Scale, CoastLine Digital Pro Pocket Scale, Ozeri Touch Digital Kitchen Scale, Etekcity Digital Stainless Kitchen Scale, and Timemore Plus Coffee Scale, offer various features and functionalities to suit different brewing preferences.

In this guide, we will explore the importance of accuracy, battery life, size, style, and special features in selecting the ideal coffee scale.

So, let us delve into the world of coffee scales and unlock the secrets to brewing the perfect cup of pour over coffee.

Advertisement

Key Takeaways

  • Coffee scales are essential for achieving consistent and exceptional coffee.
  • Factors to consider when choosing a coffee scale include size, style, precision, battery life, and special features.
  • Different brewing methods require different ways of using the scale.
  • The HARIO Drip Scale is the editor’s choice for its accuracy and ease of use.

Top Coffee Scale Options

The top coffee scale options for pour over brewing include the HARIO Drip Scale, Acaia Pearl S Brewing Scale, CoastLine Digital Pro Pocket Scale, Ozeri Touch Digital Kitchen Scale, Etekcity Digital Stainless Kitchen Scale, and Timemore Plus Coffee Scale. These scales offer a range of features such as accuracy, portability, style, and precise measurement down to 0.1g.

When it comes to accuracy versus portability, the CoastLine Digital Pro Pocket Scale is the best option for on-the-go brewing due to its small and portable design.

On the other hand, the Acaia Pearl S Brewing Scale stands out for its advanced features, such as Bluetooth connectivity, which allows for seamless integration with coffee brewing apps and offers additional functionalities like recording brewing data and creating custom brewing recipes.

These coffee scales provide a variety of options to suit different preferences and brewing needs.

Factors to Consider

When selecting a coffee scale, it is important to carefully consider various factors such as size, style, precision, battery life, and any special features that may enhance the brewing experience.

Precision is crucial in coffee scales as it ensures accurate and consistent measurements of the coffee grounds. A high level of precision allows for precise control over the brewing process and helps achieve the desired strength and flavor profile.

Advertisement

Battery life is another important consideration as it determines the scale’s longevity and convenience. Opting for a coffee scale with a long battery life reduces the need for frequent battery replacements and ensures uninterrupted brewing sessions.

By taking these factors into account, coffee enthusiasts can choose a scale that meets their specific brewing needs and enhances their pour-over coffee experience.

Recommended Scale for Pour Over

One highly recommended scale for pour-over brewing is the HARIO Drip Scale, known for its accuracy and ease of use. This scale is specifically designed for brewing coffee, making it an ideal choice for pour-over enthusiasts. The HARIO Drip Scale offers several features that make it stand out from other scales on the market.

Firstly, it is slim and compact, allowing for easy placement on a coffee brewing station.

Secondly, it provides precise measurements, ensuring that coffee grounds are weighed accurately for consistent results.

Advertisement

Lastly, it has a user-friendly interface, making it easy to operate even for beginners. With these recommended scale features, the HARIO Drip Scale is a reliable tool for achieving the perfect pour-over brew.

  • Sleek and stylish design
  • Touch-sensitive buttons for easy operation
  • Accurate measurements for consistent results

Frequently Asked Questions

Are coffee scales only used for pour over brewing?

While coffee scales are commonly used for pour over brewing, they also have benefits for other brewing methods such as espresso. Using a coffee scale in espresso brewing ensures accurate measurement of coffee grounds, resulting in consistent and well-balanced flavors. It allows baristas to maintain precise ratios and adjust variables for optimal extraction.

Additionally, coffee scales provide a level of precision that volumetric measurements cannot achieve. Therefore, coffee scales are a valuable tool for achieving quality coffee in various brewing methods, including espresso.

Can coffee scales be used for measuring other ingredients besides coffee?

Coffee scales can be used for measuring other ingredients besides coffee, such as spices and baking ingredients. These scales are designed with precision and accuracy, allowing users to measure ingredients down to the gram. They offer a versatile tool for precise measurements in various culinary applications.

Whether it’s measuring the perfect amount of spices for a recipe or weighing baking ingredients for precise ratios, coffee scales provide a reliable and efficient solution for precise ingredient measurement in the kitchen.

Do coffee scales have a built-in timer function?

Yes, coffee scales can have a built-in timer function. For example, the Acaia Pearl Brewing Scale mentioned earlier in this guide has a built-in timer. This feature allows users to time their brew accurately and consistently, ensuring optimal extraction.

Advertisement

The benefits of a built-in timer include convenience and efficiency, as it eliminates the need for a separate timer and allows for precise control over the brewing process. However, it is worth noting that there are alternative timing methods, such as using a separate timer or smartphone app, for those who prefer not to rely on the scale’s built-in timer.

Are coffee scales waterproof or resistant to spills?

Waterproof coffee scales offer several benefits for pour over brewing. Firstly, they provide protection against spills and moisture, ensuring the longevity and durability of the scale. This is particularly important in a coffee brewing environment where liquids are frequently involved.

Additionally, waterproof coffee scales are easier to clean and maintain, as they can be wiped down without the risk of damage. Overall, investing in a spill-resistant coffee scale enhances the user experience and ensures accurate measurements for a consistently excellent cup of coffee.

Can coffee scales be calibrated for different units of measurement, such as ounces or grams?

Calibration options are available for coffee scales, allowing users to switch between different units of measurement such as ounces or grams. This feature provides flexibility and convenience for coffee enthusiasts who prefer to use specific units for their brewing process.

By calibrating the scale to the desired unit, users can accurately measure their coffee grounds or espresso, ensuring consistency in their brewing. The benefits of using different units include ease of measurement conversion and adherence to specific brewing ratios, contributing to a more precise and enjoyable coffee experience.

Advertisement

Which Coffee Scale Would Be Best for Me to Use with the Espresso Machine?

When considering which coffee scale to use with the espresso machine, it’s important to find one that is accurate and easy to use. Look for a scale that has a weight capacity suitable for your needs and offers precision measurements. This will ensure that you can consistently make perfect espresso with the best home espresso machines 2023.

Conclusion

In conclusion, choosing the perfect coffee scale for pour over brewing is a crucial step in achieving exceptional coffee. With a variety of options available, coffee enthusiasts can find a scale that suits their needs.

Some popular options include:

  • HARIO Drip Scale
  • Acaia Pearl S Brewing Scale
  • CoastLine Digital Pro Pocket Scale
  • Ozeri Touch Digital Kitchen Scale
  • Etekcity Digital Stainless Kitchen Scale
  • Timemore Plus Coffee Scale

Weighing coffee grounds with a scale provides more accurate measurements than volumetric methods, ensuring a consistent brew. Whether it’s for pour over or espresso, these coffee scales offer reliable precision and features to enhance the brewing process.

Continue Reading
Advertisement

Affiliate disclaimer

As an affiliate, we may earn a commission from qualifying purchases. We get commissions for purchases made through links on this website from Amazon and other third parties.

Advertisement

Trending